Share
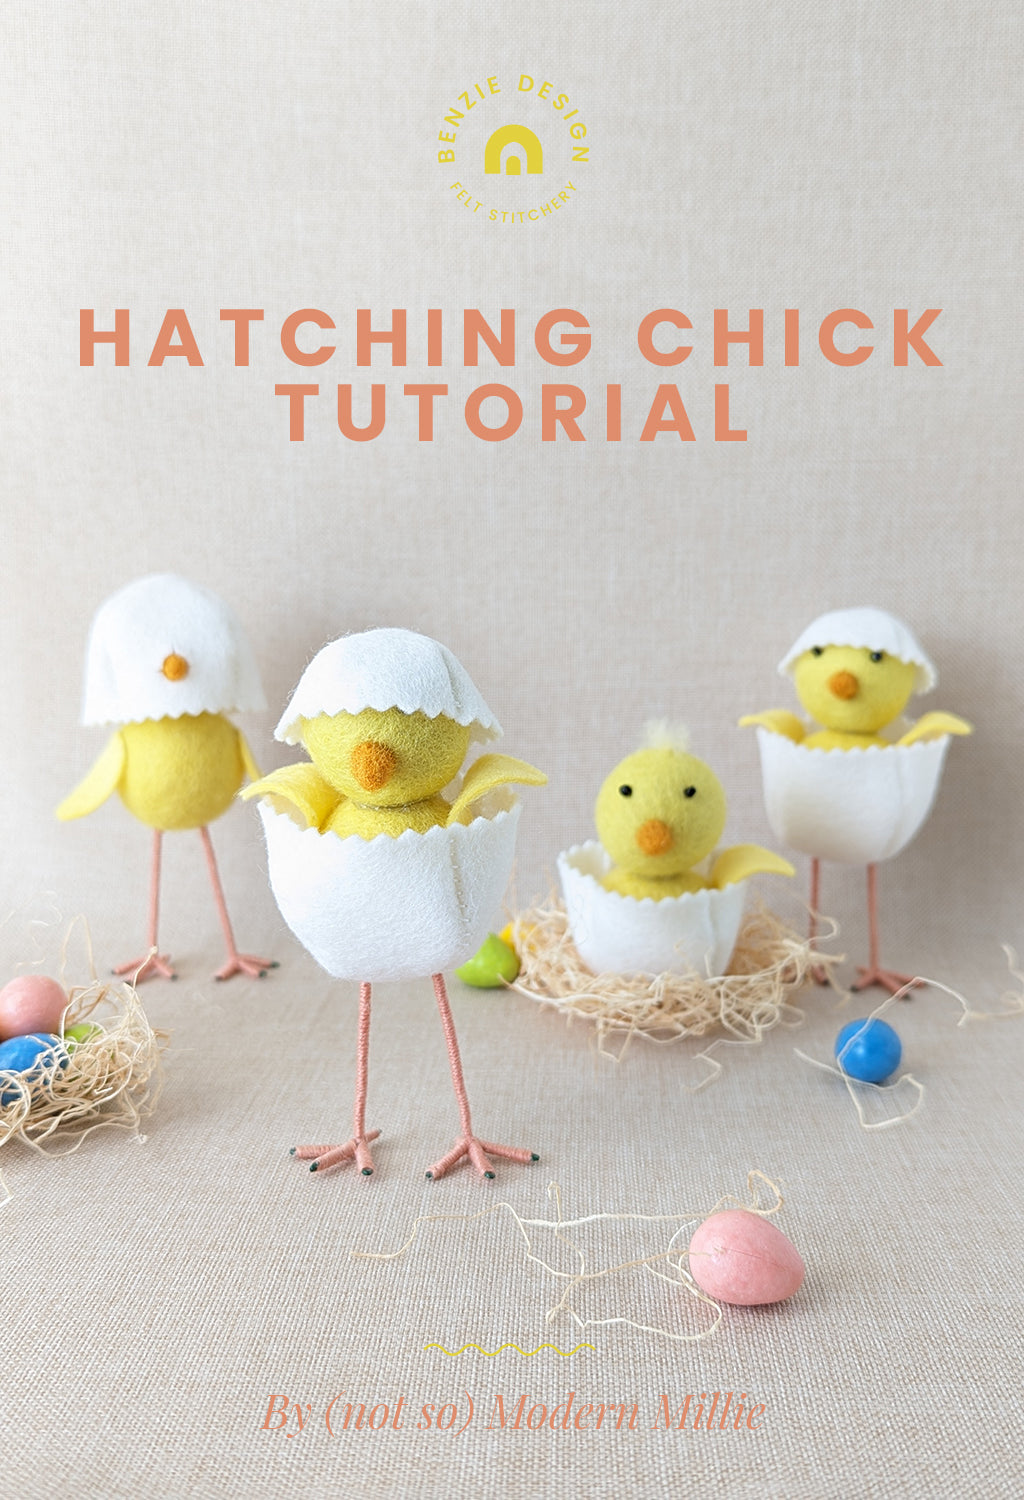
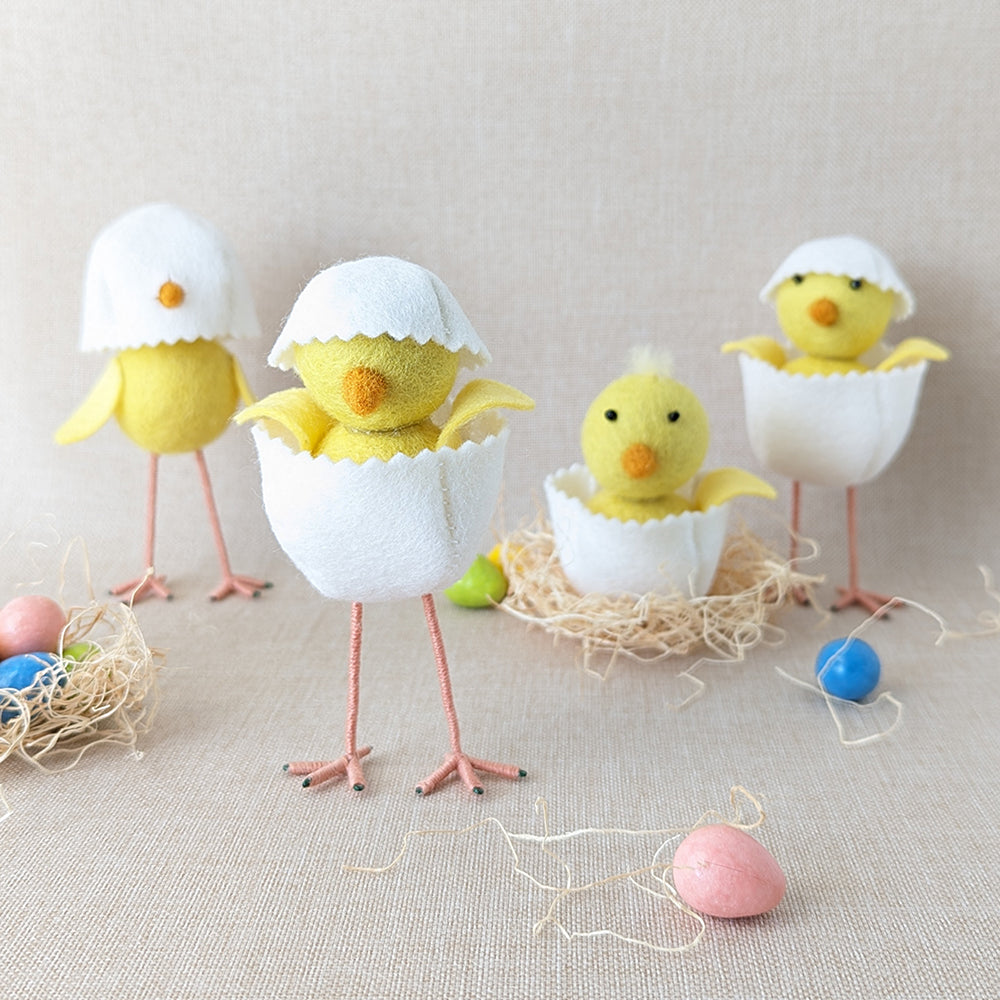
The sweetness of Spring culminates in the arrival of tiny, fuzzy baby animals! Did you ever visit the feed store as a child just to hold the newly hatched chicks or ducklings? We're bringing back a little bit of that magic with these hatching chicks! Our Chick felted pom is the star of this show but the spindly legs are a close second. Want to make some hatching chicks of your own? Let's get crackin'!
Skill Level: Intermediate
Time: 1 hour
Additional Supplies:
Hatching Chick Pattern (click to download)
Directions:
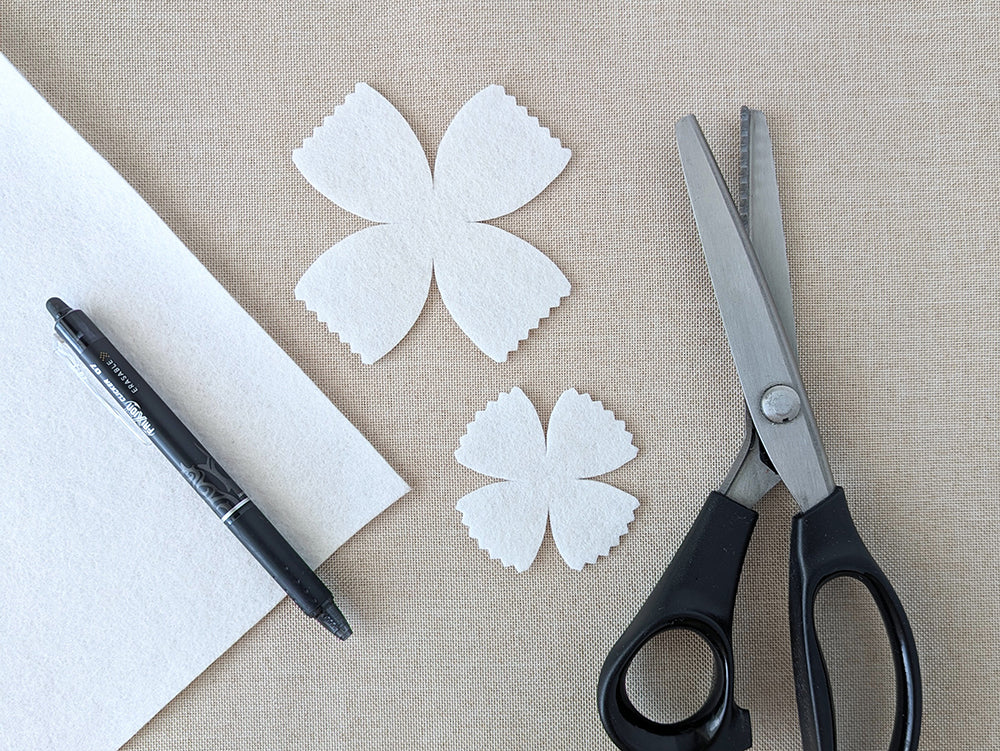
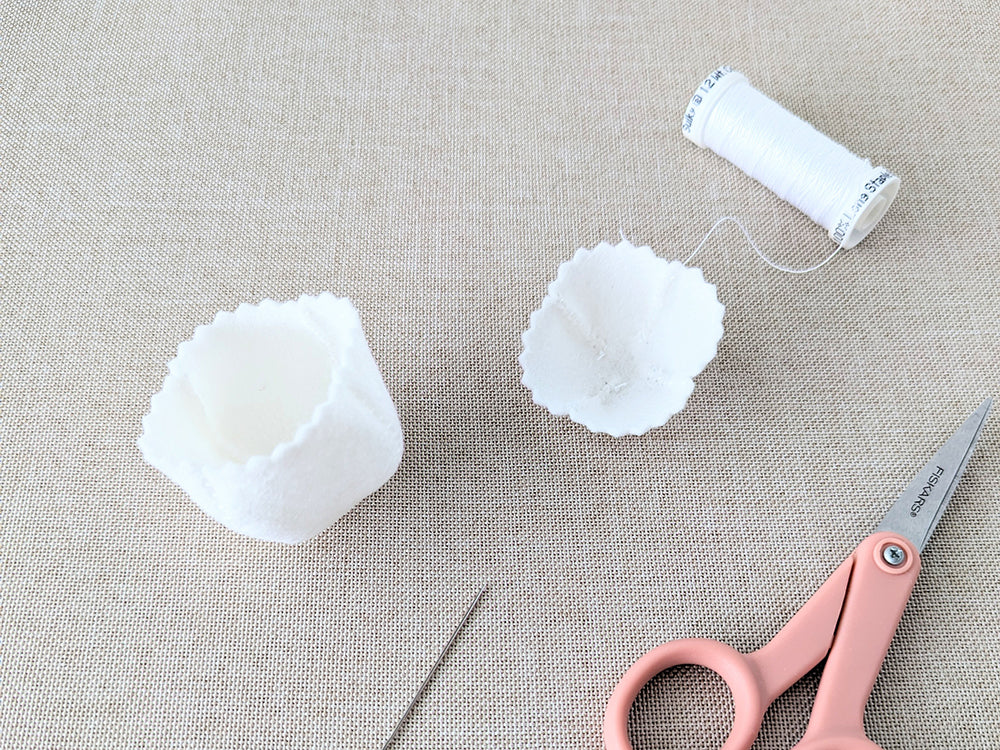
1. Print Hatching Chick Pattern above. Trace pattern pieces onto coordinating felt and cut out. Use pinking shears to cut along outer edges of Top and Bottom Shells to give "broken" effect.
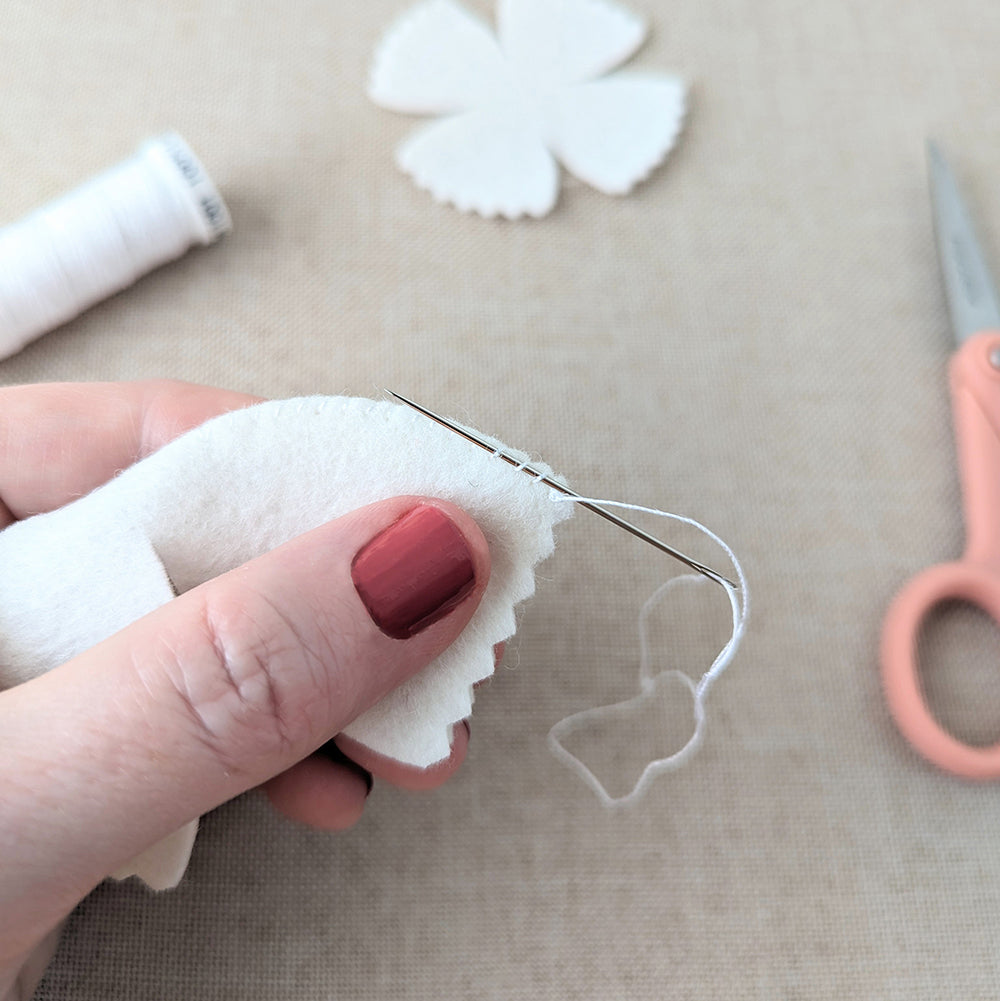
2. To form the shells, use one strand of matching thread to whip stitch along cut lines radiating from the center. Begin stitching closest to the center.
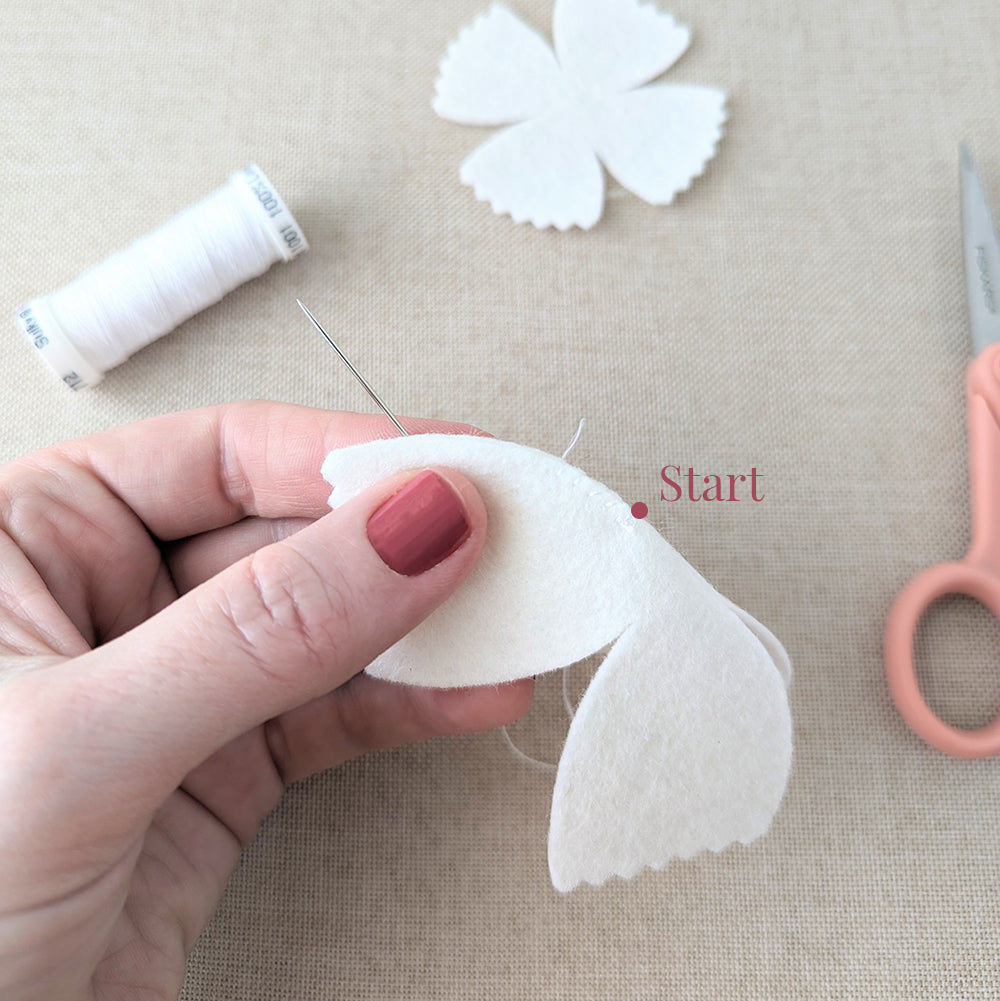
3. At the outer edge, tie a knot and then thread the needle back down three or four stitches before trimming thread. This will keep loose threads from sticking out of top of shell.
4. Turn Top and Bottom Shells inside out. Set aside.
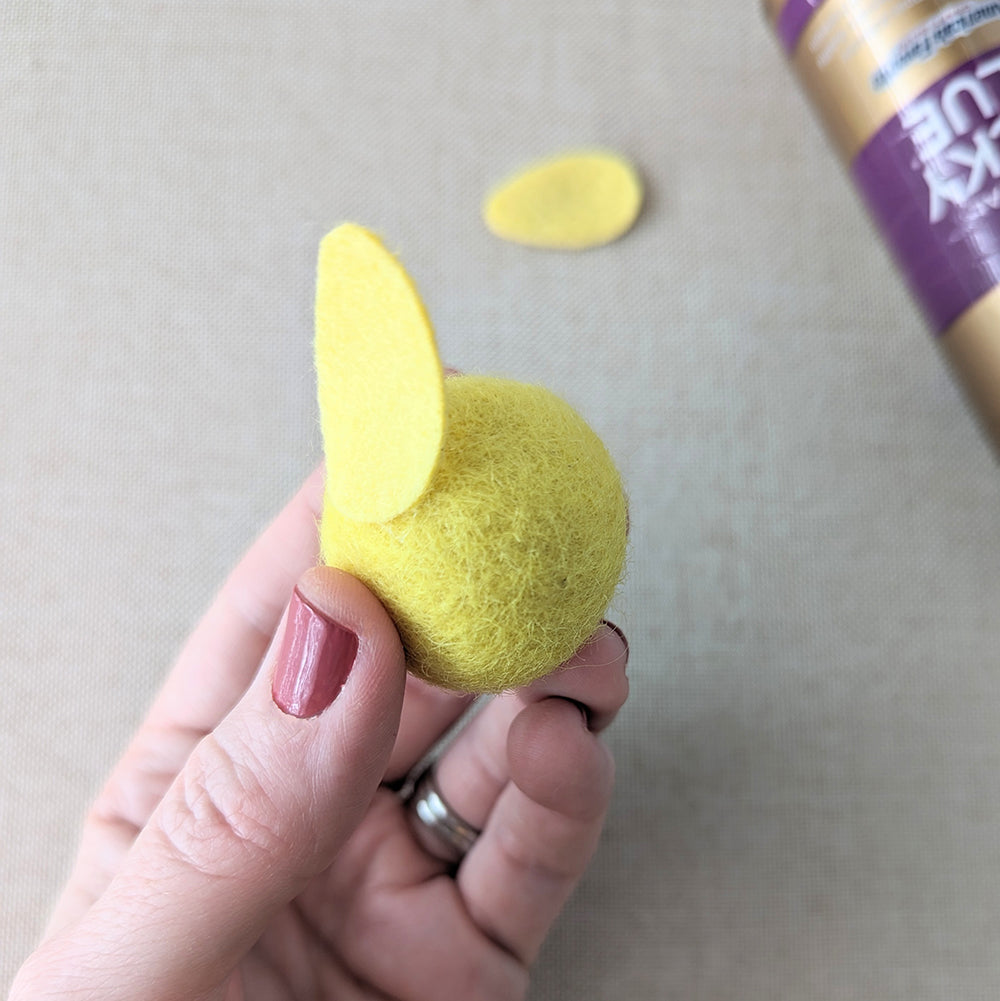
5. Glue Wings to sides of large Lemonade pom close to the top, so they will be visible above the shell. Position the larger wing end facing down and the smaller end pointing up.
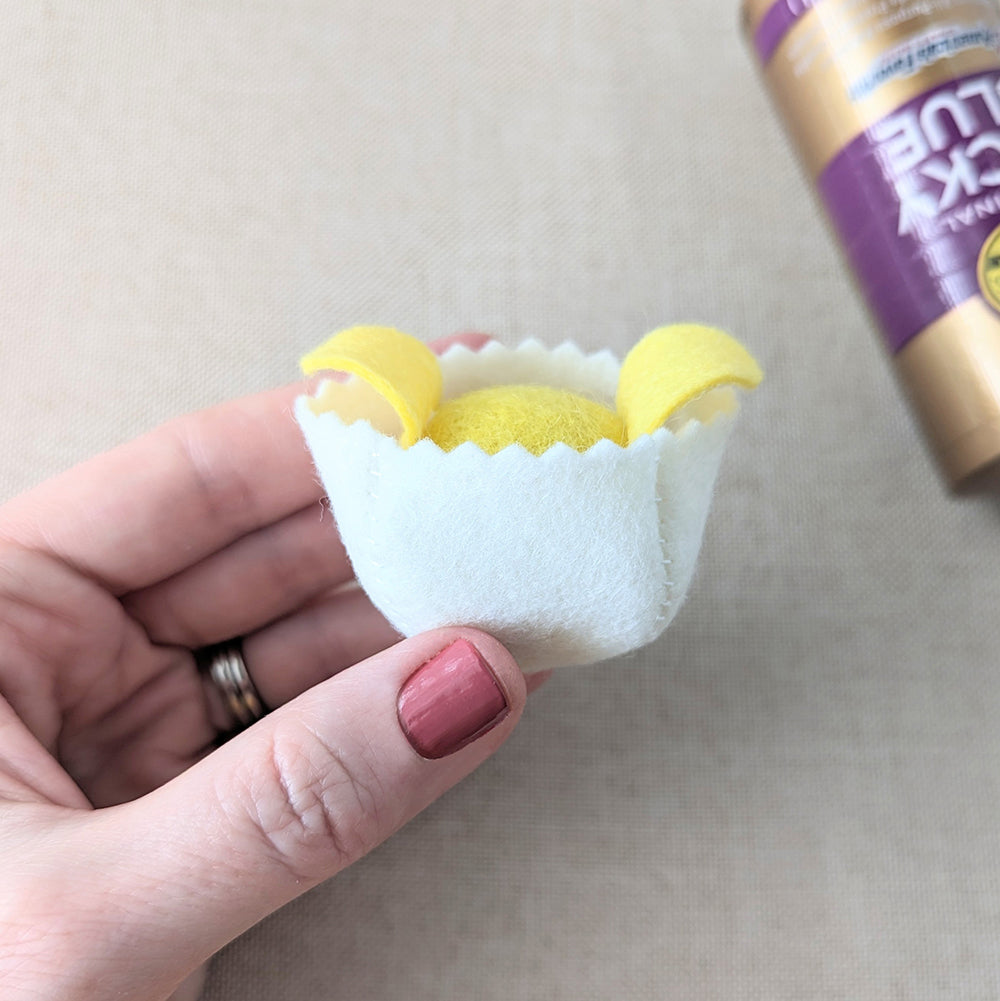
6. Glue Lemonade pom into center of Bottom Shell. Fold wings over the top. Wings will hold their shape with repeated folding, stiffening spray or by gluing them to the Bottom Shell. In this example, they were just folded into shape.
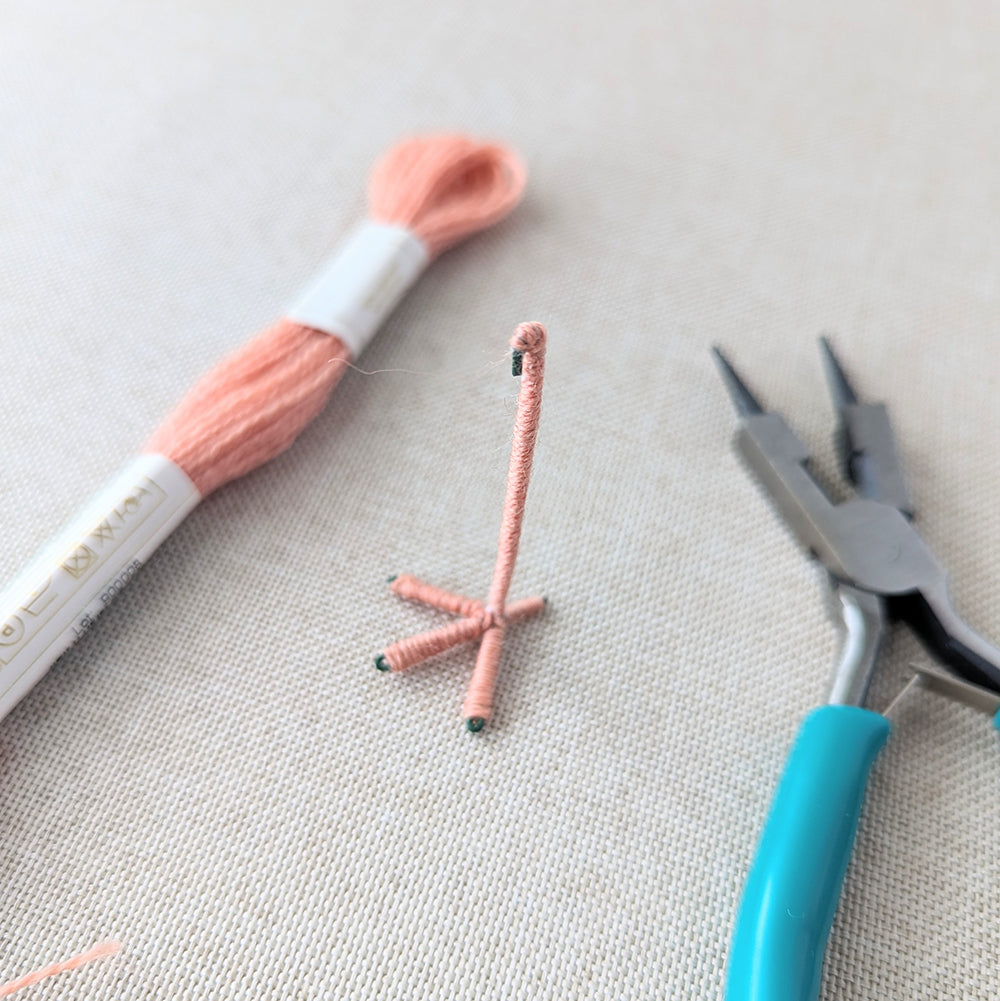
7. To make the legs, take a 6-7" length of wire and begin folding the feet at one end, beginning with the back toe. Move forward to the middle toe. Use the wire tool to bend the wire at the end of the middle toe and double back.
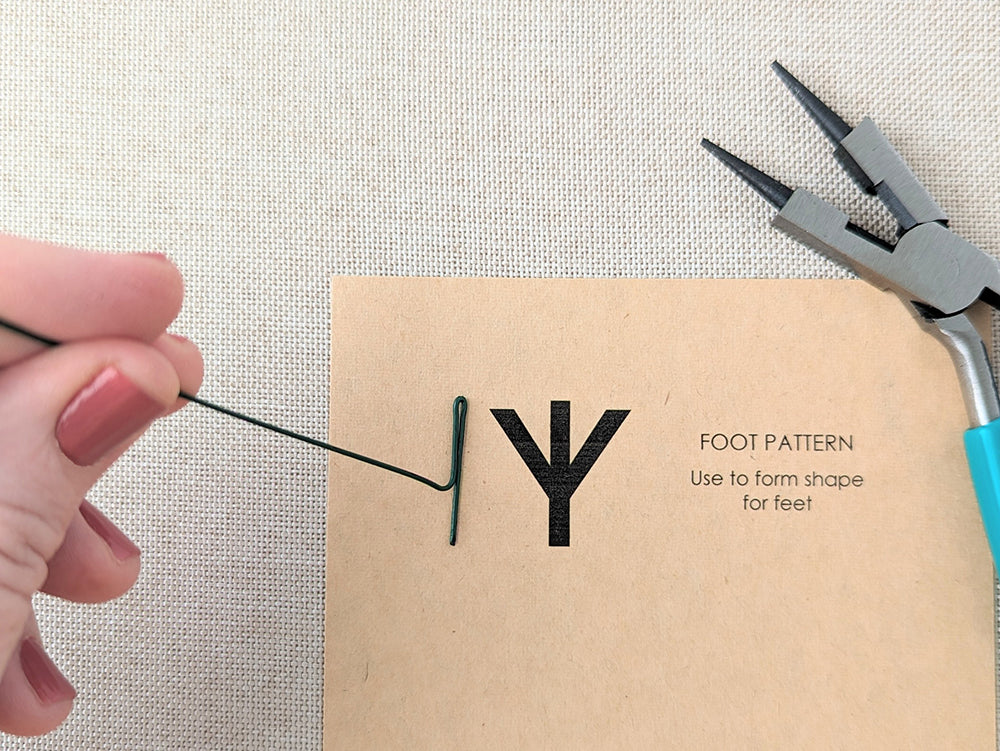
8. Work the wire out and back over the other two toes. (The back toe is the only one not doubled over.) The convergance point is the base of the leg.
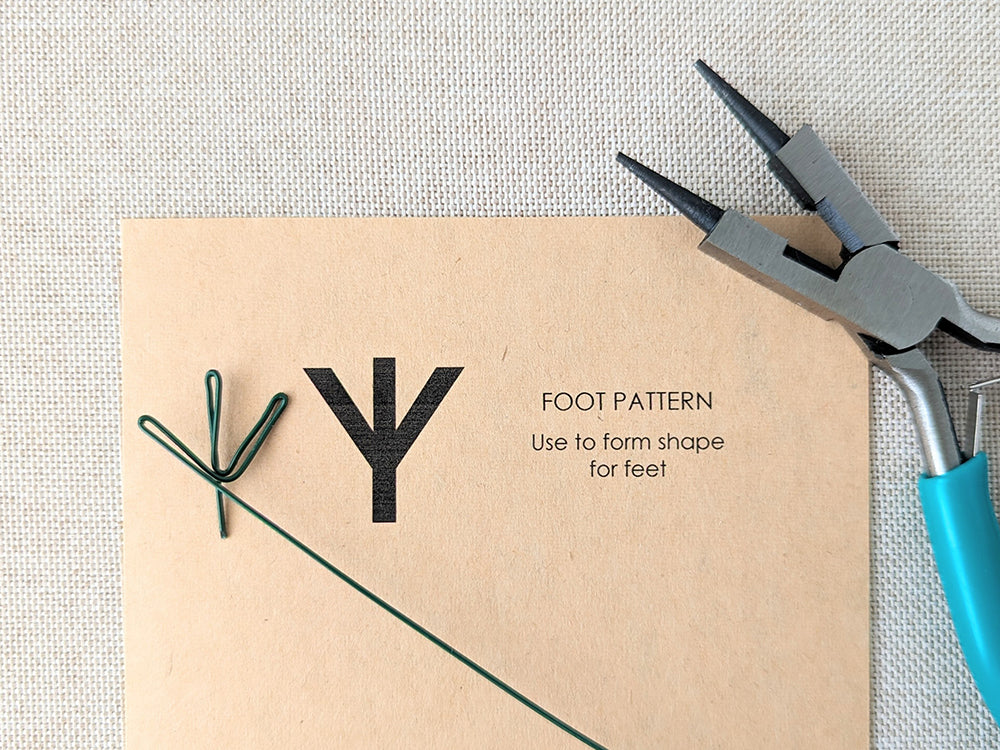
9. When all the toes have been formed, bring wire up to form the leg and cut to the desired height. (Leave an 1/4" at the top to fold over.) Go back over each section with the wire tool to smooth and close any large gaps in the wire.
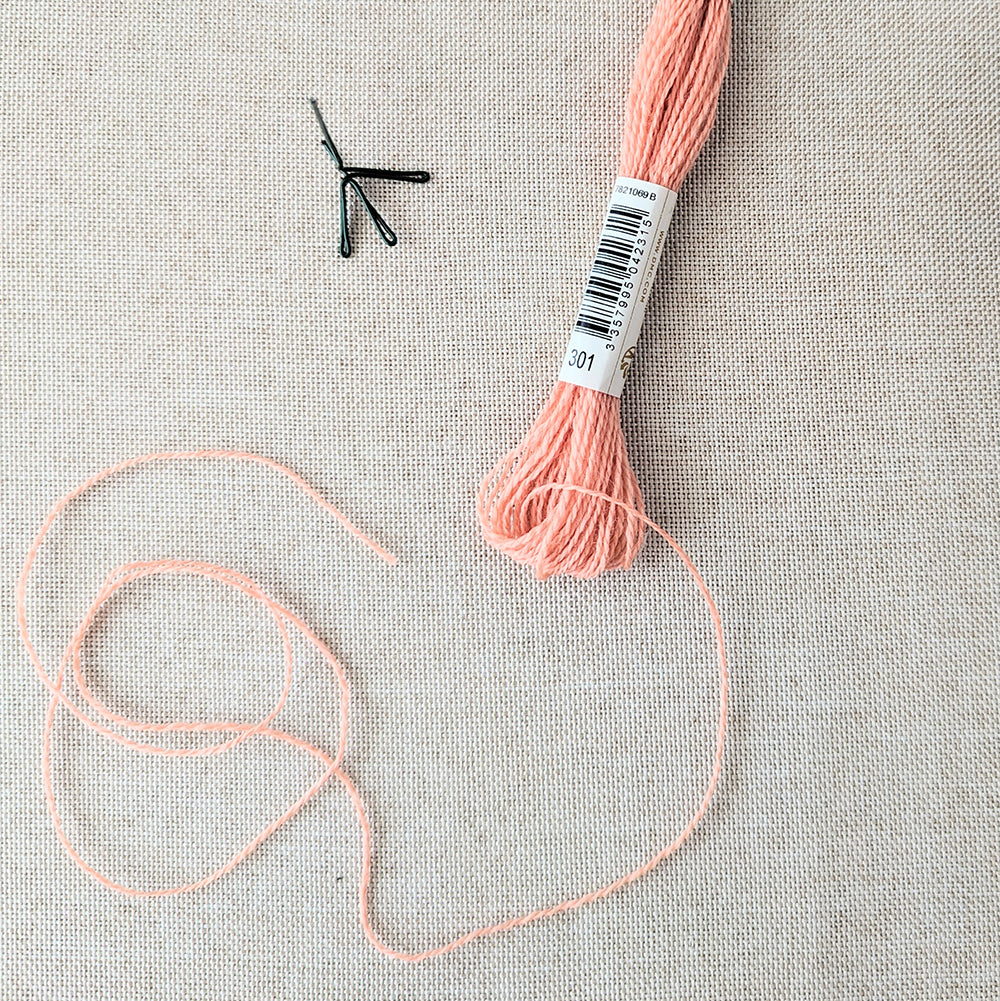
10. The feet and legs are wrapped with Eco Vita thread. Do not cut the thread because it is difficult to judge how much it will require. Instead, begin pulling thread from the numbered end of the skein.
11. Beginning 1/4" from the top, draw a thin line of glue along the leg. Wrap thread tightly along the wire toward base of the leg. Do not be afraid to secure the thread with glue - it will dry clear!
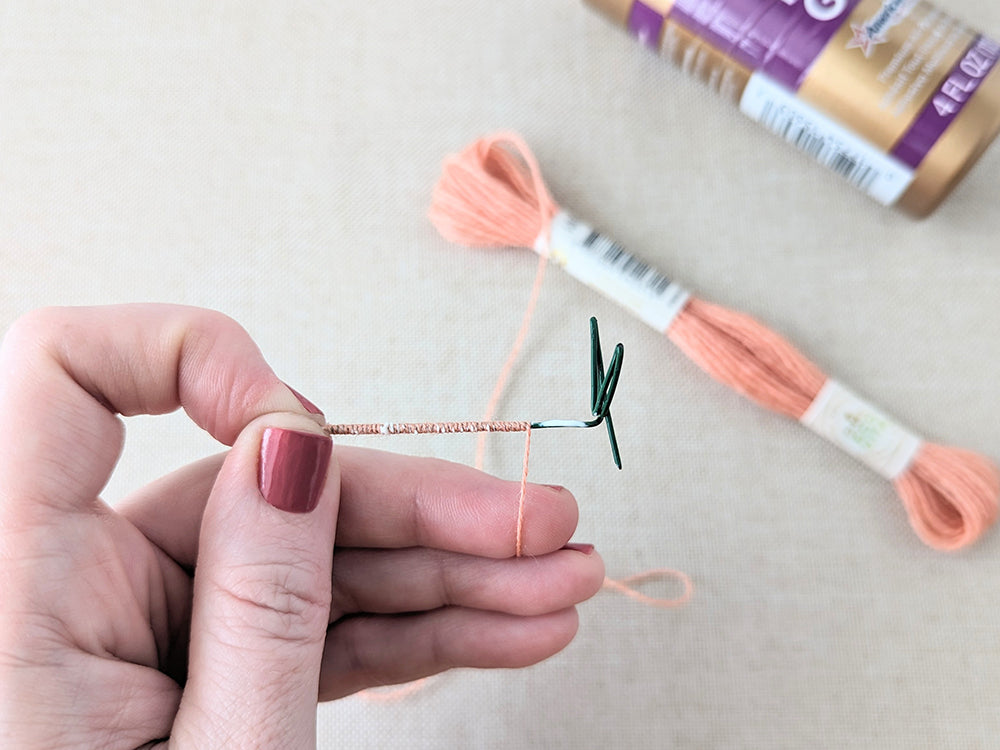
12. Criss cross over the center a few times and then wrap the thread out and back along each toe. Stop just short of the tip or claw, add another bit of glue and continue to wrap back toward the center, criss crossing over the center each time. The thread will tighten the "joints" of the foot.
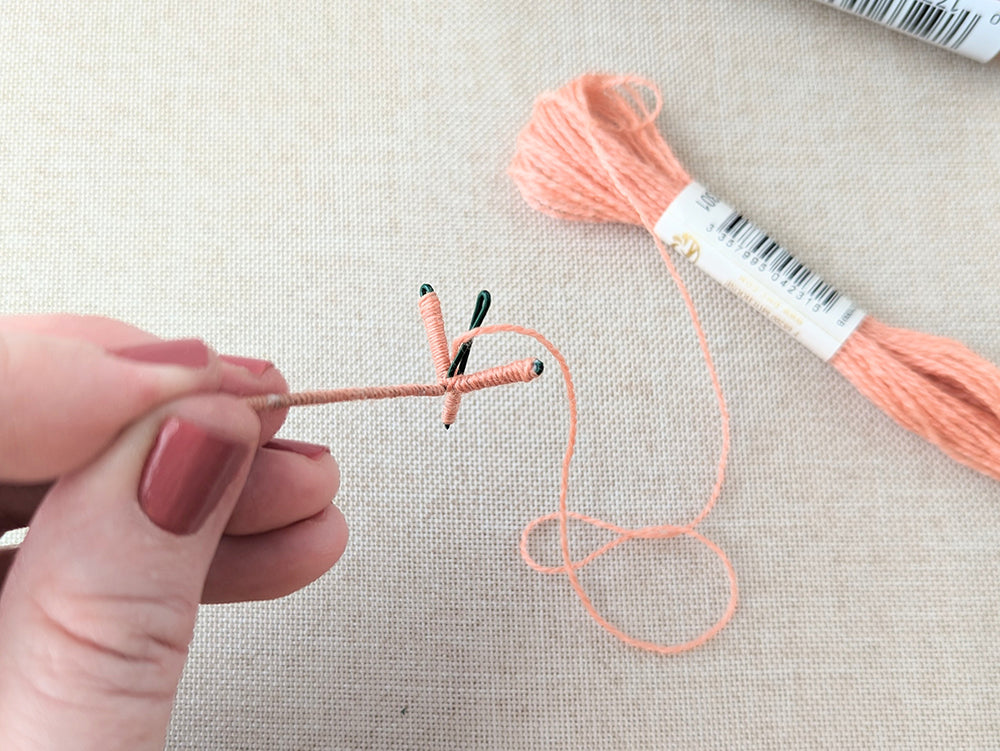
13. Once foot is wrapped and the wire is no longer visible, wrap thread back up the leg. Add more glue to the top and hold until dry. Cut thread. Fold over the top 1/4" of visible wire and add more glue for additional reinforcement. Repeat Steps 7-13 for the second leg.
14. Use an awl to make holes in the Bottom Shell through to the large pom. Add glue to the holes and insert each wire leg. Stand up the bottom half of the chick so glue will dry in a balanced standing position.
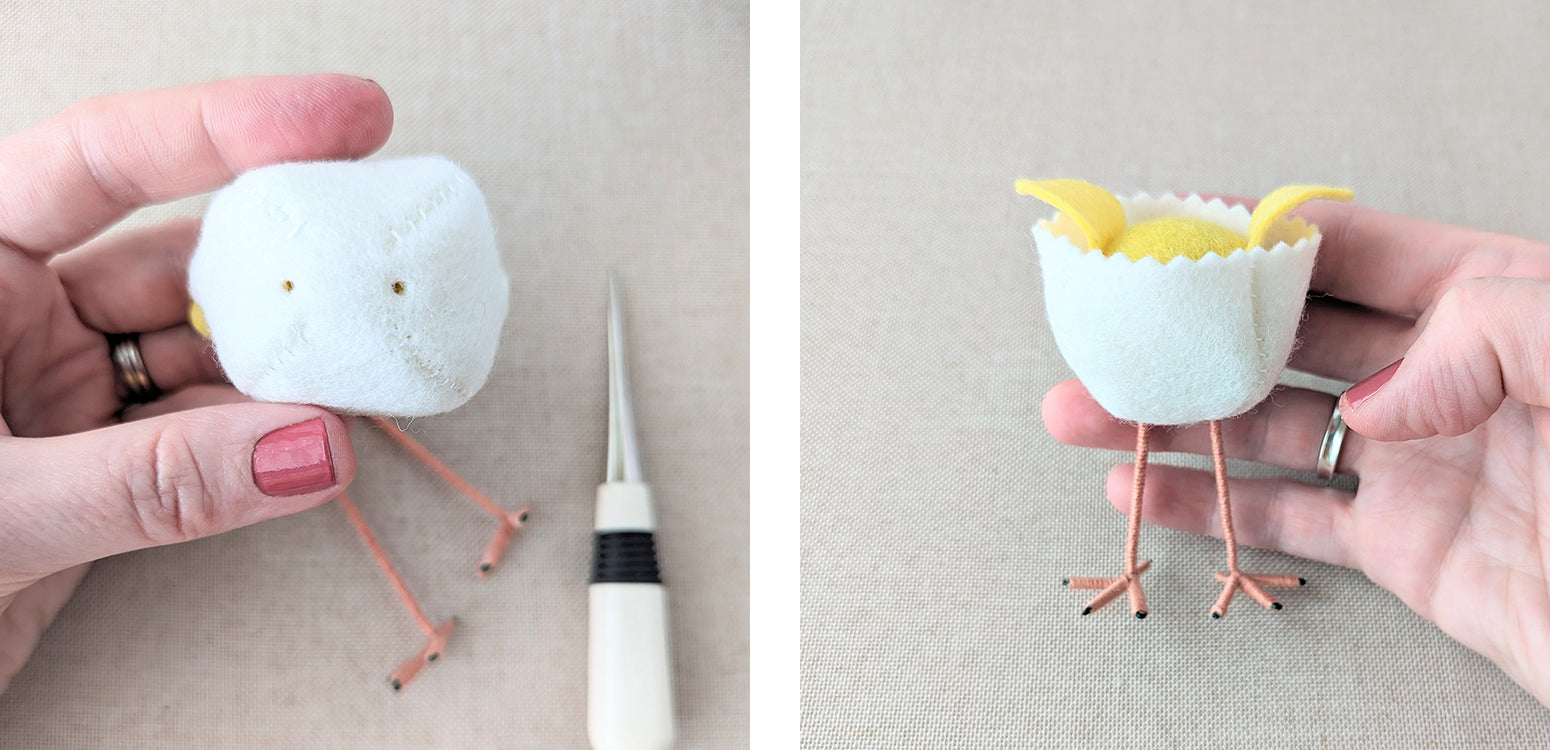
15. Glue Top Shell to top of Chick pom. Hot glue head to the middle of large pom.
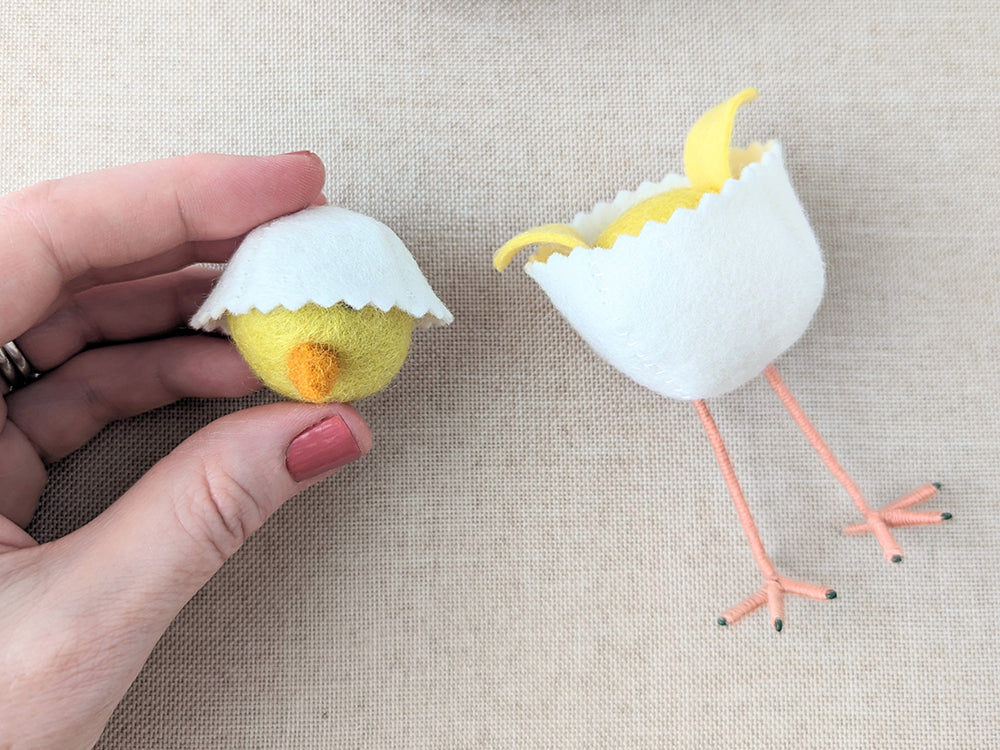
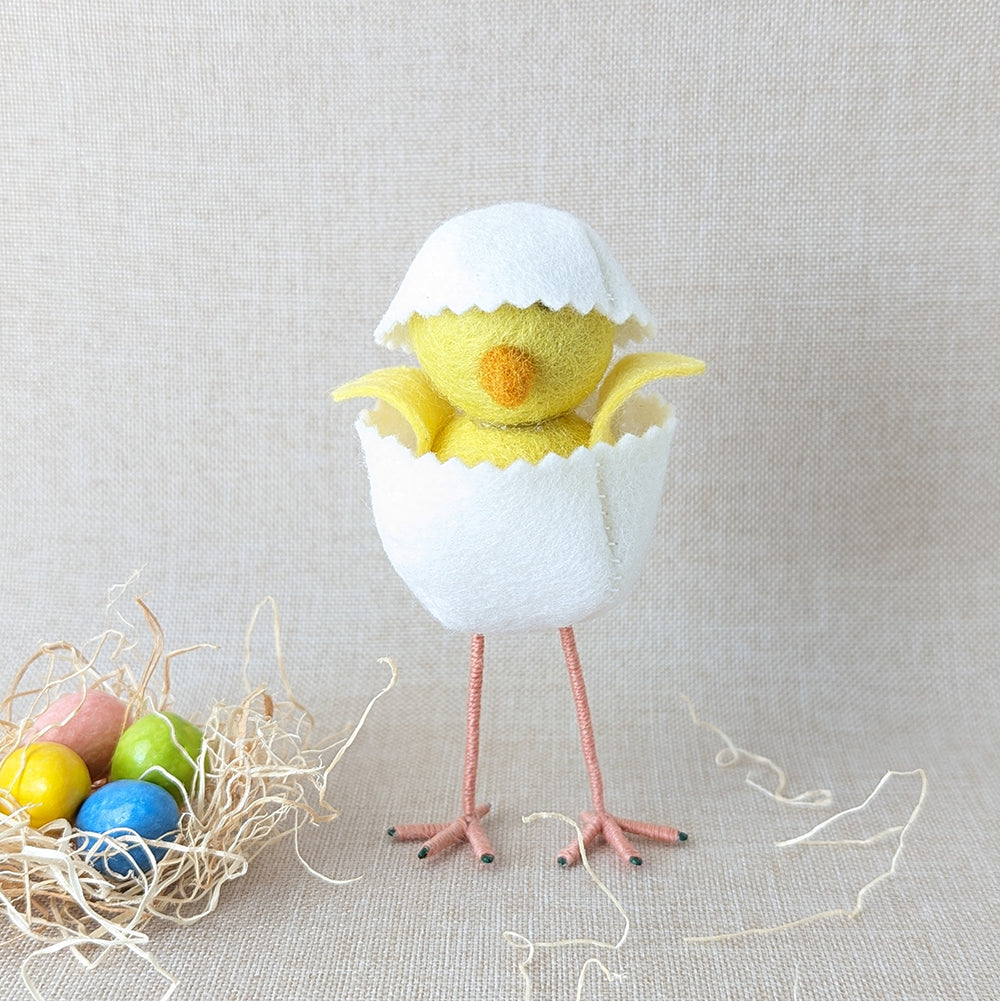
Your hatching chick is ready to greet the world!
Some fun alterations might be to leave off the legs and let the hatchling rest on it's shell. You can also leave off the Top Shell and add a tuft of hair with yellow yarn. No two chicks are alike, so have fun and add your personality!

Thanks to Camille for designing and writing this tutorial! You can follow her on Instagram @notsomodernmillie or visit her website. Stay tuned for more tutorials!


