Share

In her previous post, Benzie Design Maker Team member Astrid of @treehousefeltflowers shared an intermediate skill level felt flower tutorial. If you're ready to dive in and try a more advanced flower, her Protea Flower Tutorial is for you!
My flower instructions this week use two different felt color blends from Benzie's beautiful new Protea Palette. One set of 9 x 12" Protea Palette Wool Blend Felt sheets can make at least two of each color Protea.
Skill Level: Advanced
Time: About 2 hours per stem. Batching makes the process faster!
Additional Supplies:
Toilet Tissue Paper
Ruler
Preparing the stem base:
Put a small hole in a 2” Styrofoam ball and insert hot glue. Place one end of an 18-gauge floral wire in the hole and hold until the glue has set. Cut a small 1 ½ “circle of BURGANDY felt and glue it to the top of the foam ball if you are making the FOXGLOVE/BURGANDY colored flower. Use a circle of LINEN if you are making the LINEN/OATS flower.
Unroll about 16 “(4 squares) of toilet tissue paper. Fold in half lengthwise, then fold again. Wrap the toilet paper around the bottom half of the Pom and taper it to a finish on the wire. Hot glue in spots as you form the paper taper. Don’t worry if it doesn’t look perfect! The toilet paper is there to add bulk and will be completely covered with petals for the end product. Set aside.


Preparing the center spikes:

Cut strips as indicated:
For the FOXGLOVE/BURGANDY Protea:
- BURGANDY: 1.5” x 11”, cut one strip
- FOXGLOVE: 1.5” x 9”, cut one strip
- BLUSH: 1.5” x 9", cut two strips
For the LINEN/OATS Protea:
- LINEN: 1.5” x 11”, cut one strip
- OATS: 1.5” x 9”, cut one strip
- MINT: 1.5” x 9”, cut two strips
1. Cut each strip into spikes by cutting narrow “V’s” on one side of the strip, as indicated in the photo.
2. Starting with the BURGANDY felt, glue the bottom of the strip about half-way down the Pom, checking to be sure when you fold the spikes together they meet in the center of the Pom.


3. Using your glue sparingly, place a little glue on the center of the Pom and gently fold the spikes so they meet in the middle.
4. Wrap the FOXGLOVE and BLUSH strips, in that order, going slightly down the Pom so they have a graduated effect when the spikes are gently pressed towards the center.
5. Set aside until needed.


Preparing the outer petals:
For the FOXGLOVE/BURGANDY Protea: cut the following size rectangles:
- 1st layer: FOXGLOVE: ½” x 2 ¼, cut 16
- 2nd layer: FOXGLOVE: ½” x 1 ½" cut 16
- 3rd layer: BLUSH: ½” x 1 ½", cut 8
- Final layer: BLUSH: 3 ½" square, cut 1
For the LINEN/OATS Protea: cut the following size rectangles:
- 1st layer: OATS: ½” x 2 ¼", cut 16
- 2nd layer: OATS: ½” x 1 ½" cut 16
- 3rd layer: BLUSH: ½” x 1 ½" cut 8
- Final layer: BLUSH: 3 ½" square, cut 1
Color the top third of BOTH sides of the petals with Pan Pastel magenta. To make the outer petal shape, fold the rectangle in half lengthwise and starting about a half-inch down snip a small arch out of the top of the petal, cutting toward the folded edge. Do this for all outer petals.


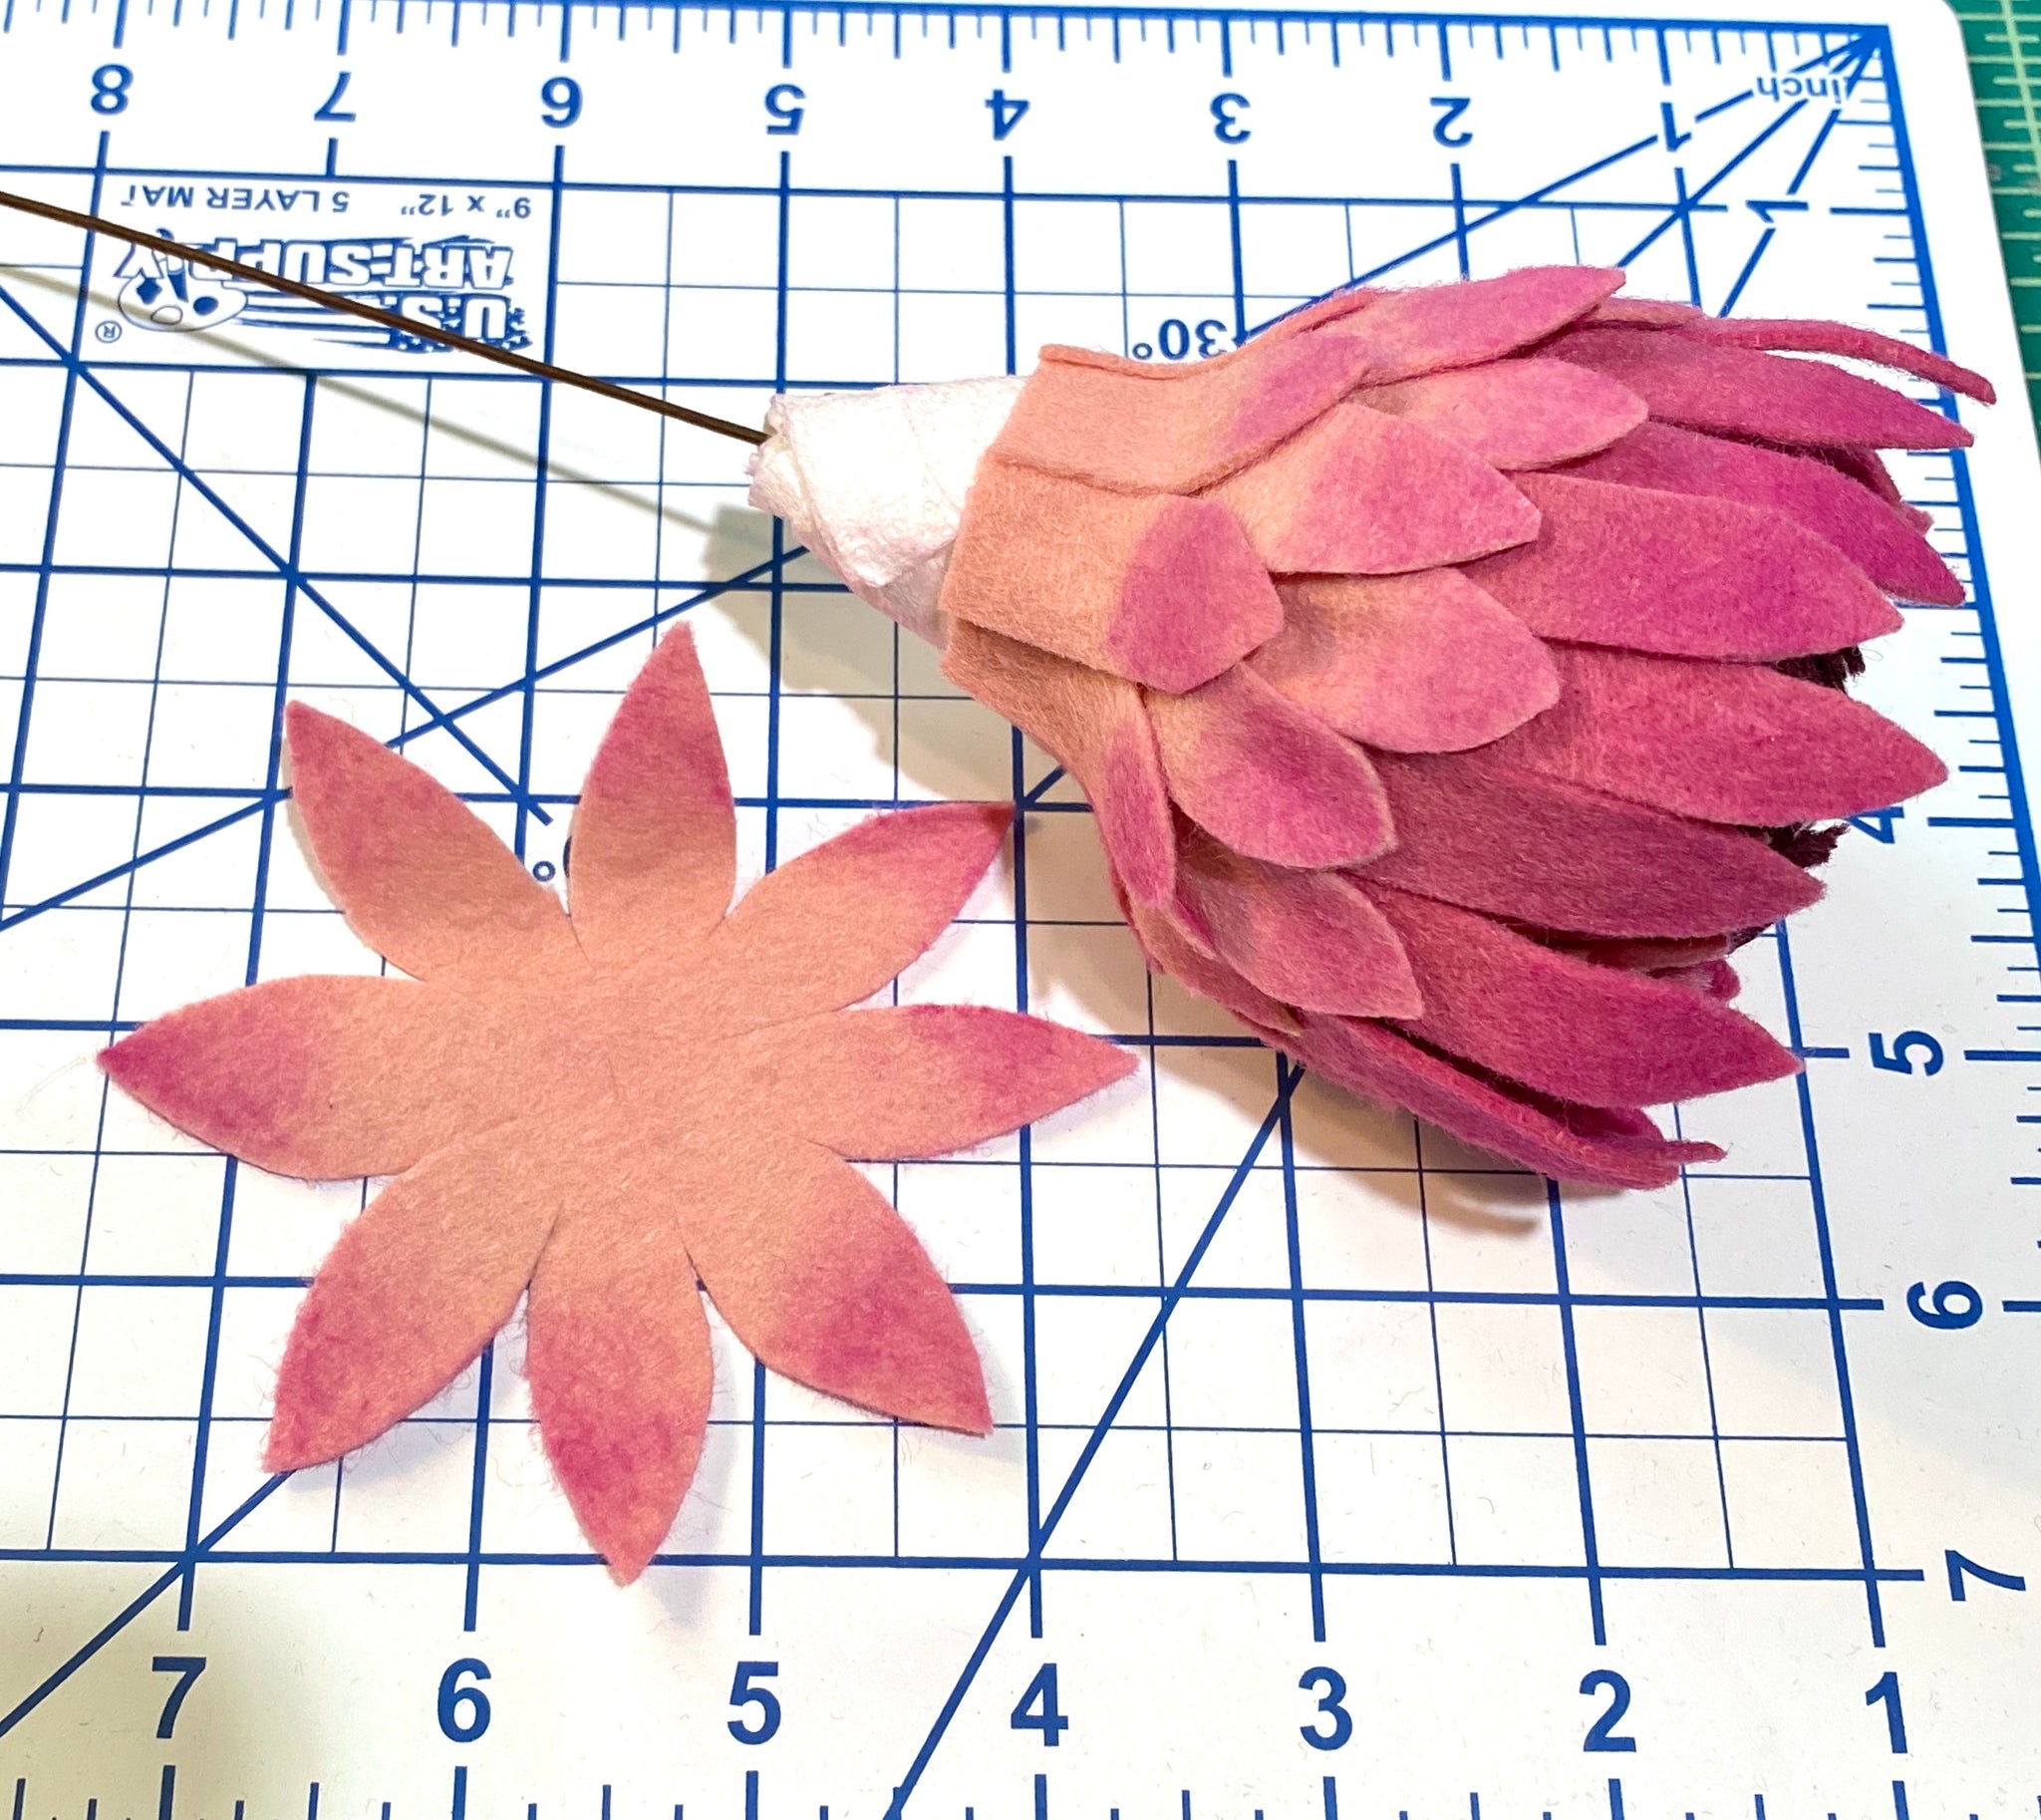
Cut a circle out of the BLUSH square, and fold the circle in half. Make a small slit in the center for your wire. Cut the circle into 8 equal quadrants. Shape each ‘petal’ to match the ones above. Color the top third of each petal (BOTH sides) on the circle with Pan Pastel magenta.

Attaching the petals:
First layer:
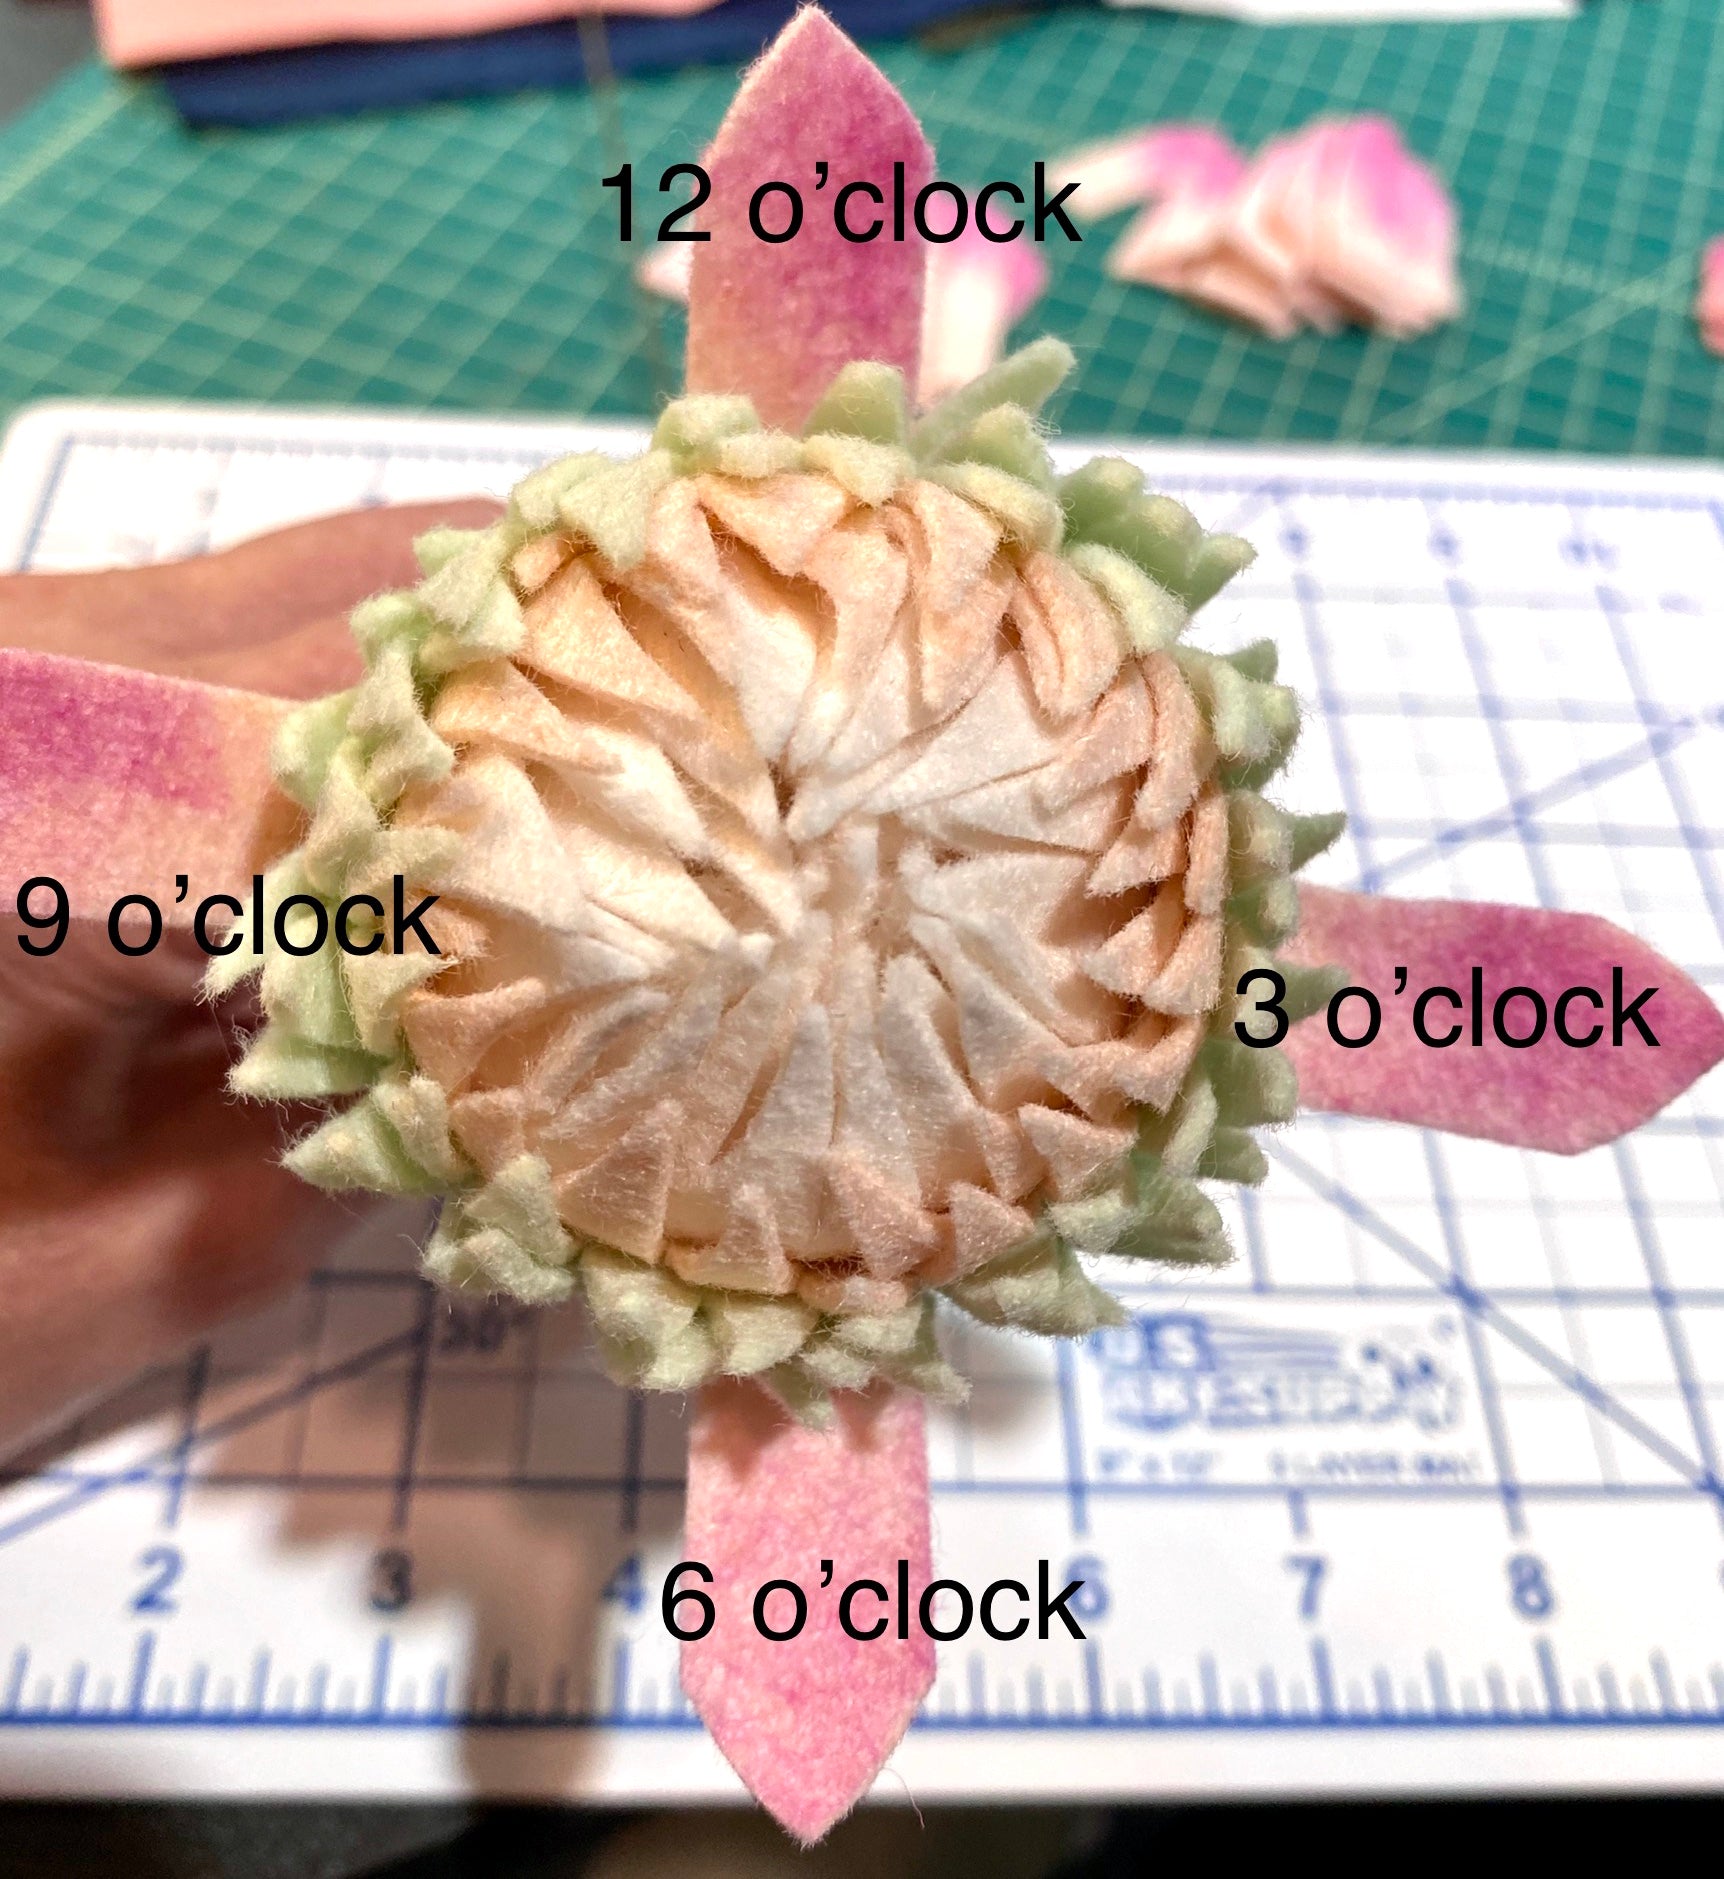
View the Protea center face like a clock. Starting with the 2 ¼” petals, glue one petal at 12 o’clock so the base of the petal is about ¼” below the prepared center. Glue the second petal on the opposite side of the flower at 6 o’clock. Then glue a third petal in between the first two at 3 o’clock, and the 4th petal in between the first two on the opposite side at 9 o’clock. Fill in each space between the glued petals with 3 additional petals. Continue gluing the petals to the flower until you have 16 petals evenly spaced.

Second layer:
Place 8 of the second layer petals evenly around the stem, about a half inch below the first layer. Be sure all exposed Styrofoam and tissue are covered. Use the second 8 petals to make a second row, slightly below the layer above and offset as shown in the photos.


Third layer:
Place all eight 3rd layer petals evenly around the stem, about a quarter of an inch below the previous layer, slightly offset, as indicated in the photo.

Final layer: Put the wire stem through the slit on the circle of petals. Put some hot glue on the bottom of the flower on any exposed tissue paper. Slide the circle into place and press firmly. Cup the circle of petals to shape. Glue each petal down to finish the flower.

Preparing the leaves:
Cut as indicated:
- OLIVE: 1” x 3”, cut 3
- CYPRESS 1” x 3”, cut 3


To make the leaves, put a line of hot glue lengthwise down the center of a rectangle. Place a 6” piece of 22 gauge wire in the glue and fold and press the rectangle together. Trim the bottom and top of the folded rectangle to make rounded leaves. Open and shape into an arching leaf.

To Assemble:

Starting just underneath the flower head, wrap the stem with green floral tape. At about an inch below the flower, start adding the OLIVE leaves in a whorled pattern. Continue with the CYPRESS leaves. Wrap the leaf wire around the stem, then cover with tape. Continue the tape to the end of the stem. Twist to secure. Congratulations! You've finished your beautiful Protea! Enjoy them in a bouquet with contrasting colors like navy florals, or own their own for a pop of pink.


Thanks to Astrid for designing and writing this tutorial! You can follow her on Instagram @treehousefeltflowers or visit her website. Stay tuned for more tutorials from the Benzie Design Maker Team!


