
Benzie specializes in more than felt - we are a fine stitchery as well! That's why we are delighted to bring you the latest in our Benzie Basics series, a beginner's guide to cross stitch from expert Camille of @notsomodernmillie! Camille brings decades of cross stitching experience to our Maker Team, and today she's sharing everything you need to know to start your first cross stitch project. And don't forget to read to the end of her post for a free cross stitch pattern download!
Cross stitch – sometimes called ‘counted cross stitch’ – is a very old and simple sewing technique that uses X-shaped stitches to form a picture. Cross stitch has had a resurgence in popularity recently as designers have introduced more modern themes and patterns for stitching. If you’ve ever been curious about cross stitch but didn’t know where to begin, the following information will give you the tools and tips to get started.
Skill Level: Beginner
Cross Stitch Supplies
Fabric – Cross stitch fabric is made up of woven squares. The fabric is categorized by the size of the squares. 14-count fabric = 14 squares per inch. The smaller the count of the fabric, the larger your completed project will be.
Embroidery floss – The thread or floss used for cross stitch consists of 6 strands. The floss is cut to the desired length and then the strands are separated. Most stitching is done with 2 strands.
Needle – A cross stitch needle has a blunt end and large eye. A #24 Tapestry needle is perfect for most projects.
Scissors – Small embroidery scissors work best for cross stitch since most cutting consists of up-close thread snipping.
Embroidery hoop – Embroidery hoops are used to hold the fabric in place while stitching. Although not a necessity, a hoop can keep the fabric from stretching/distorting.

Preparing the Fabric
Select and/or cut your fabric so that it is large enough to accommodate the finished design AND the method you are using to finish the piece – hoop, frame, etc. Adding 2 inches to the finished dimensions is a good rule. Example: If you are framing your piece in a 4” hoop, cut a 6” square of fabric.
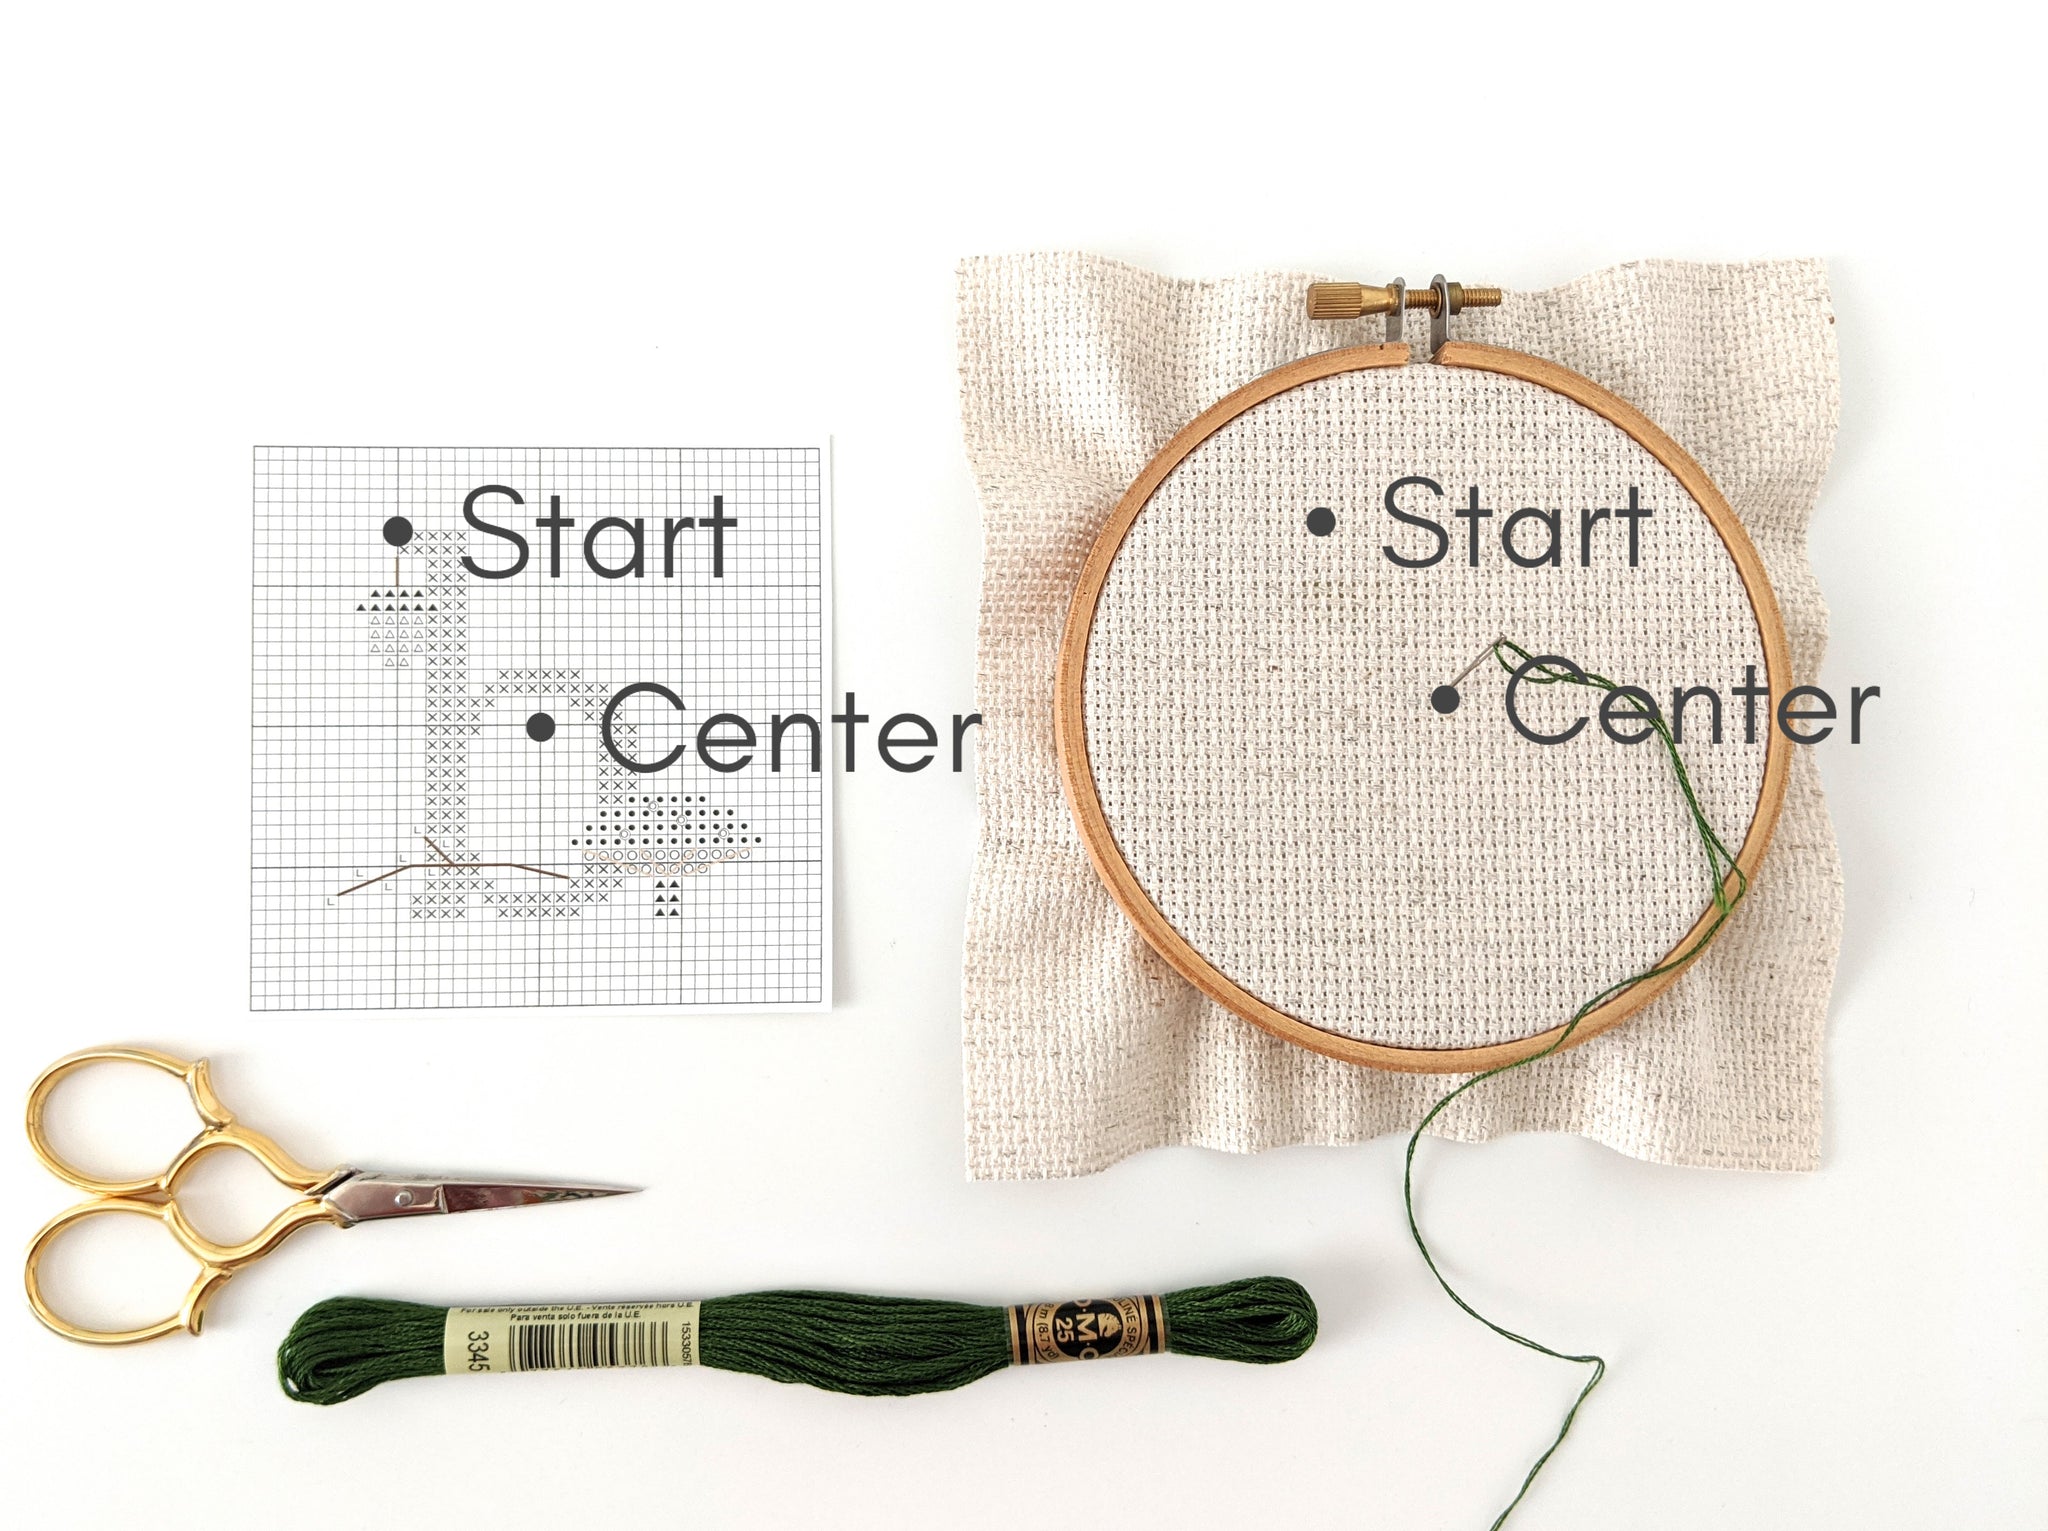
You may start at any point, but be sure to center the design on the fabric. To find the center, fold your fabric in half lengthwise and crosswise. On the pattern, count the number of squares from the center of the chart to where you wish to start. Then from the fabric’s center, find your starting point by counting out the same number of stitches (or squares).
Reading a Pattern
A cross stitch pattern contains a variety of symbols. The symbols correlate to a specific floss color listed on the pattern summary. Each square on the pattern represents a square on your cross stitch fabric.

Types of Stitches
Although there are several variations of stitches, most beginner cross stitch patterns only have a few stitches you need to know. The most common are the following:
Full stitches: Create each stitch using diagonal lines (left to right) then stitch back over the row (right to left), creating Xs.

Back stitches: Begin by bringing your needle up through the fabric (1) and then back down (2) to make a single stitch. Bring the needle back up a space away from the first stitch (3) and back down through the end of the first stitch (1).

French knot: Bring your needle up from the back of the fabric. Pull the length of floss all the way through. Point the needle downward and wrap the floss around it three times. Hold the length of floss with your left hand (or right, if left-handed) and insert the tip of your needle back through the same hole in the fabric.
With your left hand, gently pull the wrapped floss tight around the base of the needle, forming the knot. Once the knot is settled against the fabric, slowly draw the needle through while maintaining tension with your left hand. Do not pull too tightly or the knot will pull through to the back of the fabric.

Starting Stitching
To begin stitching, thread your needle with 2 strands of floss. Leave a long enough tail on the back side of your work so you can hold it in place while your first few stitches are worked over it. This secures your thread. Do not tie a knot in your thread.

Ending Stitching
To end stitching, run the needle under 4 or 5 stitches on the backside of your fabric to secure the thread. Cut the thread close to the cloth so there will not be loose strands that could get caught up in other stitches.

When you have completed the project, remove it from the hoop (if using) and place face down on a clean towel. Press with a hot iron until all indentions are gone. It is ready to be framed!

Now that you have a basic understanding of cross stitch, let’s give it a try! The Mushroom Monogram pattern below is simple enough for a beginner and uses the three basic stitches you’ve just read about. Use it to make ornaments or gift tags or embellish your home décor – the only limit is your imagination!
Mushroom Monograph Pattern (click to download)


Thanks to Camille for designing and writing this tutorial! You can follow her on Instagram @notsomodernmillie or visit her website. Stay tuned for more tutorials from the Benzie Design Maker Team!


