
With crisp, fall air and dark evenings descending on many parts of the country, Benzie Design Maker Team member Astrid of @treehousefeltflowers wanted to help you bring a little light into your home! Felt flowers can brighten up any season, and they'll never need to be watered. This week, Astrid shows us how to make a sunny California poppy inspired by the state she once called home. As Joni Mitchell sang, "California, I'm coming home."
I had the good fortune to live in northern California in the early 80’s, and one of my favorite memories is driving through the foothills looking for spring blooms. Imagine what it was like for this Jersey girl to see her first hillside full of golden orange California Poppies! It was magical. Also known as California Sunlight or Cup of Gold, these sunny beauties will brighten up any corner of your home. Using the SVG file I’ve included, you will want to make a whole vase! I like to use Benzie Design felt colors Golden and Tangerine for the petals, with Marigold for the centers. I’m including a pattern for making poppy buds, which add to the realistic feel!
Skill Level: Beginner
Time: About 30 minutes to make 1 flower. Making them in batches by using the included SVG file increases the efficiency!
Supply List:
9 x 12" sheets of wool blend or 100% wool Bellwether felt in the following colors:
Tangerine
Marigold
Zucchini
Tip: A variation made with Golden felt petals looks very pretty mixed into a bouquet of poppies.
18 gauge green wire stem
Glue gun and glue
Scissors
Rotary cutter with self-healing mat
Ruler
Artist pastel in burnt orange or bittersweet (optional Fix-it spray)
Paper towel
Tweezers
If using a programmable cutting machine:
Poppy flower SVG file (click to download)
Poppy bud SVG file (click to download)
Instructions for cutting by hand:

1. Prepare the center: Using your rotary cutter and mat, cut a rectangle of Marigold felt measuring 0.75” x 2.5”. Using scissors, fringe the rectangle as shown in Fig. 1. I usually make these flowers in batches, so cut as many center rectangles as you think you will need for your project.
2. Attach the center to the stem: Put a thin bead of hot glue along the bottom edge of the center rectangle. Wrap around the stem as shown in Fig. 2. Make one stem/center for each flower. Set aside.

Figure 1
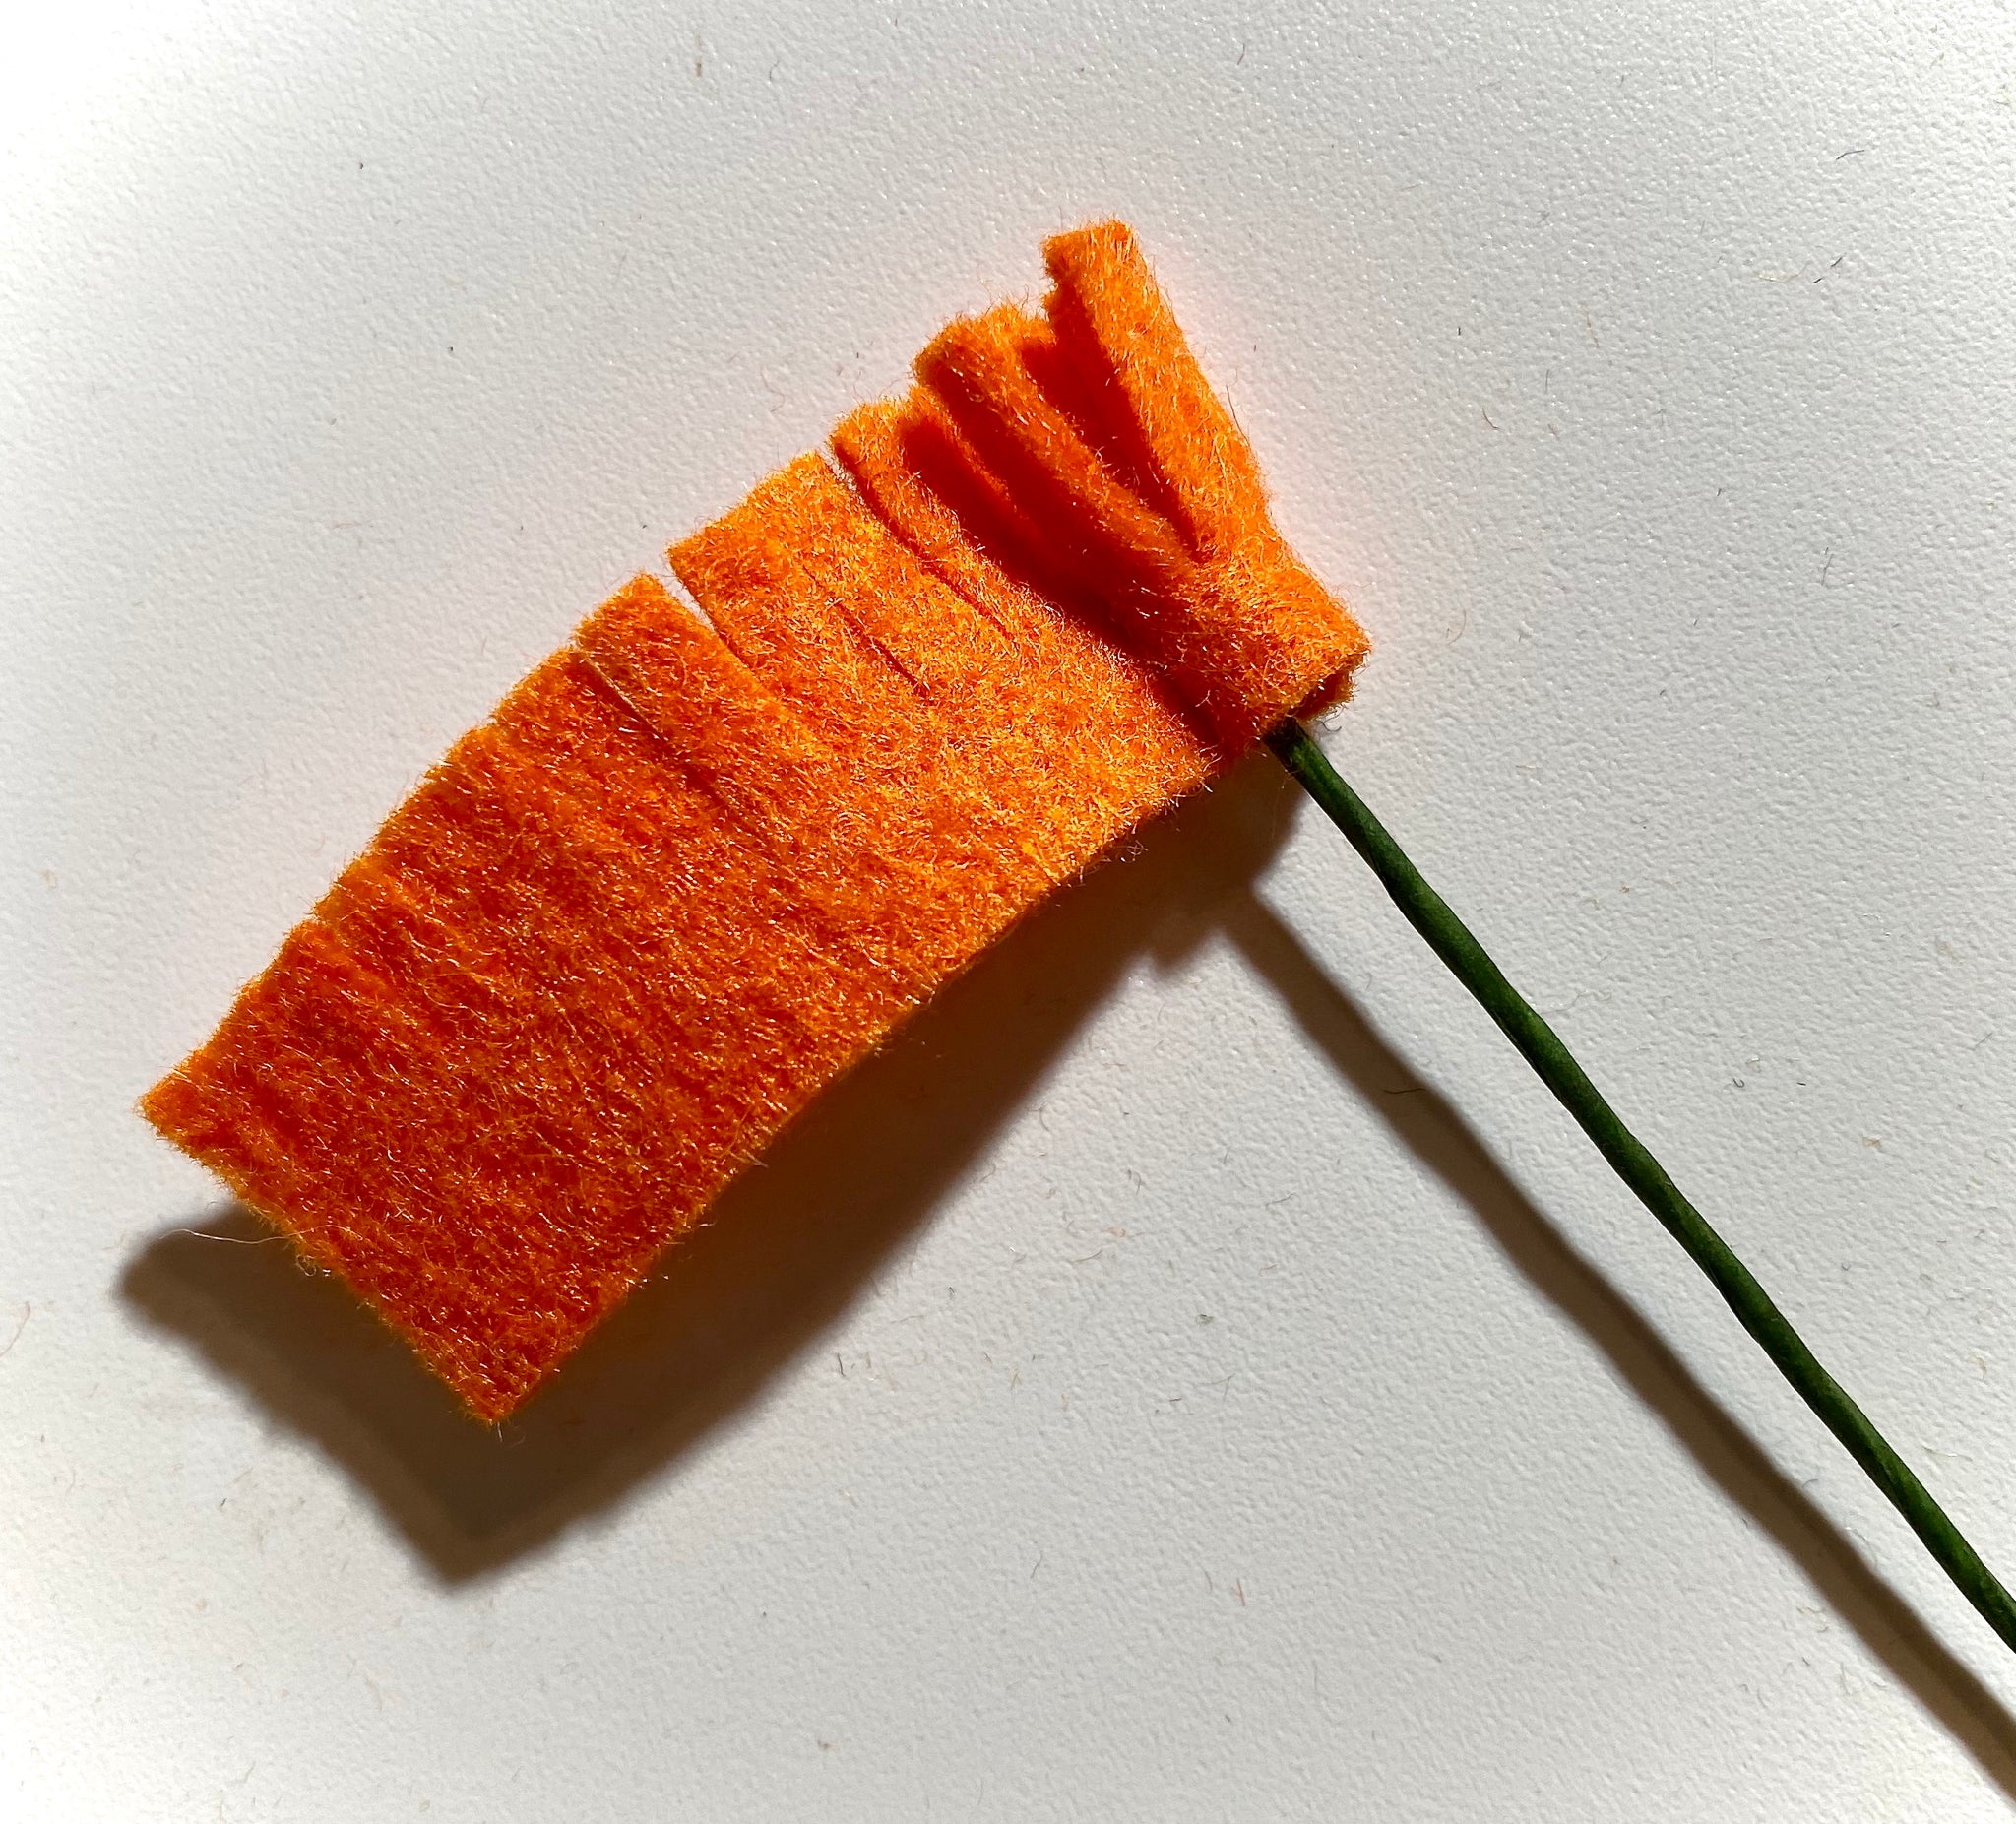
Figure 2

3. Cutting petals by hand: Using your rotary cutter and mat, cut four 2” x 1¾” rectangles per flower. Cut out flower petals using Fig. 3 as a guide. Cut a ¾” slit in the bottom of each petal. We will use these slits to add dimension to the petals. Don’t worry if each petal does not look exactly alike. Petals in nature vary, too!

4. Add shading to your petals: Your flowers will look more realistic if you add some shading. Using a burnt orange or bittersweet colored pastel, shade the bottom half of each petal. Blot off excess pastel chalk with a paper towel. Spray with Fix-it or hairspray to help the color stay in place. See Fig. 4.

5. Shaping the petals: Using your glue gun, place a dab of hot glue on the bottom left of the petal. See Fig. 5. Pull the right bottom edge over the glue and press. This will add shape to your petal and give it more dimension.

6. Attaching petals to stems: Using your hot glue gun, place a dab of glue on the inside bottom of the petal. Place the petal on the stem, aligning the bottom of the petal to the bottom of the flower center. See Figures 6. Repeat with the other 3 petals, spacing them evenly around the stem.


Figures 6
7. Making the flower sepal: The sepal of a flower is what encloses the bud when it is young. As the flower matures and opens, the sepal appears a s a green “backing” to the flower. To make the sepal, cut a ¾” x ¾” rectangle out of Zucchini felt. Using Fig. 7 as a guide, cut the squares into 4 sided sepals. Make one for each flower.

8. Placing sepal on flower: Slide the cut sepal up the stem and glue to the bottom of the flower. See Fig. 8.

Figure 8
Using a programmable cutting machine and SVG file:
Using a programmable cutting machine will greatly increase your productivity. I am including an SVG file to download to use with your machine. When using my machine (I like to refer to it as “my assistant”) I can prep the stems while the machine cuts the petals. What a time saver! I also like to shade the petals while on the sticky backing sheet. See Fig. 9.

Figure 9
Making Poppy buds:
The SVG file includes 4 petals to make poppy buds. To make the buds, place a bead of hot glue along the right side of the first petal. Place the second petal on the first, slightly overlapping. Continue with the next two petals. Close the bud by gluing the 4th petal to the 1st. Slip the “tube” of the bud into the prepared stem and glue the center to the bottom of the bud. Add a sepal. See Figures 10.


Figures 10
Adding Poppy leaves:
Cut a rectangle of Zucchini felt measuring about 1.25” by 3”. Cut small triangular leaves from the rectangle as shown in Figures 11. Glue two or three leaves to the poppy stem.
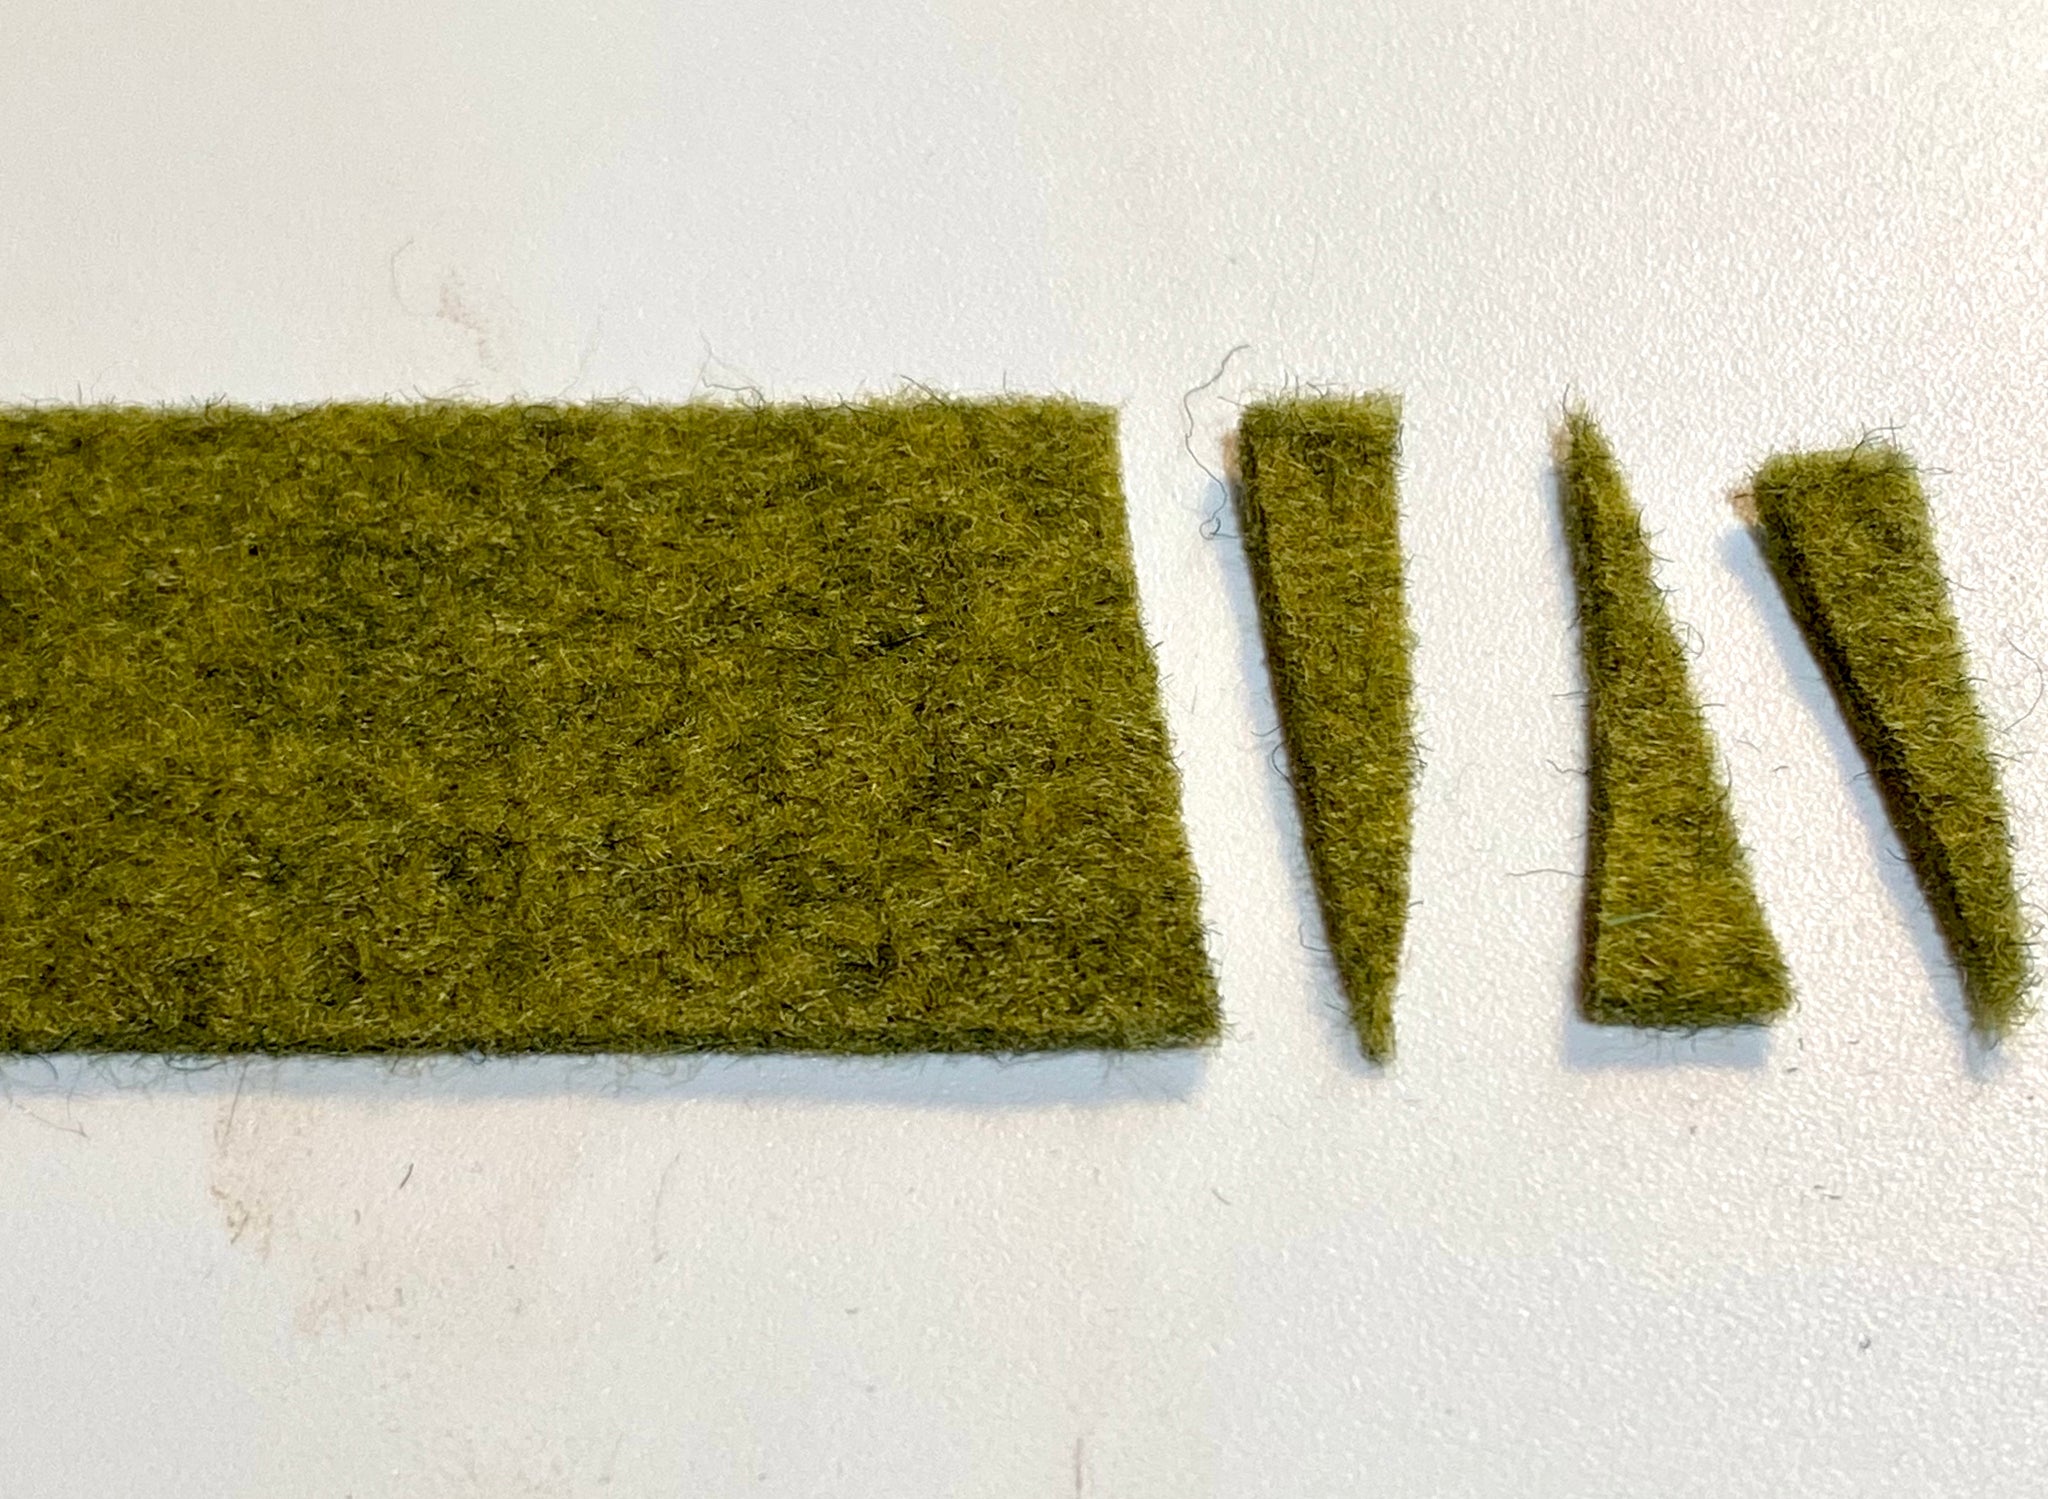

Figures 11
I find making the poppies out of both Tangerine and Golden colored felt from Benzie Design creates a really natural look. Remember to look at photos of the actual flower to get familiar with the details, if you are going for a realistic look. Have fun making these bright, cheerful blooms!


Thanks to Astrid for designing and writing this tutorial! You can follow her on Instagram @treehousefeltflowers or visit her website. Stay tuned for more tutorials from the Benzie Design Maker Team!


