
Do you remember that wonderful childhood feeling of decorating warm sugar cookies, fresh from the oven? Deciding what color frosting would go on each cookie, adding colorful sprinkles, and of course, eating them was always a highlight of the holiday season. Now you can relive that with your favorite children by making these felt Christmas cookies! They’re the perfect addition to any child’s play kitchen. You can use the templates included in this tutorial, but if you have some special cookie cutters you use to make your family’s holiday cookies, you can also trace those and follow the steps below for an added personal touch.
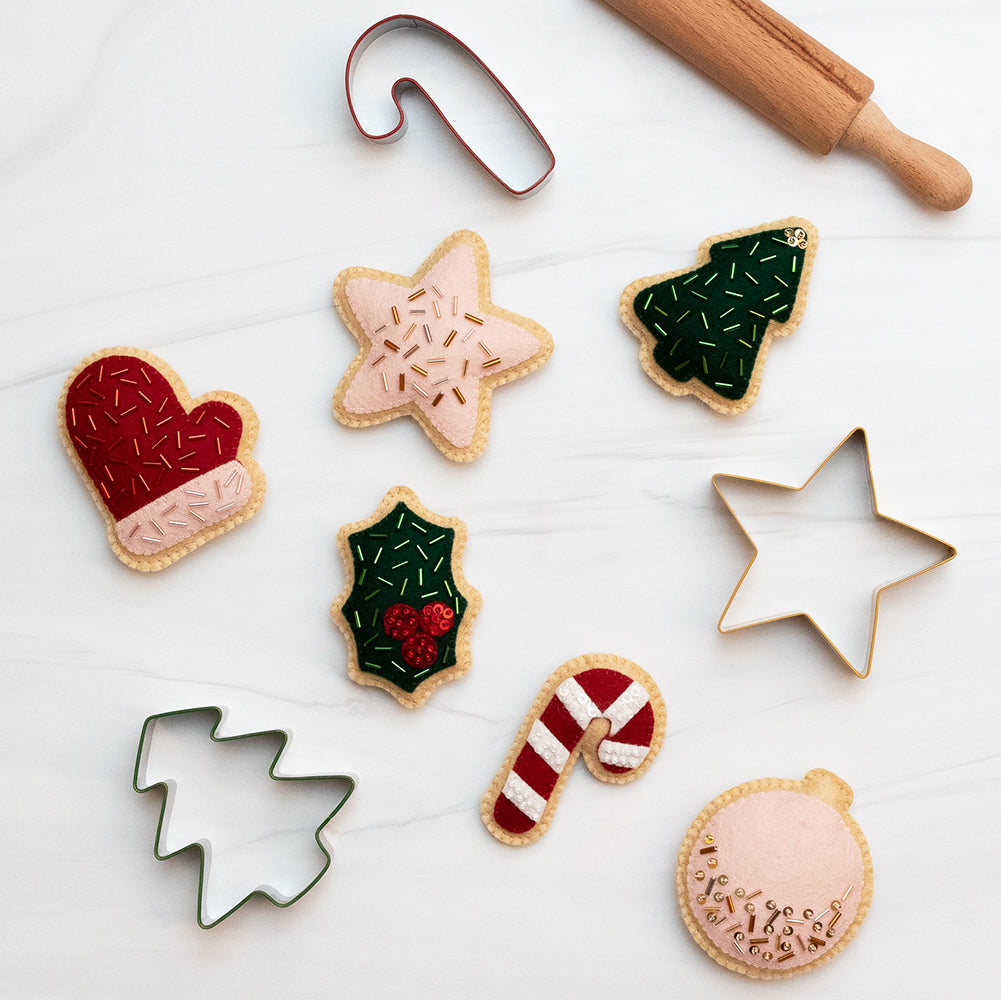
Keep reading to make this charming set of felt Christmas cookies yourself!
Skill Level: Intermediate
Time: Approximately One Hour per cookie
Additional Supplies:
Christmas Cookie Template (click to download)
Freezer Paper - optional
Stuffing Tool - optional
Directions:
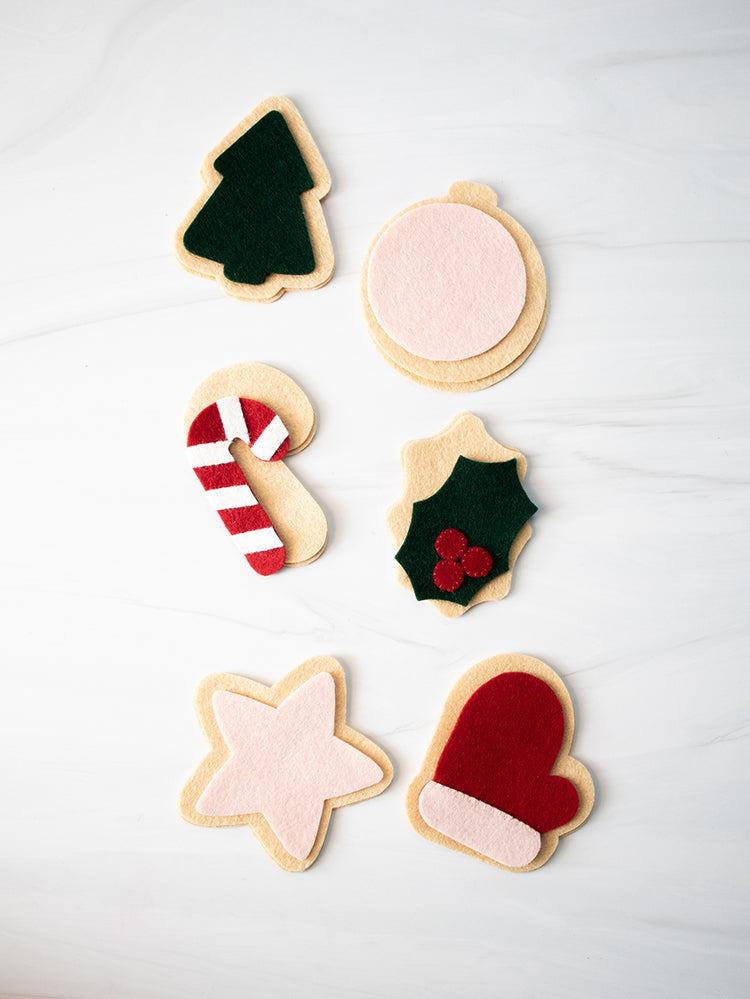
Cut Felt Christmas Cookies Shapes
1. Print the felt Christmas cookie templates on freezer paper. Iron them onto the corresponding felt colors using medium heat. Cut along the template lines.

If you don’t have freezer paper, print the templates on cardstock and use a chalk marker or disappearing ink pen to trace around them.
2. For each cookie, there are two cookie bases and one piece of cookie frosting. For the Candy Cane, Mitten, and Holly, there are also smaller felt details.
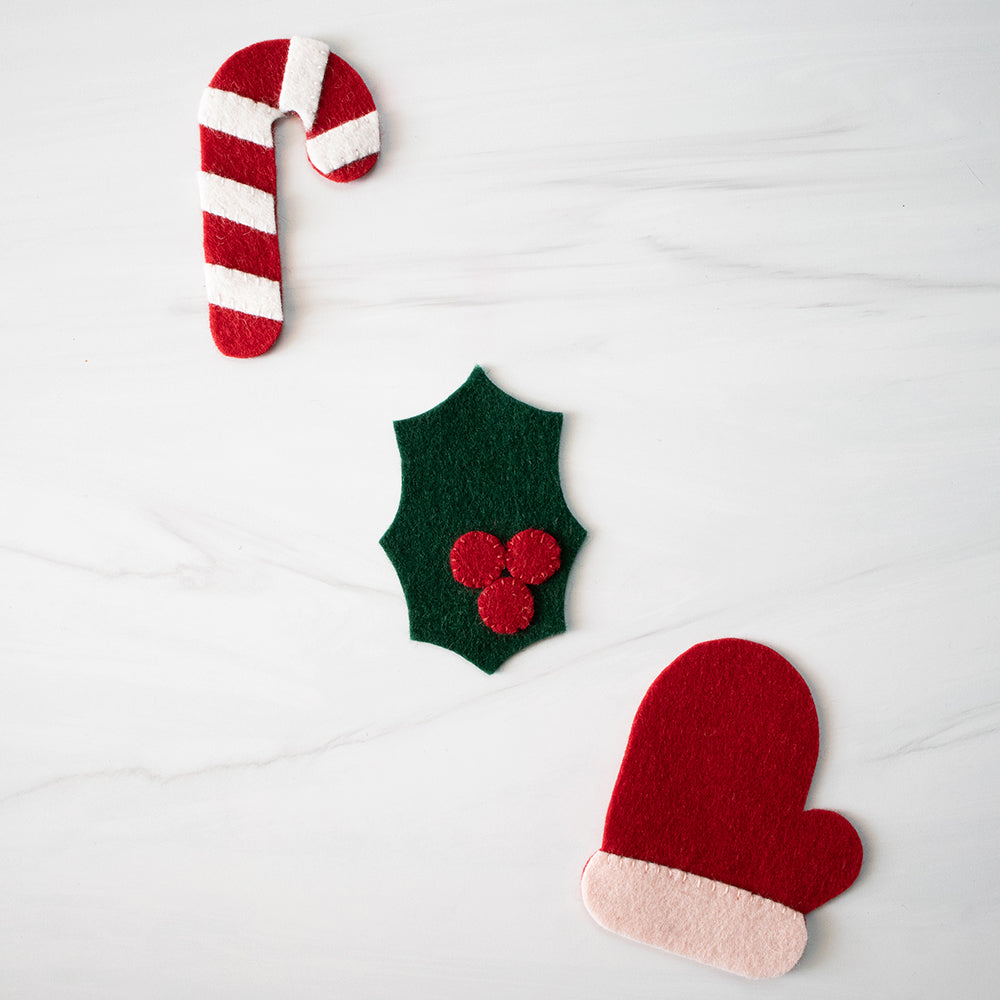
Add Felt Details
3. The Candy Cane, Mitten, and Holly have felt details. Begin by whip stitching those details to the frosting. Stitch them as follows:
Candy Cane - Whip stitch along the top and bottom of each stripe.
Mitten - Whip stitch the top of the mitten cuff. Do not stitch the sides or bottom.
Holly - Whip stitch around each of the three berries.
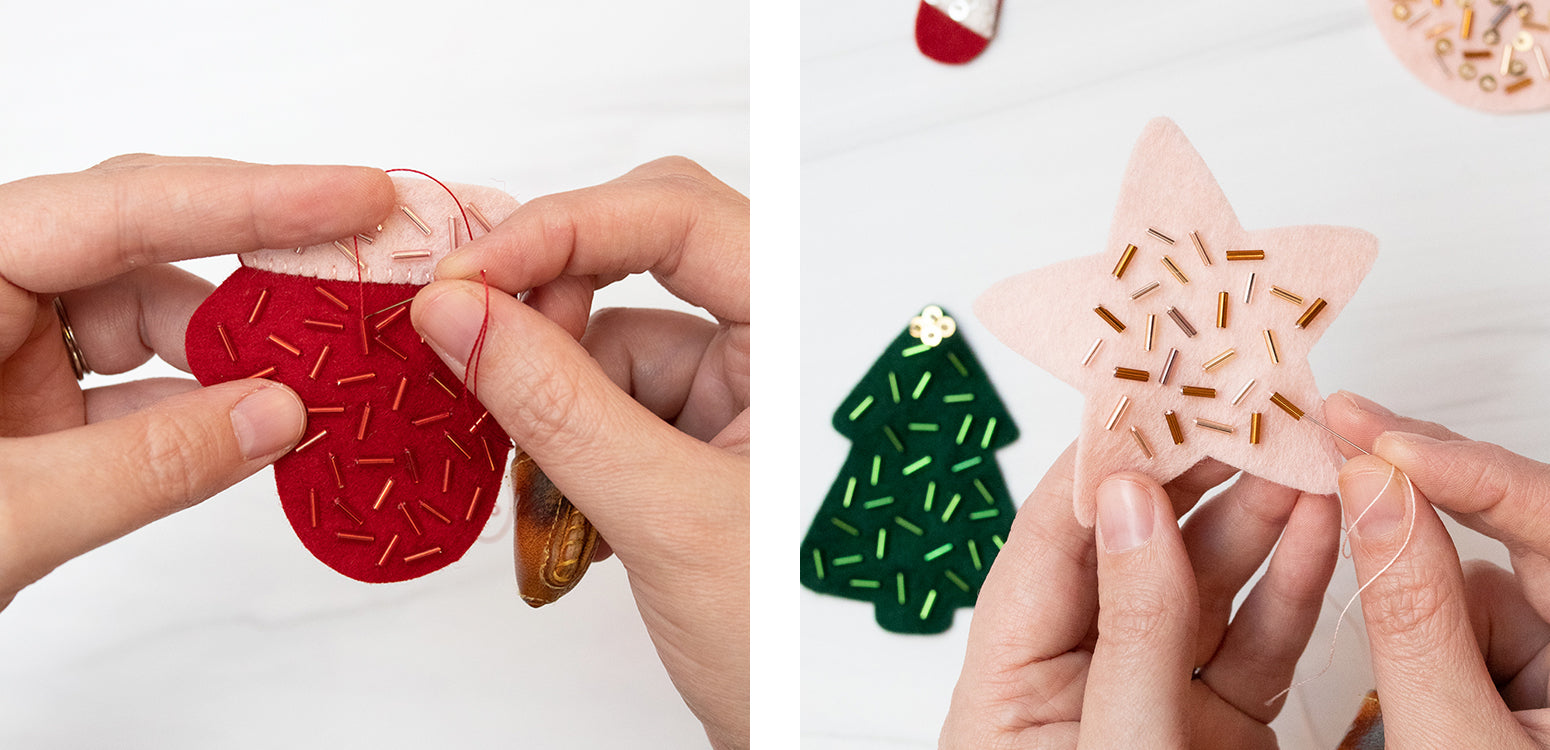
Add Beads and Sequins
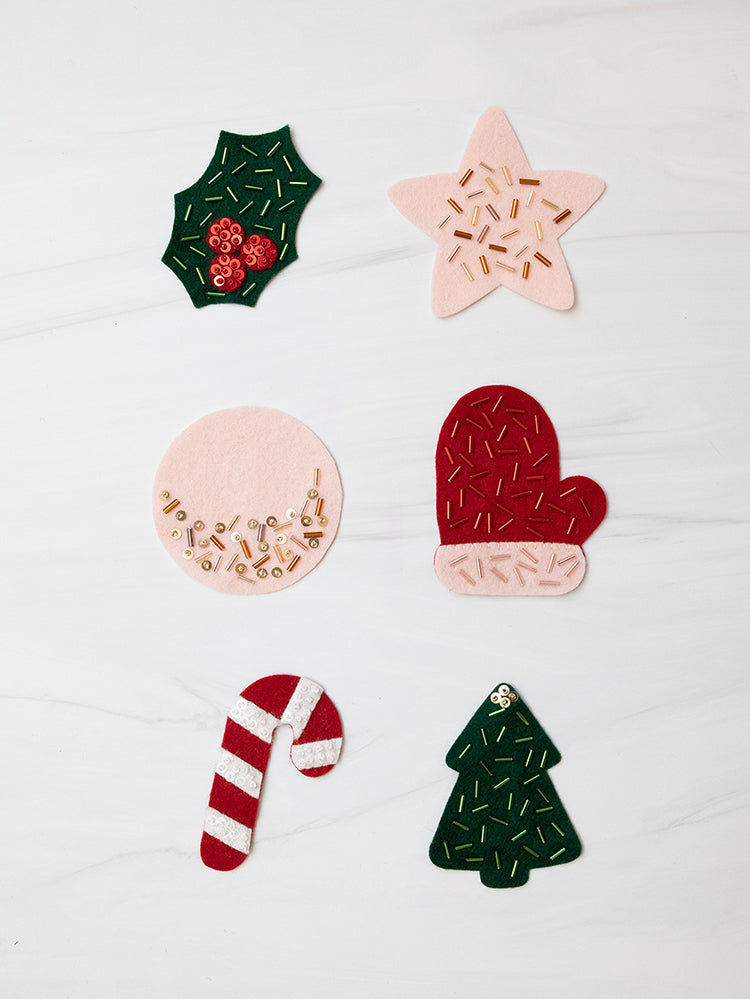
4. The best part of making holiday sugar cookies is decorating them! Sprinkles hold a special kind of magic over children so I couldn’t make felt holiday cookies without sprinkles. Using a beading needle, add a festive mix of bugle beads, seed beads and sequins to decorate the cookies. These can be added in any colors or placement you desire! Remember that sprinkles on sugar cookies are not perfect, so make sure your sprinkles are randomly placed.
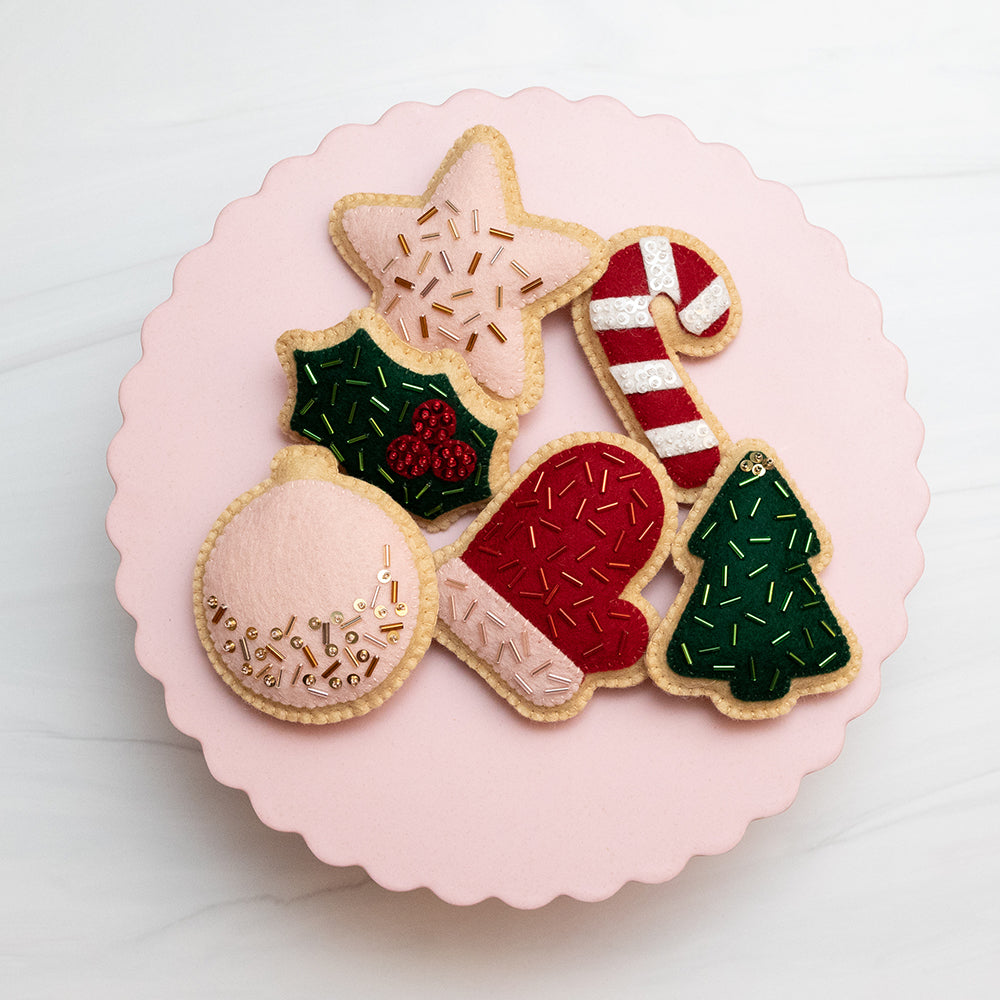
5. Felt Christmas cookies look great without sprinkles if you’d prefer to skip this step. But if you want the full sugar cookie effect, here are the beads and sequins used in this example:
Holly - Green bugle beads, Red metallic sequins, Red beads
Star - Neutral bugle beads
Ornament - Neutral bugle beads, Gold metallic sequins, Gold beads
Mitten - Pink bugle beads, Red bugle beads
Candy Cane - White metallic sequins, White beads
Tree - Green bugle beads, Gold metallic sequins, Gold beads
Sew Felt Frosting to Cookie Tops
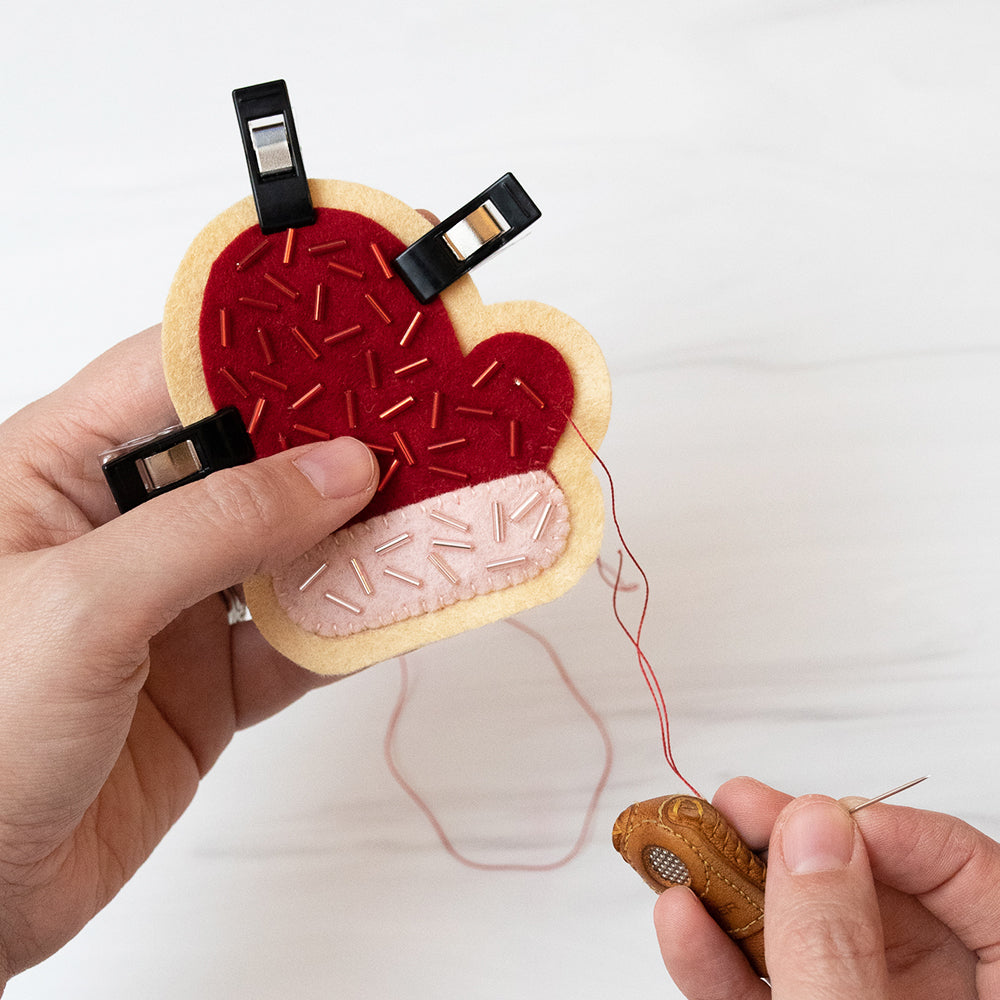
6. Each felt holiday cookie has three main components - frosting, cookie top and cookie bottom. The first step in assembling the cookies is to whip stitch the felt frosting to the cookie top.
7. Using thread that coordinates with the frosting colors, whip stitch around the entire felt frosting piece so it is fully attached to the cookie top. For the Holly, Star, Ornament and Tree, you can use one thread color because the felt colors do not change along the border.
8. For the Mitten, begin by using pink thread to whip stitch the cuff to the cookie top. Knot the pink thread off at the end of the cuff. Use red thread to whip stitch the remainder of the mitten.
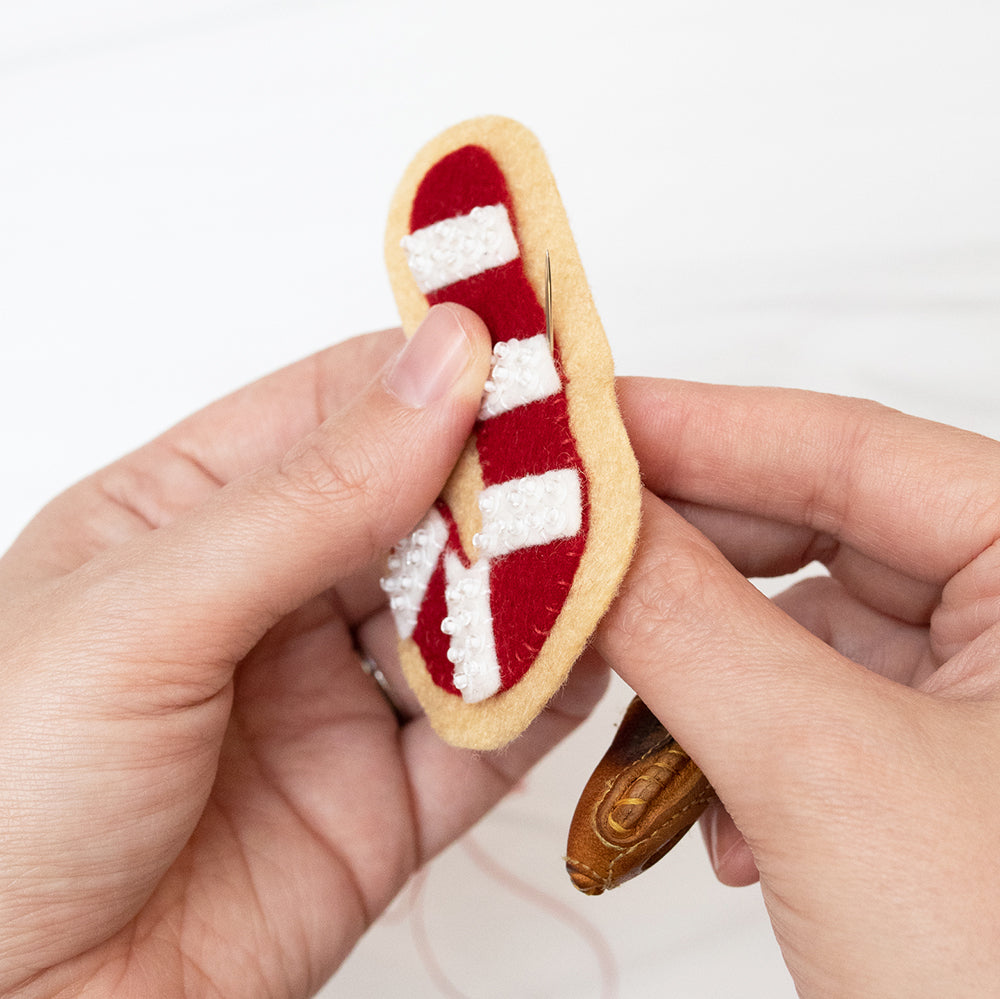
9. For the Candy Cane, use red thread to whip stitch the entire frosting piece onto the cookie top. If you do not want red thread on top of the white stripes, angle the needle so your whip stitch comes up in between the red and white felt, only stitching the lower red layer.
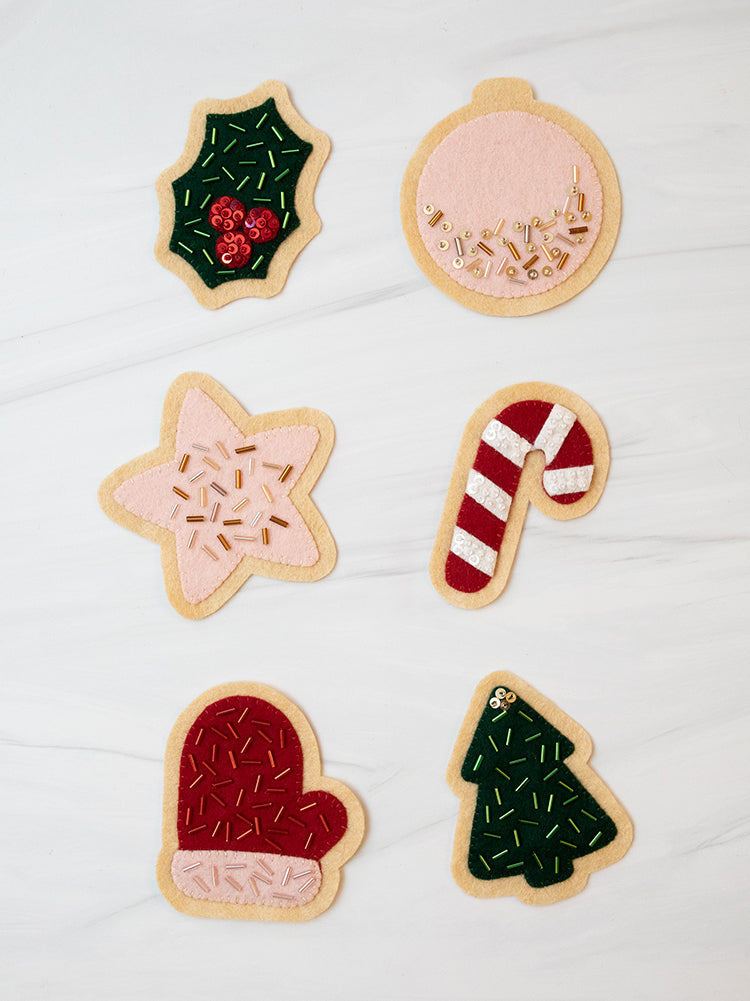
The cookie top pieces should now look decorated as shown below.
Attach Cookie Top and Bottom
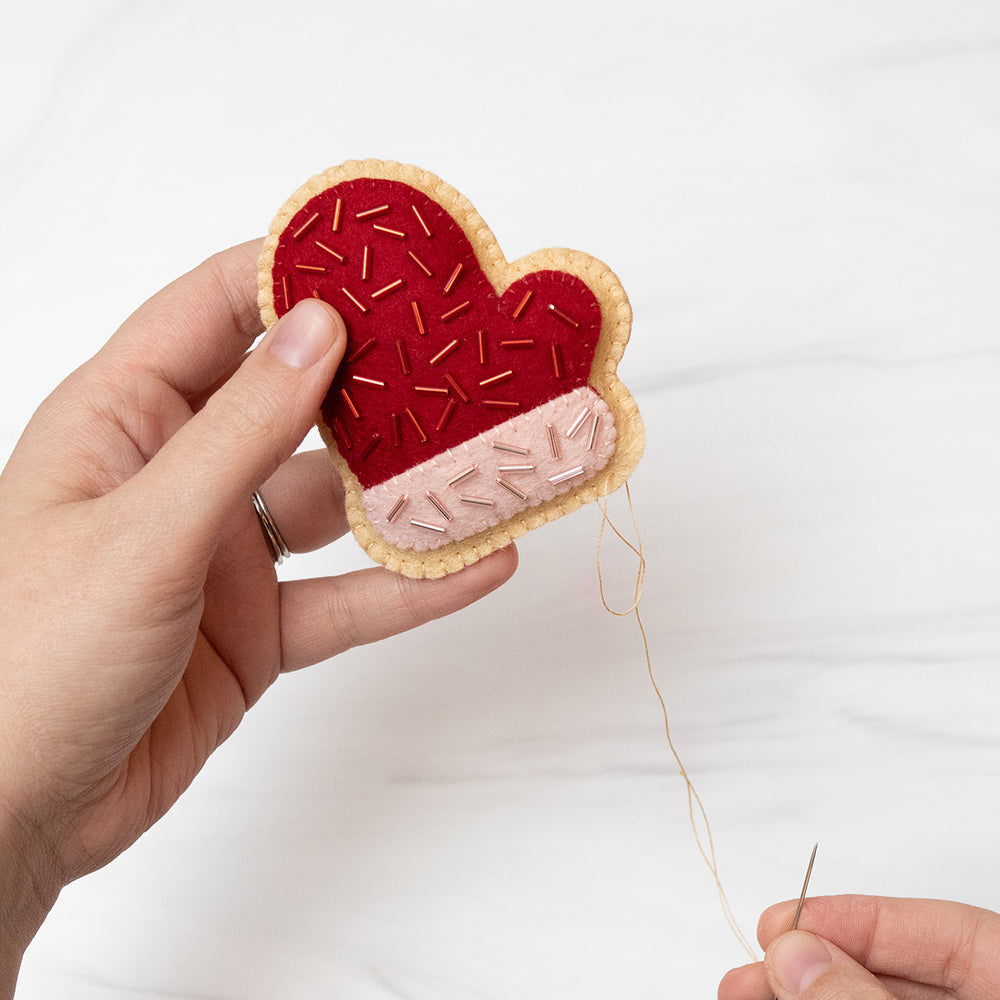
10. Match the decorated cookie top and plain cookie bottom. Pin or clip the pieces in place. Using a blanket stitch, sew around two-thirds of the cookie. Do not tie off the thread yet.

Finishing Cookies
11. Using a stuffing tool or chopstick, add polyfil stuffing. Do not overstuff or cookies will look more like balls than tasty treats.
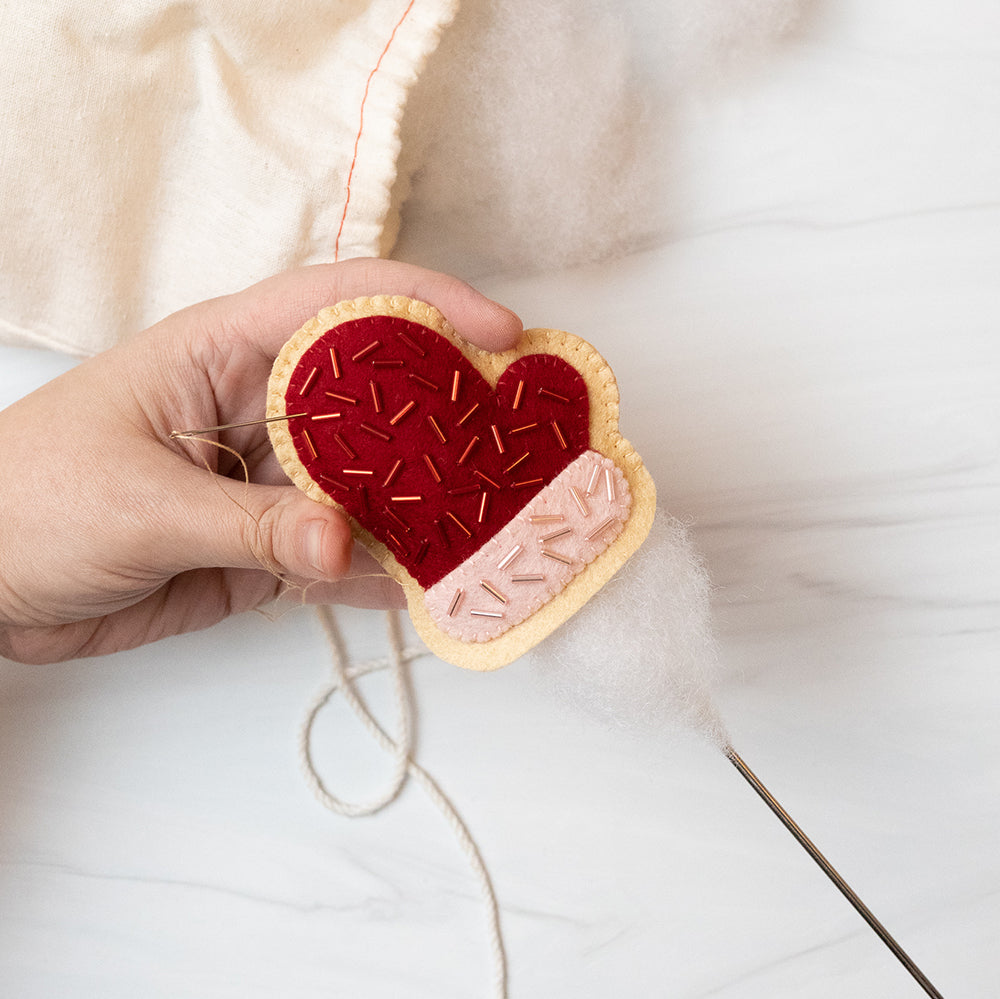
12. Once the cookies are stuffed, continue blanket stitching until you reach the end and knot off the thread.
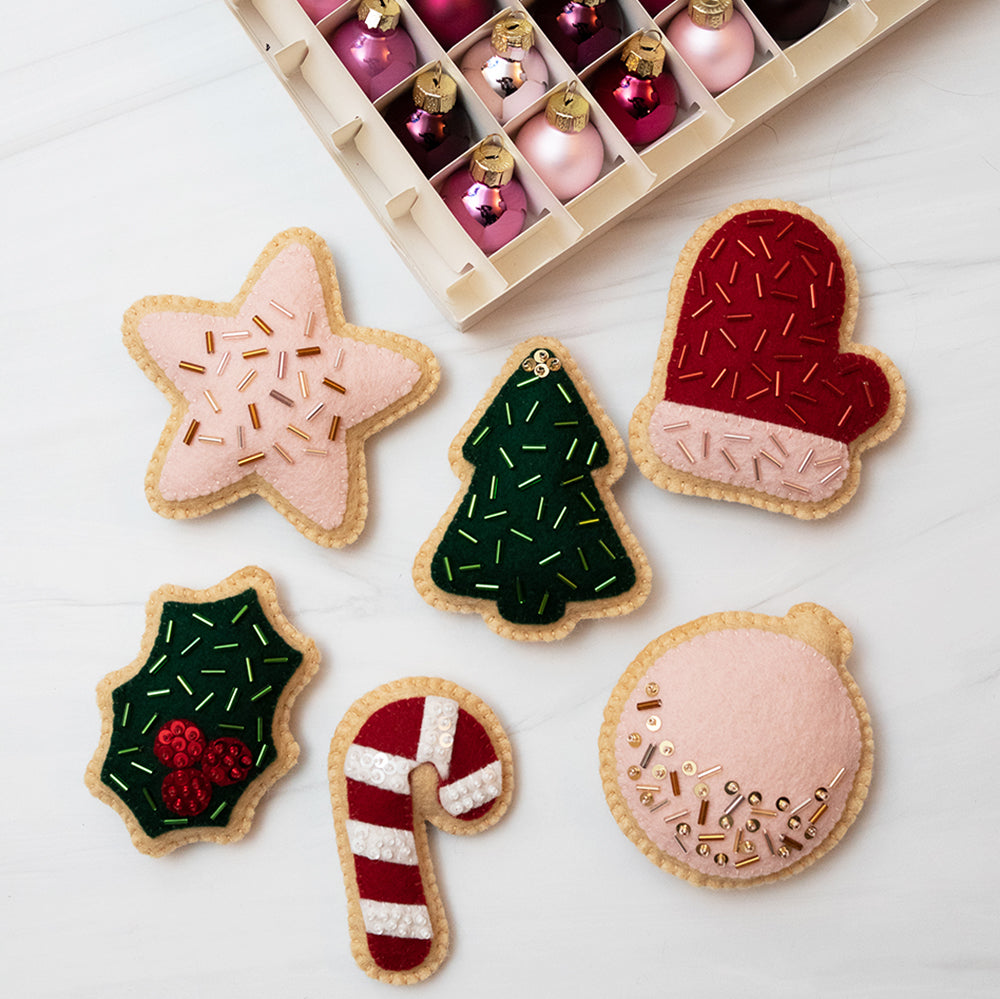
Your cookies are finished and look good enough to eat!
And if you don’t have a special kid in your life to make these cookies for, they also make adorable ornaments. Just add a loop of string and you’re ready to deck your halls with felt cookies!
Thanks to Laura for designing and writing this tutorial! You can follow her on Instagram @sonicstitches or visit her website. Stay tuned for more tutorials!


