
At Benzie we love playful crafts and it is extra fun when they’re really small or REALLY BIG. Today, we’re bringing you oversized felt dominoes! Dominoes is a classic game that can be enjoyed by all ages, in so many ways - just like this giant version. Make a few as kitschy accent pillows or make a whole set for rainy afternoon fun. No bones about it, you’re going to have fun with this project!
Skill Level: Beginner, Intermediate
Time: 1 ½ hours Prep + 2 - 3 hours Making (per domino)
Additional Supplies:
Domino Template (click to download)
Ruler
Sewing Machine – optional
Directions:
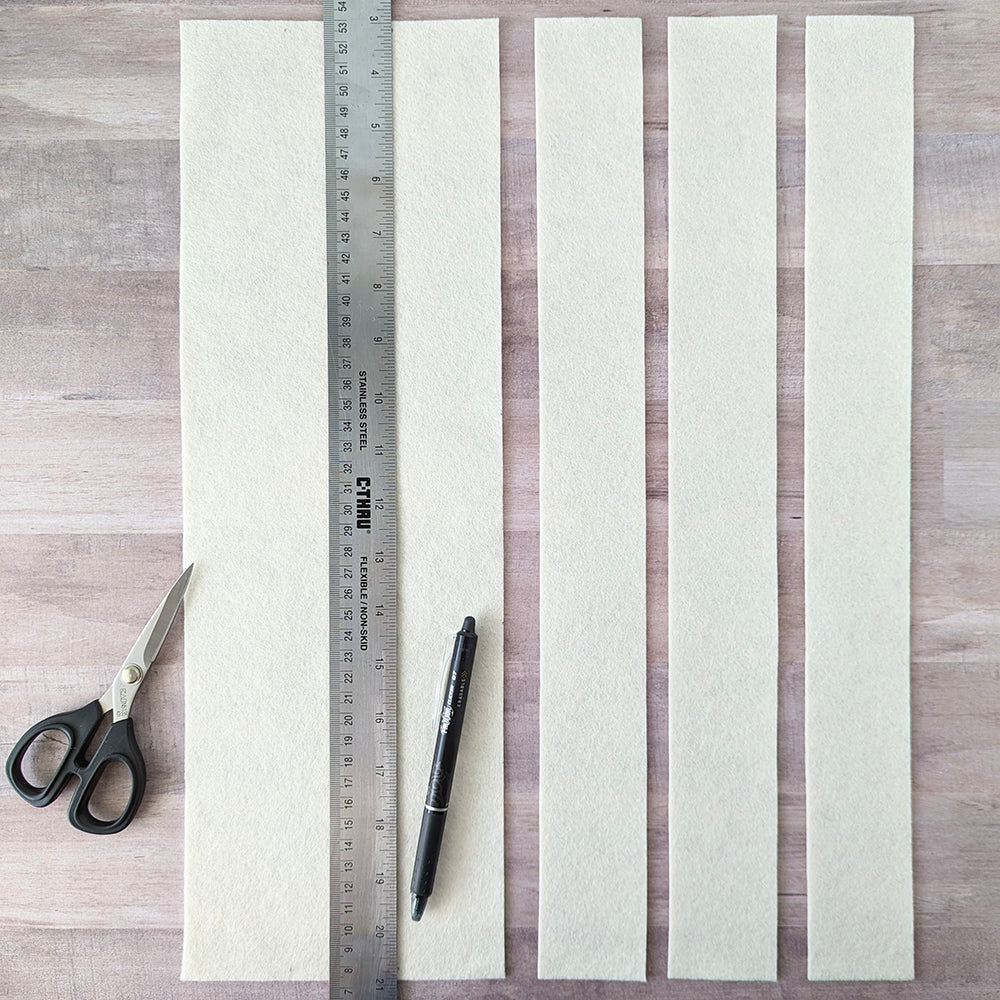
1. Orient Ecru felt horizontally. Measure and cut felt into three equal rectangles measuring 6 x 12”. Repeat with second sheet of Ecru felt.

2. Orient third sheet of Ecru felt vertically and cut into six strips measuring 2 x 18”. Three 12 x 18” sheets of felt will make three large dominoes.
3. Print Domino Template above onto cardstock. Cut out DOT and DIVIDE and set top template aside.
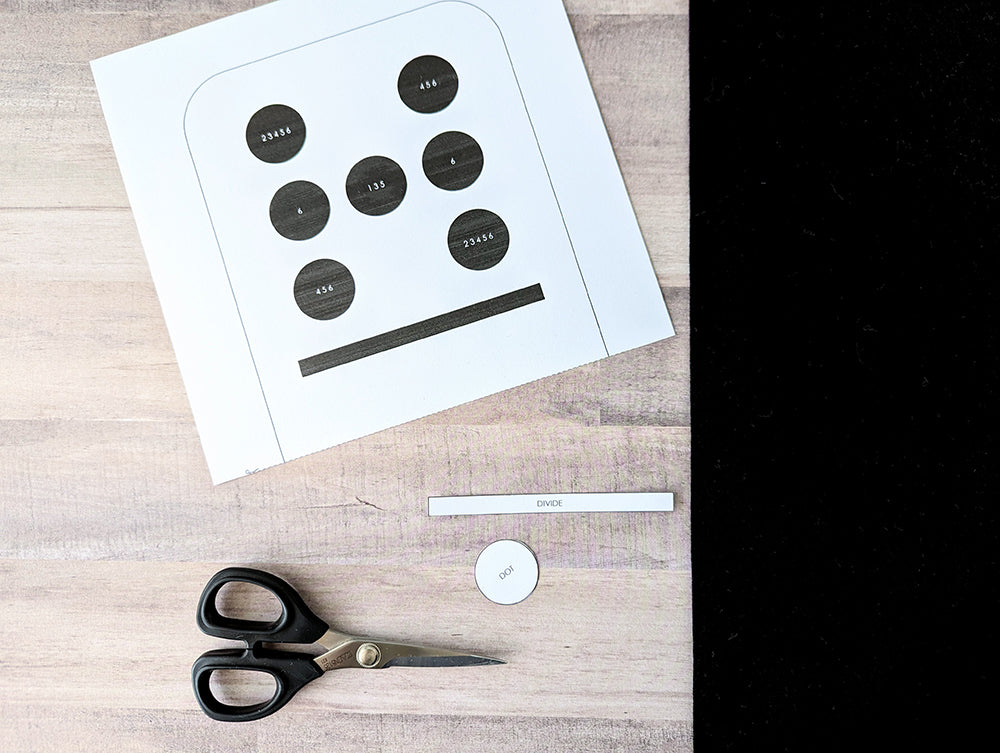
4. Cut three DIVIDE pieces from Black felt. Count DOT pieces needed and cut from Black felt. The number of DOT pieces needed is dependent on which dominoes you are making. Domino combinations are shown below.

5. Tape Domino Template to light table or window. Place one sheet of 6 x 12” Ecru felt over it, lining up top and side edges. Use template and Frixion pen to mark rounded corners, divide and dot placement on domino front. The dots on the template are numbered to show you which to use for each domino end.

Rotate felt (not template) 180° and repeat for other end of domino. Be sure top and side edges and divide are aligned.
6. Repeat for two remaining dominos fronts. Domino backs will need to be marked with rounded corners, but are otherwise blank.
7. Cut rounded corners from all six domino body pieces.

8. Add glue to the inner part of markings on domino fronts. Place Black felt DOTS and DIVIDE in proper positions. Use coordinating thread to whipstitch around perimeters.

9. Overlap two 2 x 8” Ecru strips by ½” together at short end. This strip will be thickness of domino. The sewing steps can be completed with a sewing machine or stitched by hand.

10. Place domino front right side up. Beginning at bottom center of domino, align long edge of sewn felt strip to edge of domino. Pin in place around entire perimeter. Do not cut excess felt strip as felt may stretch or shift slightly. This is the most difficult part of the project. Take your time and use plenty of pins to hold everything in place.

11. Sew with machine or by hand with a ¼” seam allowance. Ends of felt strip will overlap each other.

12. Pin domino back to felt strip in same manner and sew around edge, stopping 2-3” from fully closing. Take your time stitching around the corners!

13. Make small cuts in the seam allowance - without cutting thread - along rounded corners.

14. Turn domino right side out and stuff firmly with Polyfil. Take your time with this step! The end result should be firm and even. The best way to achieve this is by using smaller amounts of stuffing and working to keep it smooth as you go.

15. Stitch remaining length closed by hand.

16. Place a line of glue under overlapping edge to secure and you're finished!

There are so many ways to make these dominos special! If you're making just a few, use the dots to represent lucky numbers or an important date. Of course, a full set would be a fabulous gift for someone you love. Did you know Father's Day is just a few weeks away? *wink*


Thanks to Camille for designing and writing this tutorial. You can follow her on Instagram @notsomodernmillie or visit her website. Stay tuned for upcoming projects!


