Share

A holiday craft tutorial that is bold, playful and PINK - it must be from Maker Team member Heather of @heathdon. This felt candy bucket is charming enough to adorn your decorated table or to accessorize a festive outfit. It's time to have some fun with Heather and Halloween!
Holiday enthusiast Heather Donohue here. Normally I’m making crafts from felt, and this project is no exception. I’ve merged my love for blow-mold jack-o-lanterns with felt for this quick, decorative project you’ll love to display year after year!
Skill Level: Beginner
Time: 3 hours

Supplies:
Three 9 x 12" sheets of Flamingo Wool Blend Felt
One 9 x 12" sheet of Black Wool Blend Felt
Embroidery Thread
Embroidery Needle
Chenille Stems in Black
Scissors
Straight Pins
Hot Glue Gun
Jack-o-Lantern Candy Bucket Template (click to download)
Directions:
1. Print out Jack-o-Lantern Template above. Gather supplies.

2. Pin paper templates to coordinating felt color.

3. From Flamingo wool blend felt, cut out seven pieces for the body and one for the bottom. Depending on your stitching technique, it may require eight pieces for the body.

Select eye and mouth design. Cut out two eyes and one mouth from Black wool blend felt.

For the smile with teeth, cut out crescent shape and sides of teeth. Remove template and cut along bottom of teeth.

4. Thread the needle. Align one side piece with the edge of the bottom and whip stitch together. Knot but do not cut the thread. Tie all knots on the outside as you work, because the whole piece will be turned right-side out when finished.

5. Next, hold a second side piece in place and whipstitch the side pieces together. Cut thread. Sew bottom of side piece to bottom piece.

6. Repeat this pattern of adding a side piece and stitching it to the existing side and bottom until the pumpkin shape is complete.

7. Carefully turn your pumpkin right-side out. Set aside.

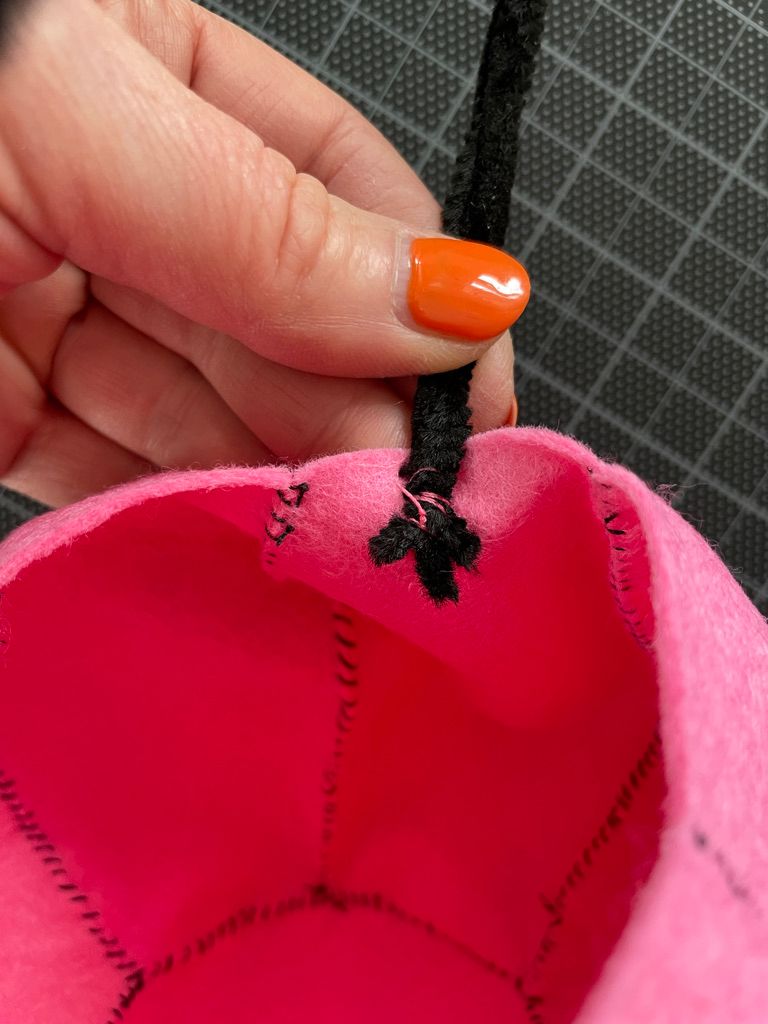
8. Align three black chenille stems and twist them together, one inch from the end. Braid the remaining length, then twist one inch from the other end. Bend into an arch to form the handle.

9. Hold one end of the handle inside the pumpkin, about an inch down. Use thread to tack it in place with about five stitches. Repeat at the other end of the handle.
10. Place the eyes and mouth on the pumpkin. Once you like the placement, use a glue gun to attach each piece. If you’re using the smiling mouth, I recommend gluing the center in place, waiting a few seconds, then gluing the sides down one at a time.

Happy Halloween and happy crafting!

Thanks to Heather for designing and writing this tutorial! You can follow her on Instagram @heathdon or visit her website. Stay tuned for more tutorials from Heather and the Benzie Design Maker Team!


