Share

Maker Team member Jessa of @sebastian.design.dolls is drawing on her family's Polynesian heritage to bring you this beautiful pillow tutorial. The technique is simple and the result is stunning! This is a project for your summer bucket list!
Just in time for summer, I have the perfect project to bring a little aloha into your home! The applique on these pillows is reminiscent of a traditional Hawaiian quilt. Hawaiian quilts have a distinct, symmetrical style and are truly works of art. Traditionally, they are all cut and sewn by hand, requiring hundreds of hours to create. Luckily, this project can be done in an afternoon!
One of the things I love most about this project is that you can customize it to match your décor, so the color options are limitless. I like using both traditional bright colors as well as modern neutrals. I have included the shades I used, but there is a rainbow of possibility. Additionally, the applique can be cut either by hand or with a Cricut machine.
Skill Level: Beginner
Time: 2-3 hours

Supplies:
One 12x18" sheet Wool Blend Felt (Swan and Black shown)
Embroidery Floss in coordinating colors
Pom Pom Maker, Large
Tapestry Wool in coordinating colors
Disappearing Ink Pen
Scissors
Needle
Pins
Pillow Cover (18x18" shown)
Pillow Form (18x18" shown)
Quilt Applique Pattern or Cricut SVG File
Directions:
1. If cutting the applique by hand, print out the PDF pattern above and carefully cut it out.

2. Place the template on felt and trace it with a disappearing ink pen. Cut out the felt shape.

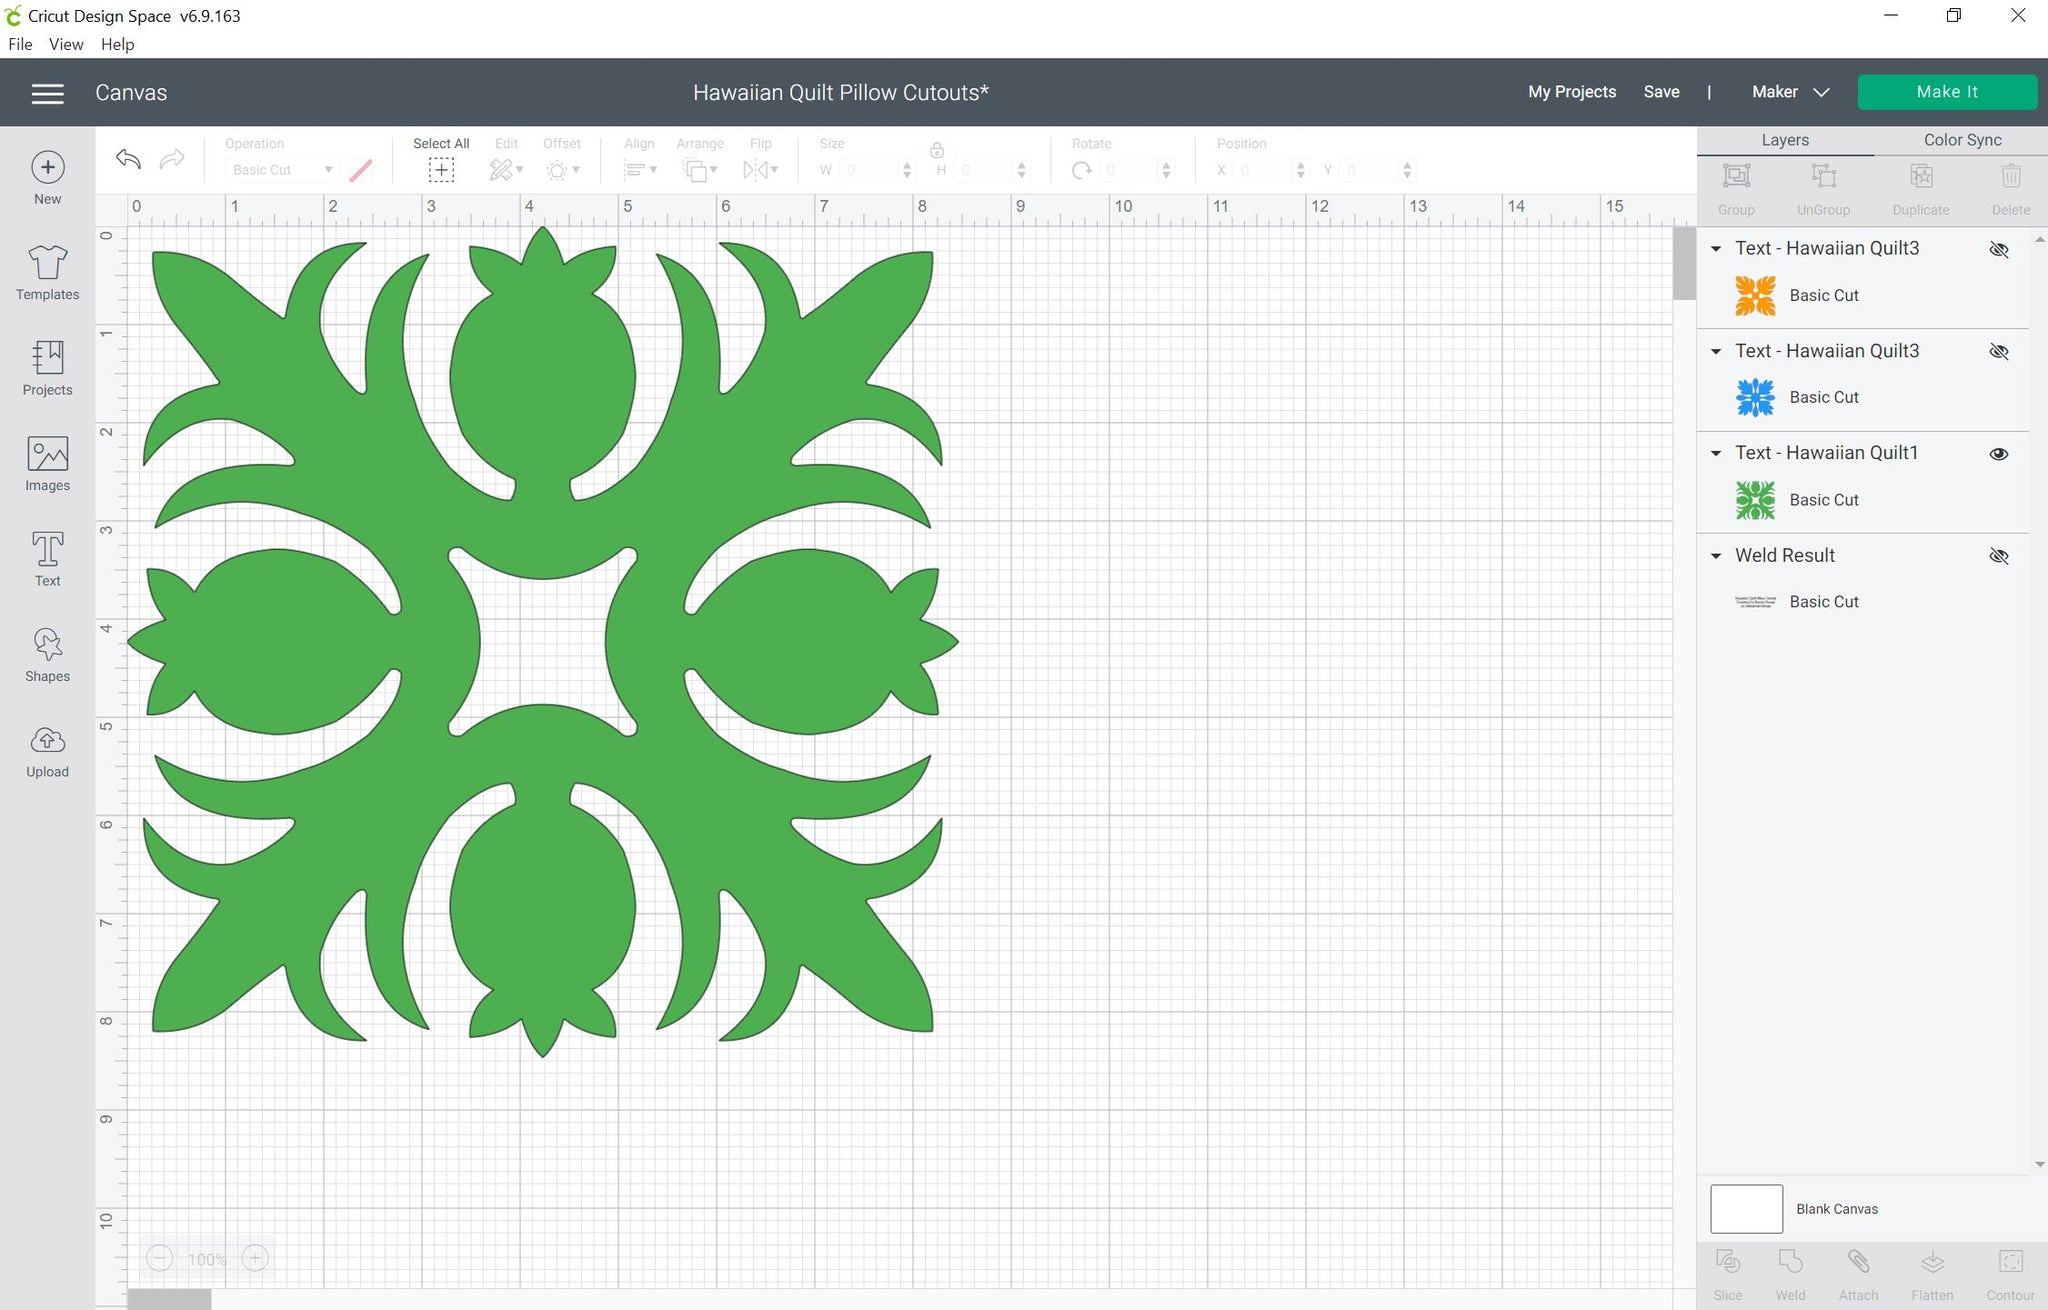
3. If cutting the applique with a Cricut, open the file and resize the template to your liking. You will be able to go as large as 11.5” square if you wish, depending upon the size of your felt. Hide everything you don’t want to cut by clicking the “eye” icon by each item on the right side.
NOTE: Make sure your Cricut design software is downloaded and updated. You will be prompted to do so, if necessary.


4. Place the felt on the mat. Select “felt” as your material and use the rotary blade. Depending on how old my blade is, I select either “normal” or “more” pressure.

5. Load mat and cut.

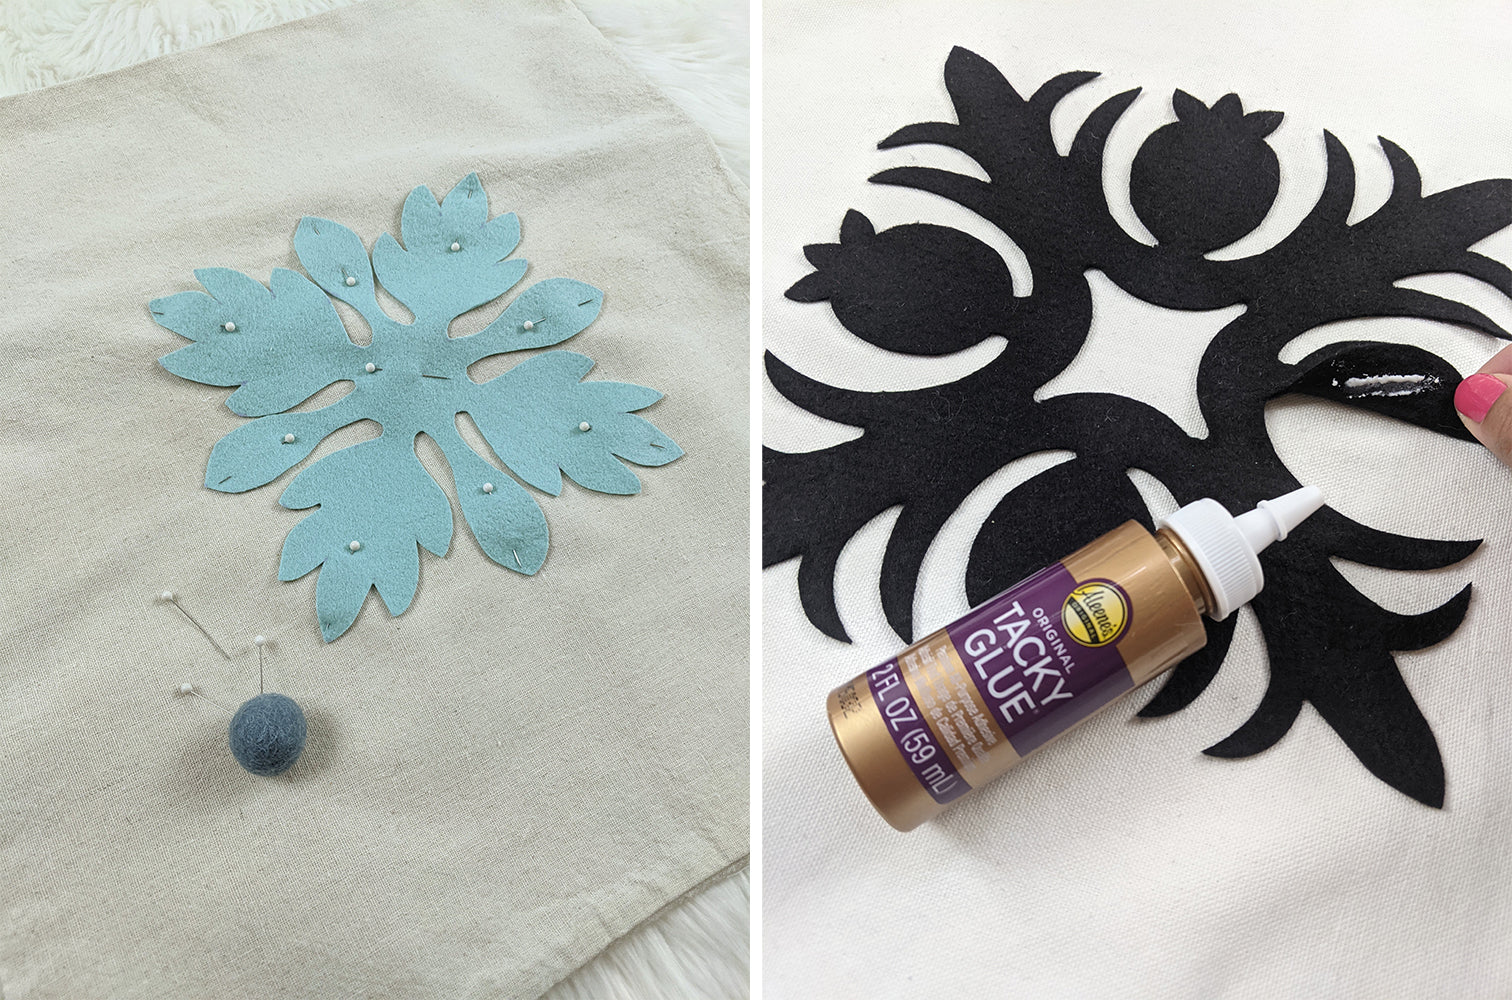
6. After the applique is cut, pin it to the middle of the pillowcase. You can measure to be exactly precise or fold it into fourths to find the center.
Tip: If your design is more intricate and is slipping, you can use a tiny amount of Tacky Glue to hold it in place in lieu of pins.

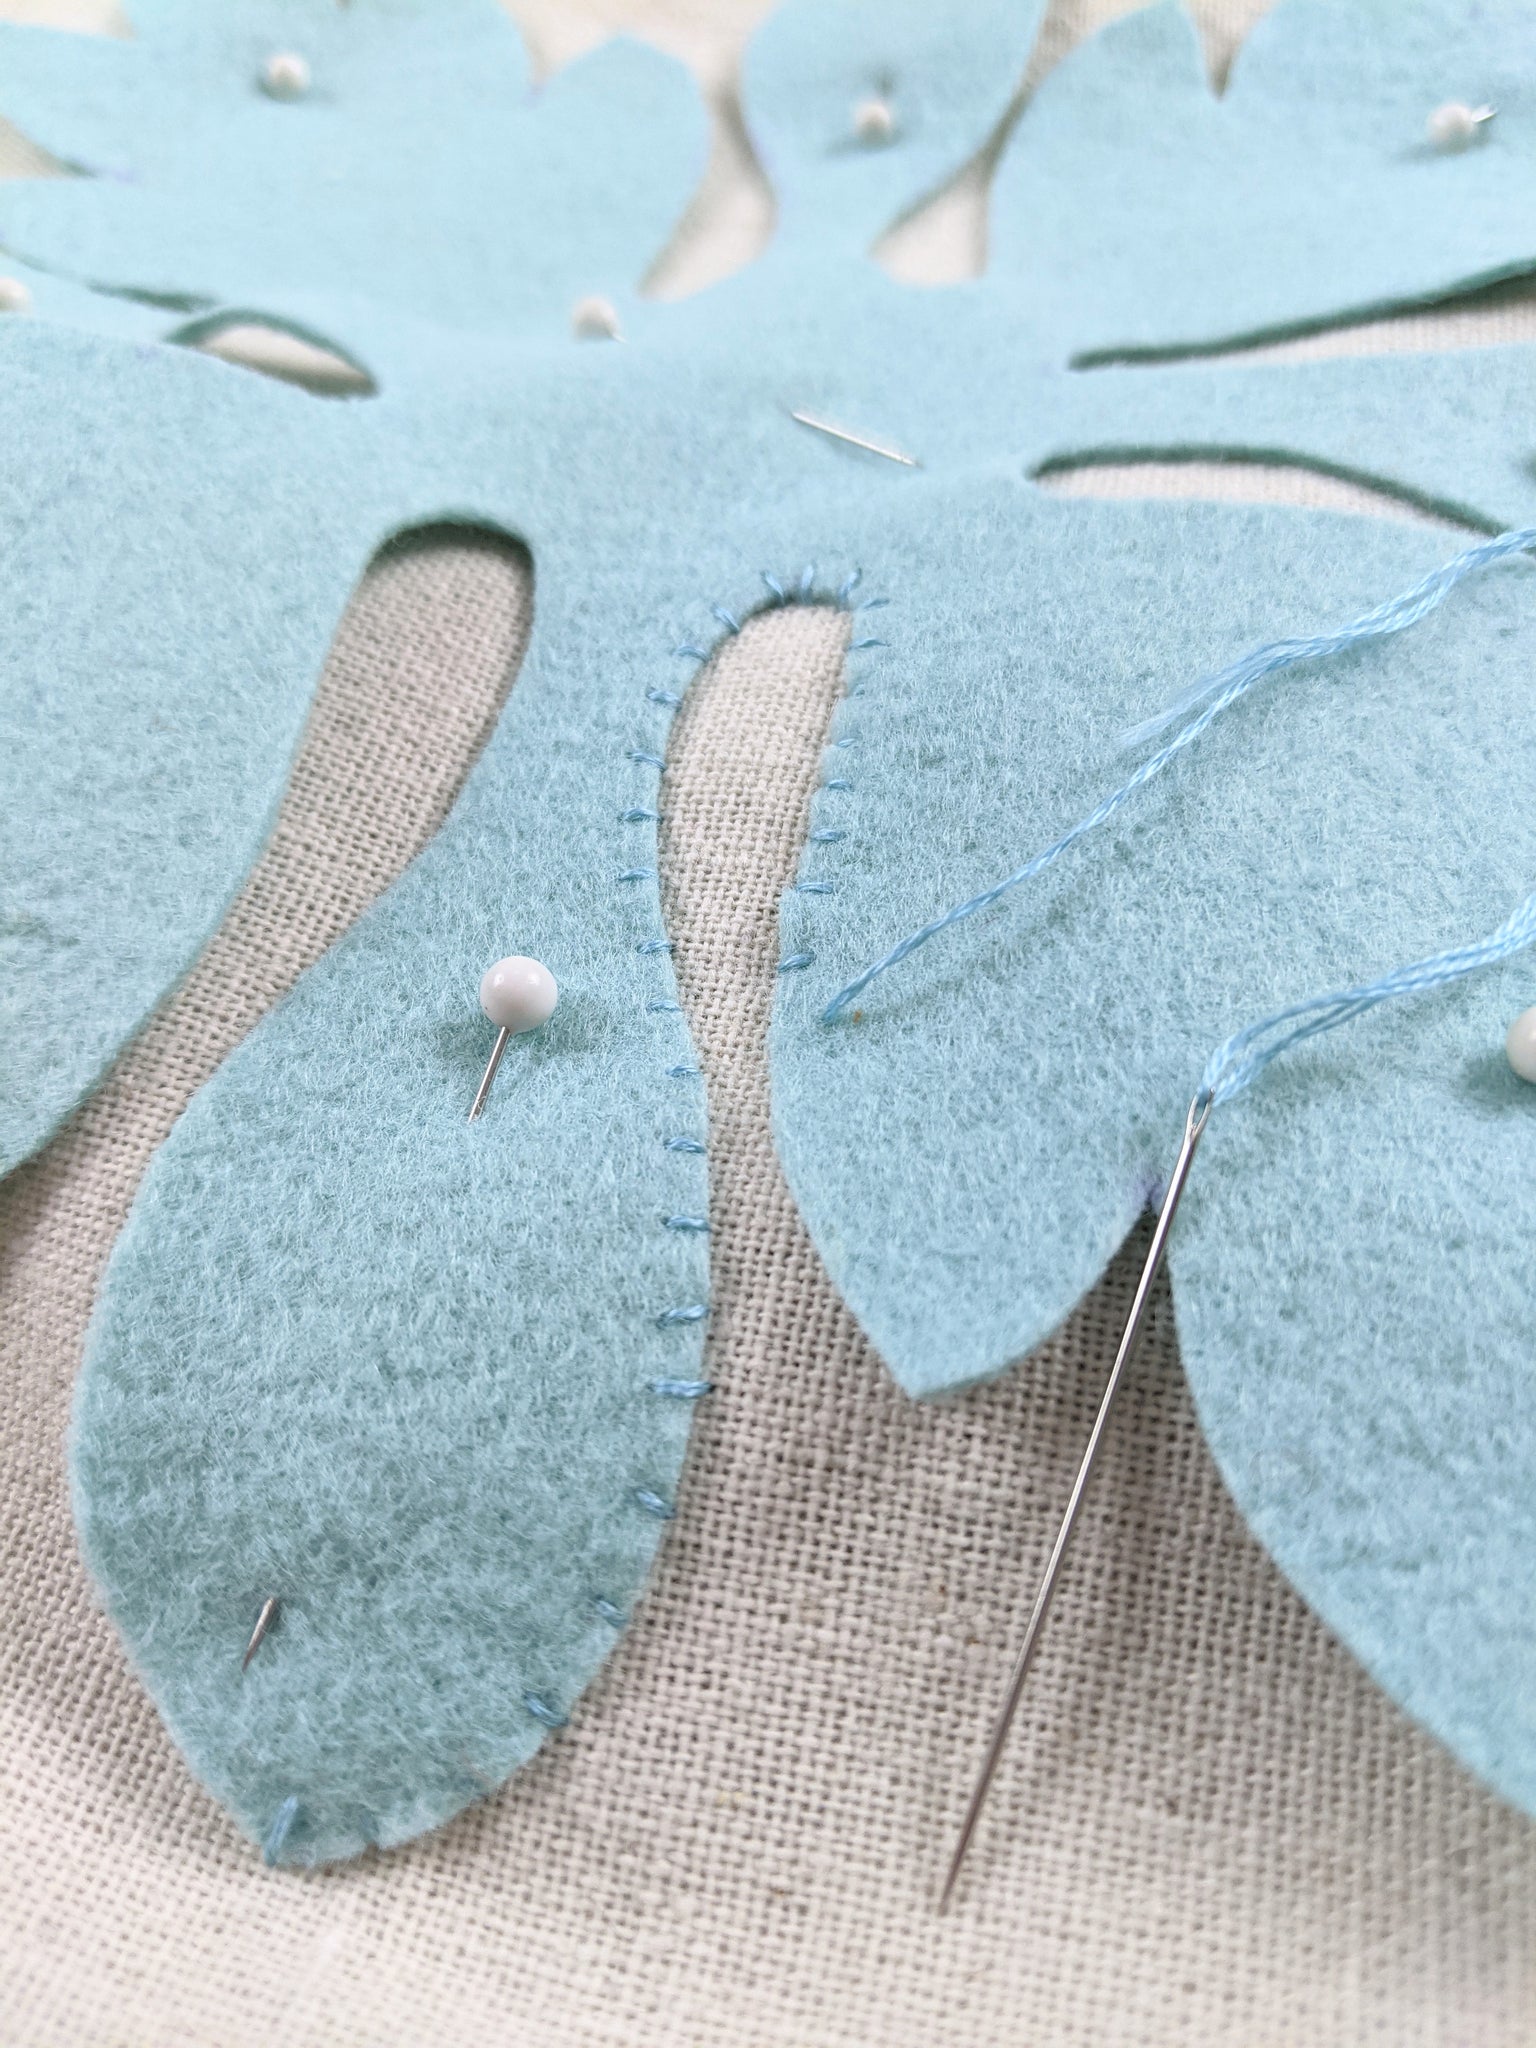
7. Now it’s time to kick back, turn on some soothing Hawaiian jams, and sew the felt cutout to the pillowcase. I use a simple whipstitch with two strands of coordinating floss. Use small, consistent stitches that are evenly spaced. Come up not too far from the edge of the felt and back down onto the pillowcase itself as close to the felt as possible so no thread shows on the pillowcase fabric.

Look at you! You did it!

8. Using the pom pom maker, create four 3-3/8” poms. When making pom poms, I like to use multiple colors and textures so that each one has lots of personality. Using smaller yarns works well with the pom pom maker.

9. Once the poms are finished, double thread a needle, come up through the inside corner of the pillowcase, and straight through the middle of your pom. Go back down through the pom pom and pillowcase again. Repeat this 7 or 8 times, or until it feels secure. Repeat with all four corners.

You’re pau! (All finished!) Look at that cute little thing you’ve just made. I hope this project was one that not only gave you a beautiful pillow, but also granted you joy during the process of creation.

Thanks to Jessa for designing and writing this tutorial! You can follow her on Instagram @sebastian.design.dolls or visit her website. Stay tuned for more Benzie Design Maker Team tutorials from Jessa and the rest of the team!