
We are living in a golden age where some of us were masters of mix tapes and others are just discovering their magic! Whether you're an old school mixer or new to the party, there's something so special about a present made especially for you. These felt Mix Tapes are just that - completely customizable to the tastes of the intented. Do you like your colors and music loud like our Pop Rocks felt palette or are you more of an easy listener with Botanical Blends? Since Valentine's Day is right around the corner, these are love songs in Fairy Ring. xo
Skill Level: Intermediate
Time: 6+ hours
Additional Supplies:
Mix Tape Pattern (click to download)
Ruler
Stitchable Alphabet Die - optional
Sewing Maching - optional
Directions:
Felt Mix Tape
1. Print Mix Tape Pattern above and cut out pattern pieces. Trace pieces onto corresponding felt colors and cut.
This example uses the Fairy Ring felt palette and coordinating thread. However, this tape should feel original - like you - so felt colors A, B, C and D can all be switched to the colors of your choice.

Cut the pieces from Black felt along the short end of one sheet, so you have enough for the pillow at the end.
2. Glue Cassette Front to Cassette Back. Keep line of glue inside of perimeter, since this piece will have whipstitching along edges.

3. Place Top, Middle and Bottom Stripes and Reel Background within Cassette Front opening. Make sure everything fits properly and trim if necessary. Glue into place.

4. Flip over Cassette Center and glue Tape Reels on each side of center opening. Flip back over and glue over the Reel Background. Outer edges of the Backgound should be completely covered.

5. Center and glue Label over the Top Stripe. Glue Cassette Base centered along the bottom edge of Cassette Front.

6. Glue one Outer Screw to the bottom left corner of Cassette Front. Glue two Inner Screws to bottom right corner of Cassette Base. (Use picture to reference placement.) Glue remaining screws to right side of cassette in a mirror image.

Embroidery Embellishments - Refer to pictures for stitch placement
7. Once glue is dry, use thread corresponding to Felt A to whipstitch around Cassette Center and sides and top of Cassette Base.

8. Use a ruler and Frixion pen to draw two lines along lengths of Middle and Bottom Stripes. Back stitch along lines with matching thread. Remove any markings with a hair dryer.

9. Draw another line above bottom quarter of Label. Use Oyster thread to stitch a reverse chain stitch along line. Remove any markings when finished.

10. Use Oyster thread to stitch eight lines radiating inward from circular openings in Cassette Center.

11. Use Black thread to stitch over Inner and Outer Screws. For the Outer Screws, bring the thread up through the middle and back down on the outside edge of the screw. Repeat eight times to form a star. For the Inner Screws, bring the thread up through the middle and back down on the outside edge of the screw. Repeat four times to form a plus sign.

Your Mix Tape is finished!

Try making another with alternating songs, er, colors. To turn your custom cassette into a Valentine, continue reading!

Mix Tape Valentine
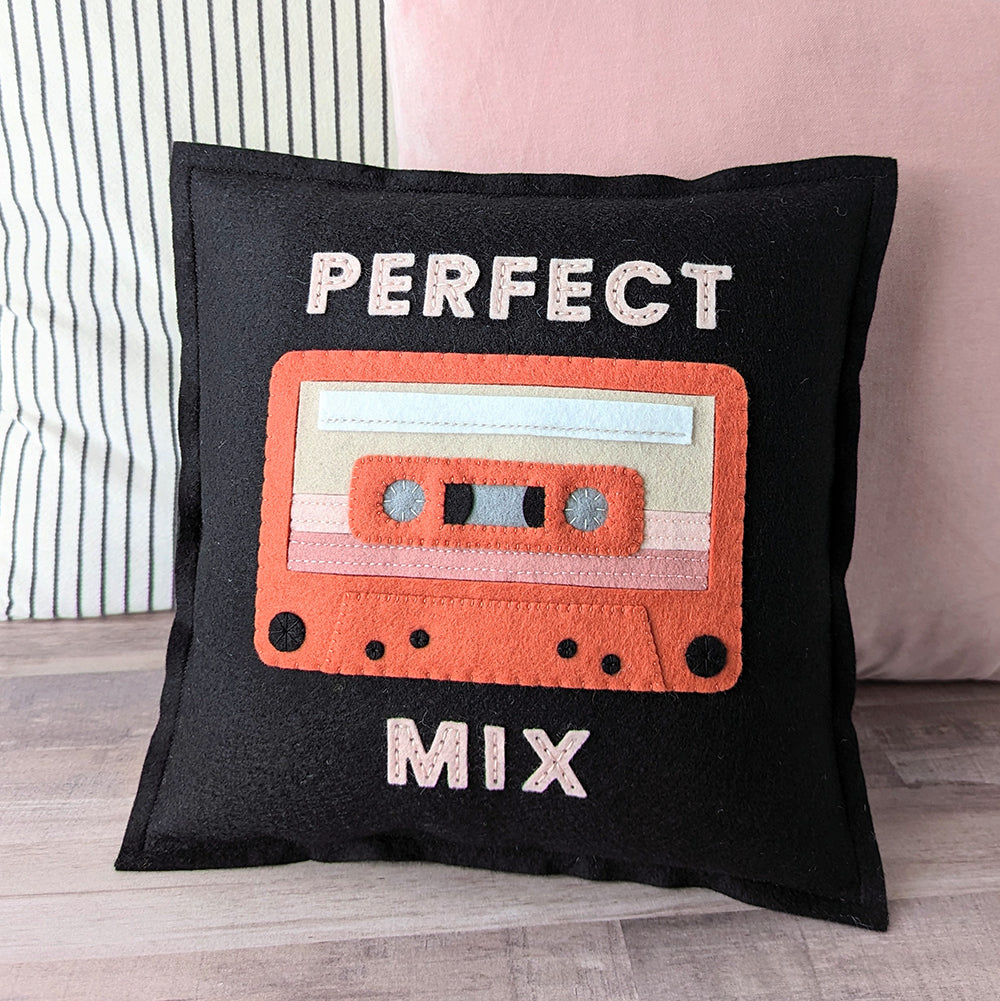
12. To make the pillow, cut two 12 x 18" sheets of Black wool felt into 12 x 12" squares. Set one square aside.

13. Glue cassette to the center of felt square. Whip stitch around cassette perimeter with coordinating thread.

14. Add a sweet saying with text cut from felt or embroidered with thread.For this example, we cut letters from Felt C using our Stitchable Alphabet Die. The letters were stitched on with coordinating thread.

15. Pin or clip second felt square to back of first. Stitch around outside edge with a 5/8" border, leaving a 3-4" opening for stuffing. If you have access to a sewing machine, this is the quickest way, but hand stitching will also work.

16. Stuff pillow and finish sewing closed.
As an alternative to a pillow, the felt mix tape can be added to a pouch or bag! Add glue to the back of the cassette and place on item. Whipstitch around perimeter with matching thread.

We hope you enjoy making this Valentine... We think it's the perfect mix!

Thanks to Camille for designing and writing this tutorial! You can follow her on Instagram @notsomodernmillie or visit her website. Stay tuned for more tutorials!


