
We've dreamed up a dazzling idea for Mother's Day! These felt moth brooches are not as delicate as they appear. We used our pure wool felt for durability and embellished them with shimmering sequins and tinsel stems. They make the perfect summer accessory. May we suggest making multiple moths?
Skill Level: Intermediate
Time: 2 hours
Additional Supplies:
Moth Pattern + Printable Card (click to download)
Hole Punch (optional)
Directions:
1. Print the Moth Pattern + Card PDF above onto cardstock. Cut out pattern pieces and trace onto corresponding felt colors. Cut out.

2. To cut the details of the Top Wing, use small, sharp scissors. The smaller hole can also be cut using a hole punch.

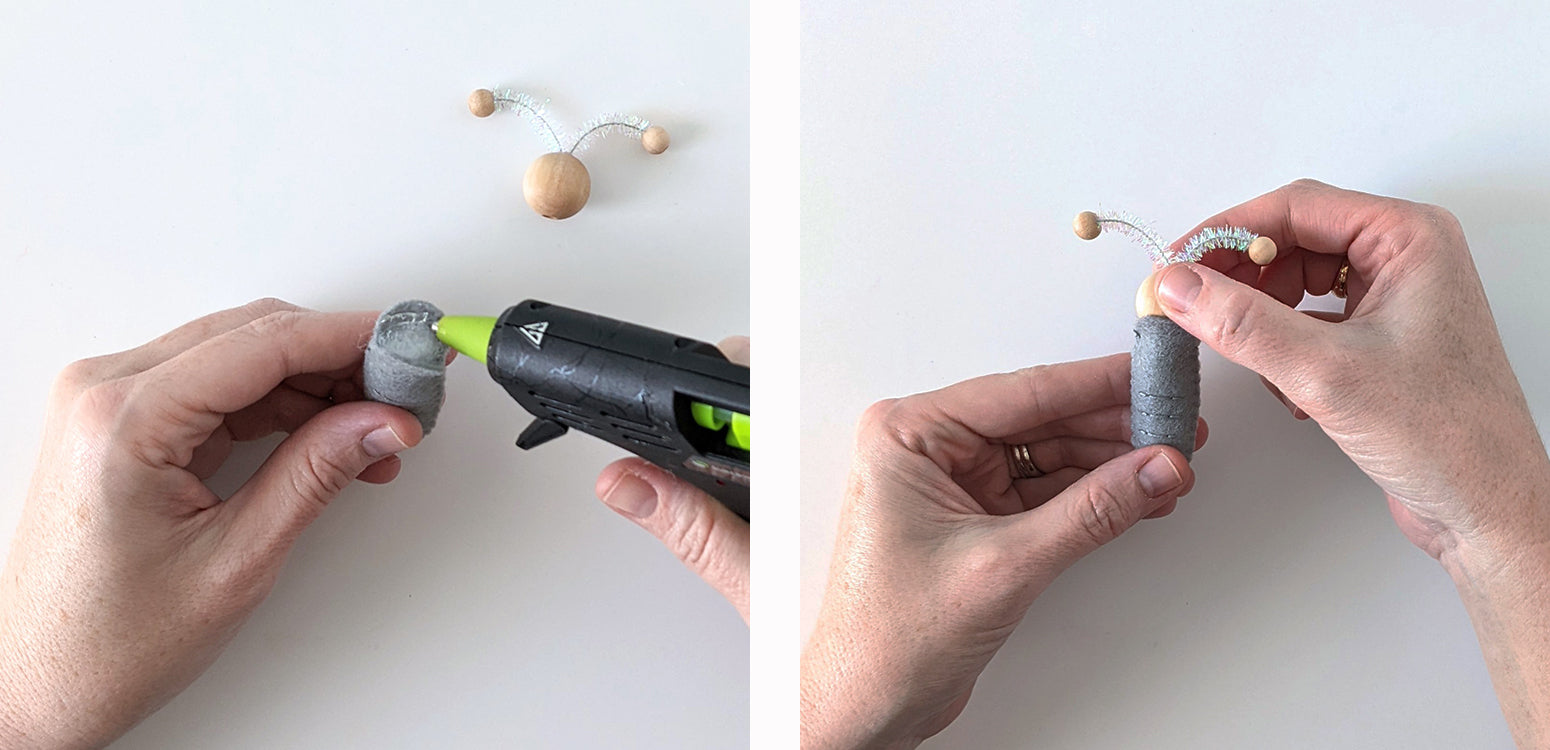
3. Use wire cutters to cut a 4" length of the iridescent tinsel stem. Put tacky glue on the top hole of the large (20mm) wood bead. Fold stem in half and place folded end into the hole. Push stem into the hole at least halfway down. Allow glue to dry.

4. Bend the two ends of the tinsel stem out to look like antennae. Add glue to each antenna tip and insert them into the holes of the smaller (8mm) wood beads. Allow glue to dry.

5. Take one felt Body piece and draw lines across the bottom half. Use two strands of DMC 169 to backstitch along the lines. This will add texture to the moth body.

Place the two Body pieces together, with the stitching right side out. Use two strands of DMC 169 to whip stitch the pieces together, stopping and starting so the top remains open.

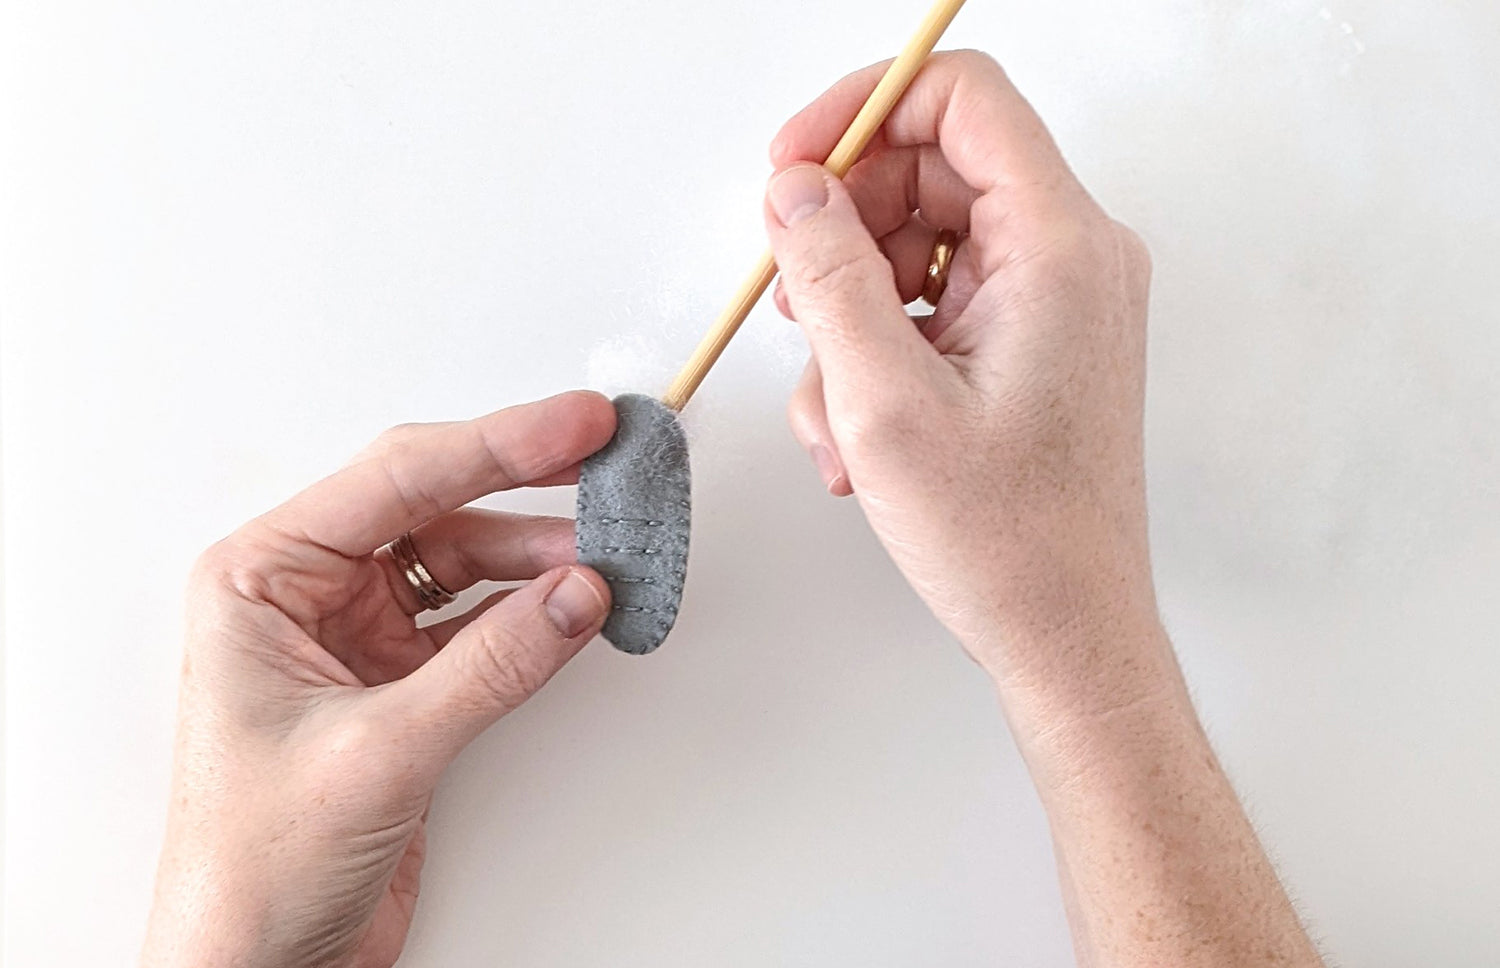
6. Stuff moth Body with Polyfil through the top opening. A skewer or eraser end of a pencil works well for this!
7. Push down stuffing and draw a line of hot glue along the inside top of both Body pieces. Set wooden bead into the opening for the moth head. The bead will keep the stuffing in place.
8. Thread needle with one strand of DMC 352. Knot the end of the thread. Begin sewing the sequins to the felt around the detail cuts on the Top Wing.

Stitch on the sequins by bringing the thread up through the felt (1). Thread a sequin onto the needle. Bring the thread back down through the fabric (2). Repeat this pattern by bringing the needle up through the fabric a distance of half a sequin away from the last sequin (3). All of the sequins will overlap by half. (see Figure 1.) When you get to the end of each opening, the last sequin can be stitched the same way and just wiggled under the first sequin (see Figure 2.)

9. Flip over the embellished Top Wing and add glue to the top half. Attach the two wings so the top center of the Top Wing lines up with the top center of the Bottom Wing.

10. Flip over joined wings and add glue to the back center of the Bottom Wing. Fold wings over the completed moth head and body. The wings should cover at least half of the large wooden bead, so only a small portion of the head is peaking out. Hold in place as the glue dries so the wings will form around the moth head and upper body.

11. Use the glue gun to secure a pin back to the moth body. Now the moth can be worn as a brooch!

While this would be a charming gift for any occasion, we think it is perfectly suited for Mother's Day. Attach this sparkling accessory to the card included with the pattern file to make it a very happy MOTHer's Day!

Thanks to Camille for designing and writing this tutorial. You can follow her on Instagram @notsomodernmillie or visit her website. Stay tuned for upcoming projects!


