
Forget the winter wonderland, let's dig our toes into the sand and string lights on palm trees! Maker Team member Jessa of @sebastian.design.dolls is celebrating the holidays in true island fashion with this sweet Pineapple Ornament tutorial. Grab your flip flops and felt and follow along!
Short on time but want to create something adorable and festive? This cutie pineapple is perfect and can be completed wikiwiki! Use it as an ornament, part of a garland, or even as a gift tag. Bring a little island flair to your holidays!
Skill Level: Beginner
Time: 1 hour

Supplies:
One 9 x 12" sheet of Golden Wool Blend Felt
One 9 x 12" sheet of Chartreuse Wool Blend Felt
One 9 x 12" sheet of Kelly Wool Blend Felt
Scraps of Assorted Wool Blend Felt (Blush, Magenta, Cyan and White shown)
Coordinating Embroidery Floss
Polyfil
Scissors
Needle
Bakers Twine
Pineapple Ornament PDF Pattern
Directions:
1. Print and cut out all pattern pieces.
Pineapple Body - Cut 2 from Golden
Cheeks - Cut 2 from Blush
Small Flower - Cut 1 from Cyan
Large Flower - Cut 1 from Magenta
Flower Center - Cut 1 from White
Crown Top and Bottom - Cut 1 each from Chartreuse
Crown Middle - Cut 1 from Kelly

2. Using the dashes from the pattern, make marks along the edge of the pineapple body with disappearing ink.
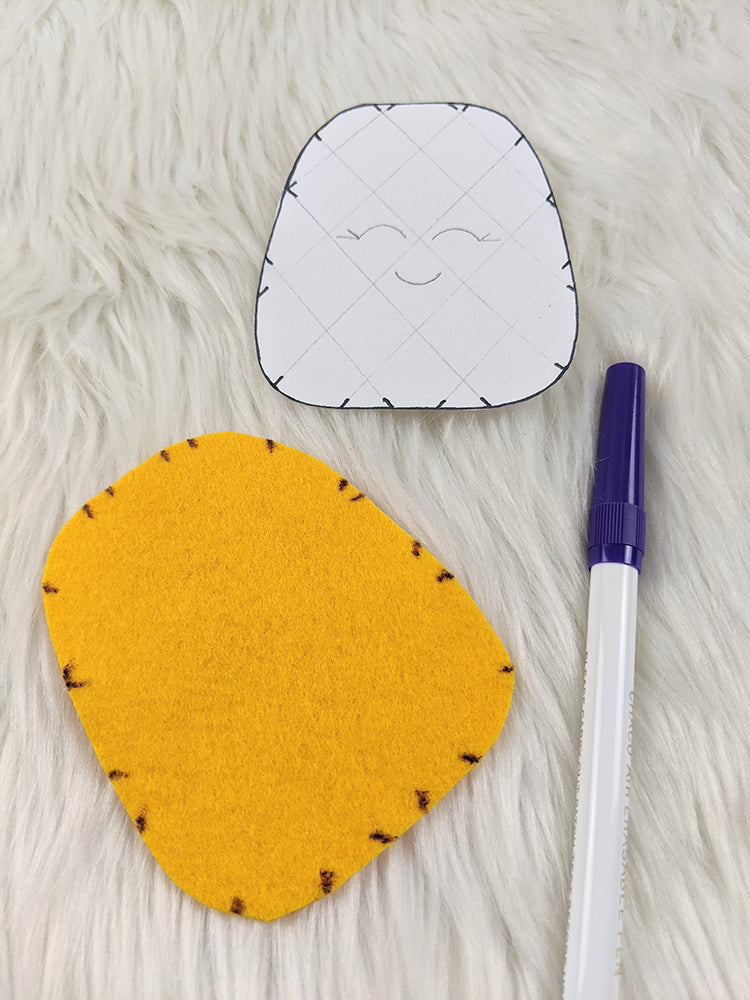
3. Using a ruler, draw the intersecting lines across the body of the pineapple with disappearing ink.

4. Stitch the front of the pineapple body with three strands of embroidery floss in a slightly contrasting yellow color. Use long stitches and make the intersections of the lines the beginning/ending of each stitch.

5. Draw the face with disappearing ink. Stitch the face with two strands of embroidery floss.

6. Place the cheeks on the face and attach with a few small stitches, using two strands of coordinating embroidery floss.

If you’d like to put a date on the back of your ornament, you can embroider the back body now before attaching the front.
7. Using two strands of yellow floss, whipstitch the front pineapple body to the back body. Start at the upper left corner, sew closed all the way around until you come to the upper right corner and stop. Do not tie off. Lightly stuff with Polyfil.

8. Insert the crown top, middle, and bottom into the top of the pineapple body and sew the top closed.

9. Assemble the flower and attach the flower center using two strands of either matching or contrasting embroidery floss. Glue or stitch onto upper corner of pineapple body.

10. Cut about 8" of bakers twine, embroidery floss, or ribbon. Create a loop and sew it on the back for hanging.

You’re all finished! Mele Kalikimaka to you and yours.

Thanks to Jessa for designing and writing this tutorial! You can follow her on Instagram @sebastian.design.dolls or visit her website. Stay tuned for more Benzie Design Maker Team tutorials from Jessa and the rest of the team!


