
We are so excited about our new stitchable die, the Pocket Rainbow! It can be finished in a variety of ways, but we are partial to using a chain stitch for this project. A chain stitch is a series of looped stitches which form a chain-like pattern. This classic embroidery technique creates a beautiful outline that elevates our stitchable rainbow... right up to the clouds!
Skill Level: Beginner
Time: 1 hour
Additional Supplies:
Manual Die Cut Machine
Directions:
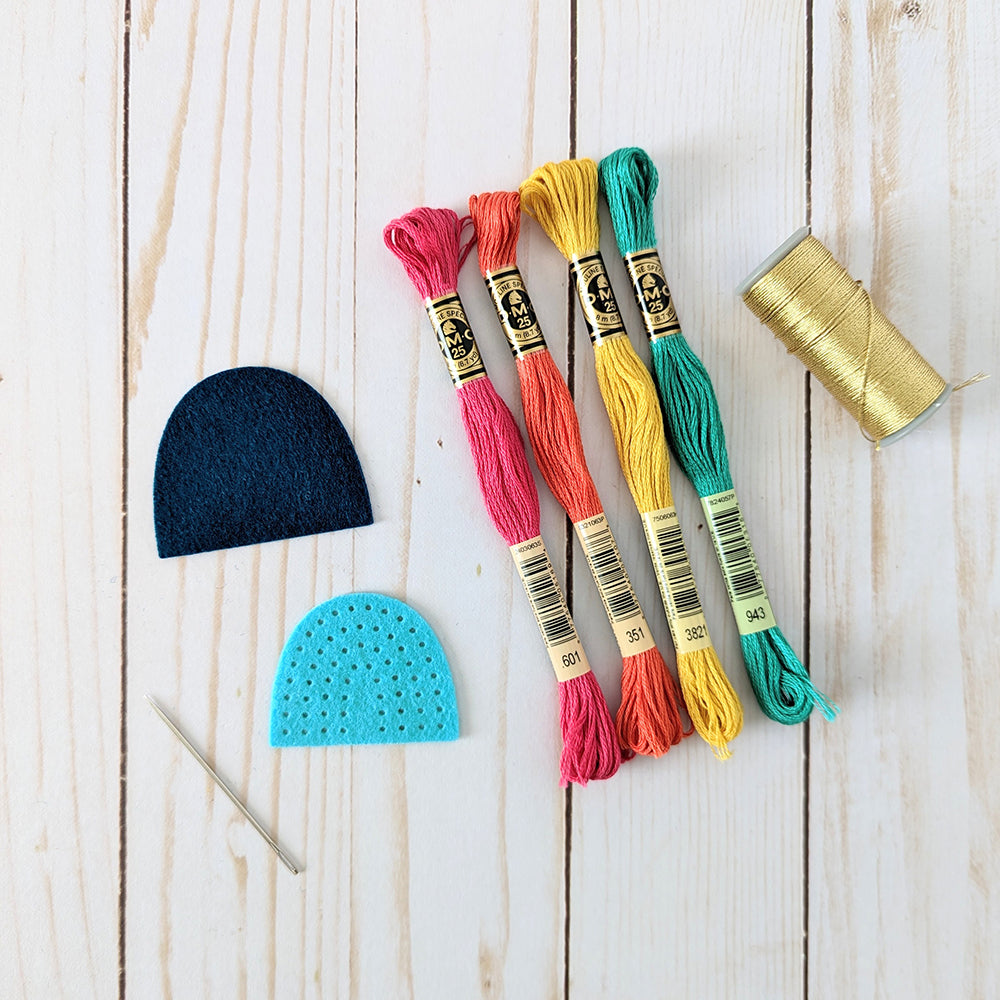
1. Begin by separating the two pieces of the Pocket Rainbow die with metal snippers. Use a die cut machine to cut out each die from the desired felt color.

2. Select the floss colors you will use to stitch the rainbow. The larger piece of felt (for backing) can be set aside for now.
3. To chain stitch the rainbow:
A. Separate the first color of embroidery floss into four strands. Thread the needle and knot at the end.
B. Bring the needle up through the back of the felt in the bottom left hole. We are stitching over the arch from left to right.

C. Put the needle back down through the same hole, leaving a small loop.
D. Bring the needle up through the second hole and through the first loop. Give the thread a gentle tug to tighten the loop.

E. Bring the needle back down through the second hole and the first loop. Leave a small loop as before.
F. Repeat these steps of making a loop and bringing the next stitch through it. Each subsequent stitch will secure the loop before it.

G. For the final ‘link’ in the chain stitch, bring the needle up through the last hole (in the bottom right) and through the previous loop. Tug gently to secure the loop.
H. Bring the needle back down through the same hole on the outside of the loop. This small stitch will secure the final ‘link’ or loop. Knot the thread on the back and trim.

Repeat these steps for the remaining arches of the rainbow.

4. When the rainbow is completely stitched, glue the larger piece of felt to the back.

5. Glue on a pin back to make your finished rainbow into an accessory for St.Patrick’s Day!

There are so many ways to customize this Pocket Rainbow. Experiment with metallic felt, beads and sequins or even add a tassel trim along the bottom edge. We can’t wait to see how you make it your own!


