
Hannah of @hannahsnow.design has a great eye for color and typography. Her beautiful felt banners are some of our very favorite things! We are so pleased to present Hannah's first tutorial as a Maker Team member - a reversible felt banner you'll "flip over."
Summer Solstice is here! It’s a great time to appreciate the joy a sunny day can bring. This reversible banner is a good project for anyone with a beginning knowledge of sewing. You could place this in a kid’s bedroom to indicate when it’s time to sleep and when it’s time to wake up. Personally, I wish waking up was as easy as flipping a banner, but I need to pair it with a cup of coffee.
Skill Level: Beginner / Intermediate
Time: 2 hours

Supplies:
One 12x18" sheet of Butter Wool Blend Felt
One 12x18" sheet of Black Wool Blend Felt
One 9x12" sheet of Mustard Wool Blend Felt
One 9x12" sheet of Butter Glitter Felt
Wooden Dowel - 14"
Bakers Twine, Black
Stick Pins
Scissors
Ruler
Tacky Glue - optional for Beginner level
Sun + Moon Template
Directions:
Banner Base - Sun
1. With a writing utensil (colored pencils work great), mark the length of 12” and 14” at the edges of the long sides of the Butter felt.

2. Match up the 14” marks with a ruler, and mark the halfway point (6”). Draw lines from the 12” marks on the sides to the 14” halfway point to create the bottom point of your banner. Cut at the lines.
Banner Base - Moon
3. Cut your Black sheet of felt to 10x12.” Mark the halfway point (5”) on the shorter side at the edge. Create a second mark 0.5” above the 5” edge mark.
4. Place the bottom point of the Butter felt banner at the second midpoint mark on the Black felt and use that as a guide to draw lines that match the angles of the Butter felt banner. Cut at the lines.

Design - Sun
5. The top 2.5” of the Butter felt banner will hold the wooden dowel. Before you place the sun pattern, fold and pin the top.

6. Using the Sun + Moon Template PDF, cut out the circle (4.5” diameter). Pin the paper onto the Mustard felt and cut out the sun circle.

7. Cut two 9x0.5” strips of the Mustard felt. Cut each strip into 6 pieces (measuring 1.5x0.5”) to make sun rays.

8. Trim the edges of the long side to create an angled ray shape.
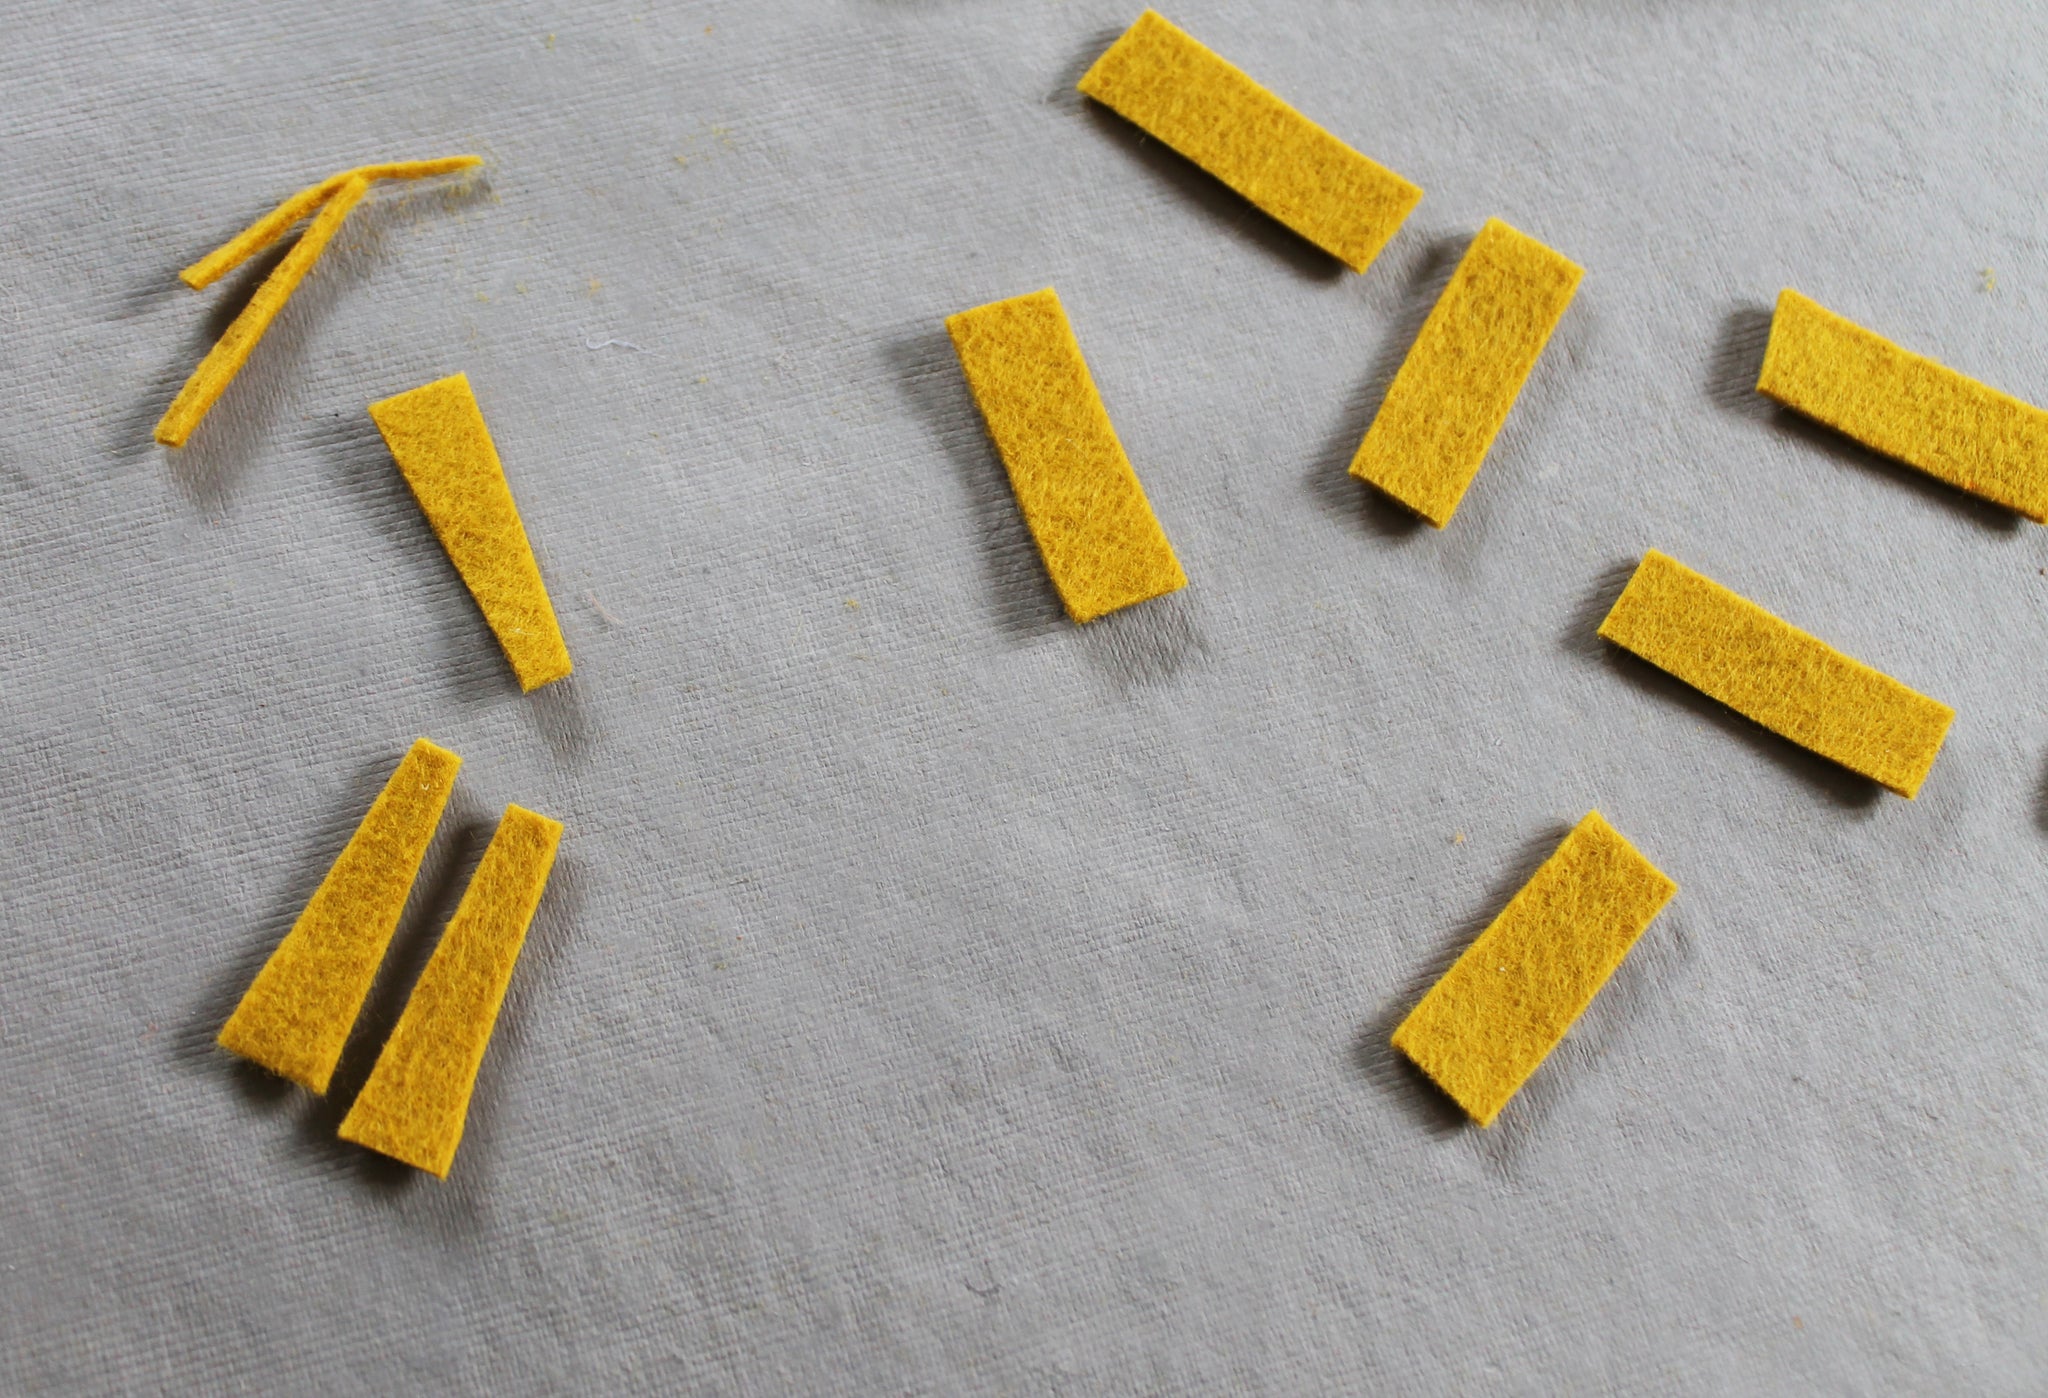
9. Repeat steps 7 and 8 with the Butter Glitter felt.
10. Pin the sun circle in the center of the Butter felt banner. It will be about 3.75” from each side and 4” from the bottom point.

11. Set the rays around the sun, alternating between the Mustard felt and Butter Glitter felt (you’ll use 20 rays total). For some variance, place the Mustard felt rays slightly closer to the sun than the Butter Glitter rays. Pin the rays onto the banner when you’re happy with the placement.

Design - Moon
12. Cut the dashed line on the sun circle template for a crescent moon shape. Use the shape as a guide to cut a moon from the Butter Glitter felt.

13. Cut out 11 small circles in the Butter Glitter felt (0.5” or smaller in diameter - a variety of sizes is great!)

14. Pin the moon to the center of the black felt banner. It will be about 3” from the left side and 3.25” from the bottom point. Place the stars, using the photo as a reference. Make a mark with a colored pencil behind each star to note your placement. If you’d prefer to use glue instead of sewing, use tacky glue to place the designs on each banner.

Sewing - Sun
15. Using a sewing machine, sew the sun circle onto the Butter felt banner, about 0.25” from the edge. (Sewing on a curve is tricky, so take it slow.). Sew each ray on with a straight line stitch through the middle. Use backstitching at the start and end of every line to prevent it from unravelling.

Sewing - Moon
16. Sew the crescent moon onto the Black felt banner, about 0.25” from the edge. Sew on the stars over your markings. Since the stars are small, you’ll need to lift up the sewing machine’s presser foot often and spin the banner to sew a small circle.

Combining Sides
17. Trim off the excess thread on the front of each banner design.
18. Place sun and moon banners back to back. Re-pin and fold the top of the sun banner over the top of the moon banner.

19. Sew two straight lines close to the edge to attach both sides together and create a pocket for your wooden dowel.

20. Slide the wooden dowel into the pocket. Cut a 20” piece of Baker’s Twine and tie it to each side of the dowel.

Congrats, you did it! Reversible banners are an easy way to switch up your wall art. You can use this tutorial as a starting point to design other possibilities - an open/closed sign, happy/sad emoji, cat/dog, etc.

Thanks to Hannah for designing and writing this tutorial! You can follow her on Instagram @hannahsnow.design or visit her website. Stay tuned for more Benzie Design Maker Team tutorials from Hannah and the rest of the team!


