
Roses never go out of style! Our new floral die allows you to create a beautiful bouquet of classic rose blooms or individual roses that you can mix with other felt flowers. Designed by felt artist Kelsey Linville, the Classic Rose die can be used to create a full rose bloom or bud. Follow along as Kelsey assembles a felt rose made with the Classic Rose die - eternally vibrant and free of thorns!
Skill Level: Intermediate
Time: 15 minutes
Additional Supplies:
Reference Sheet (click to download)
As an alternative to using a die, these shapes can be easily cut by hand. Use our SVG file and follow the instructions below.
Directions:
1. Use the Reference Sheet above to cut the corresponding color and quantity of each shape. Use any color for the rose petals and leaves. This example uses Red and Olive.
2. Sort petals into piles according to size (17 Small and 6 Large.) There are a few petal shape variations that will be glued in no particular order to create a more natural look. It does not matter if the shapes are mixed up as long as the Small and Large petals are separate. Set Large petals and leaves aside.

3. To create the center cone of rose, add a diagonal line of hot glue across a Small petal. Fold left hand corner downward at a diagonal to meet glue, pinching at the top to create cone shape. Fold right hand corner downward at a diagonal, overlapping the first fold and securing with glue.

4. Add a line of glue ¾ of the way up a Small petal and attach to center cone. Repeat with another Small petal directly opposite. Maintain cone shape by pinching petals at the glue line.

5. Glue two more Small petals in between the first two petals and opposite one another. This is the center of your rose.

6. To create natural looking petals, twist top half of each remaining petal in the Small pile between the thumb and index fingers. Twist at least two times to manipulate felt and create a soft wave in each petal.

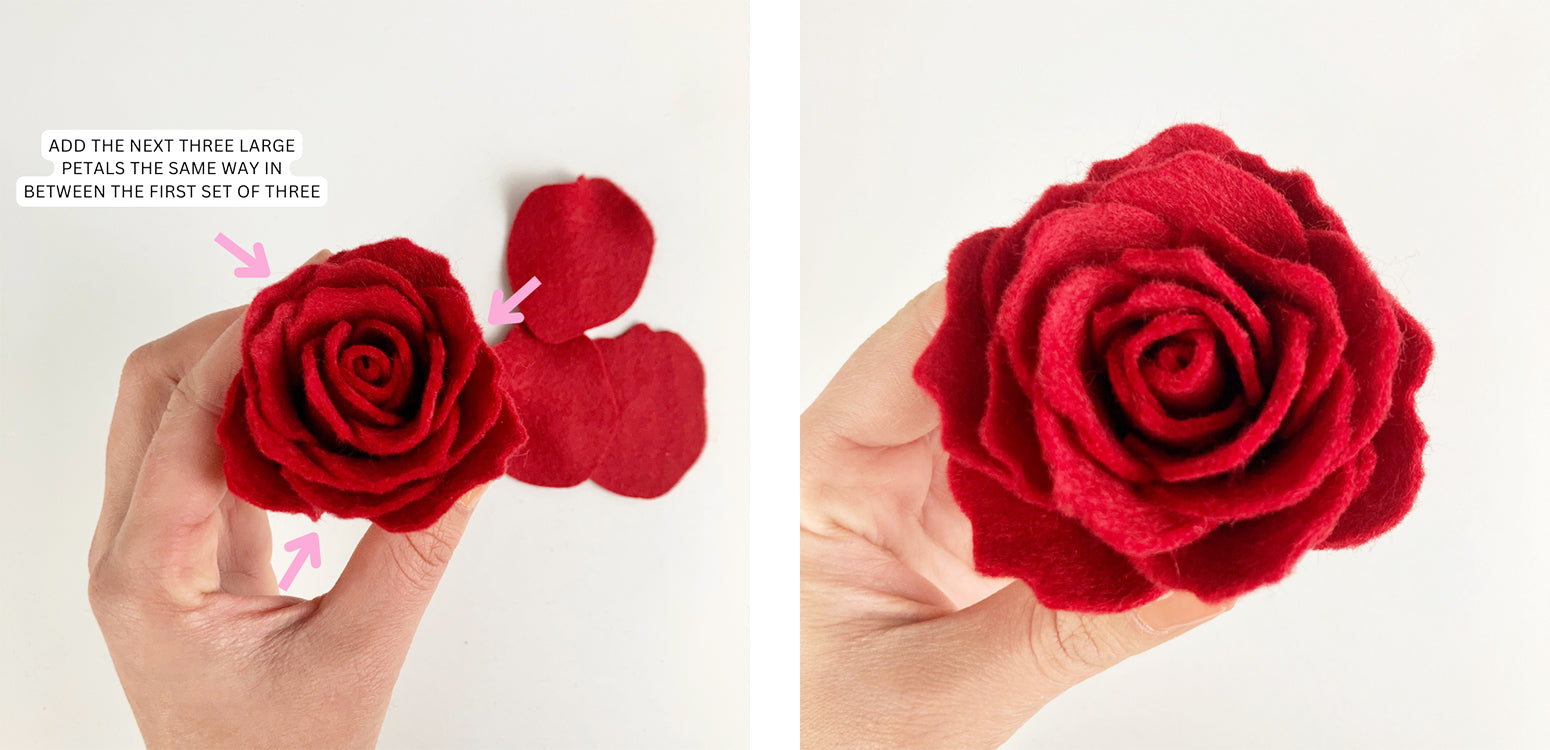
7. The next layer will have three Small petals evenly distributed around the center. Add glue to one side of petal from bottom half down. Glue petal onto center cone leaving one side unglued (which will overlap the last and third petal.)

Add glue to bottom half of second petal and position it around center cone, slightly overlapping first petal. Repeat with third petal and tuck it under unglued side of first petal. Add a dot of glue to unattached side of first petal and secure it over third petal to complete overlapping pattern.

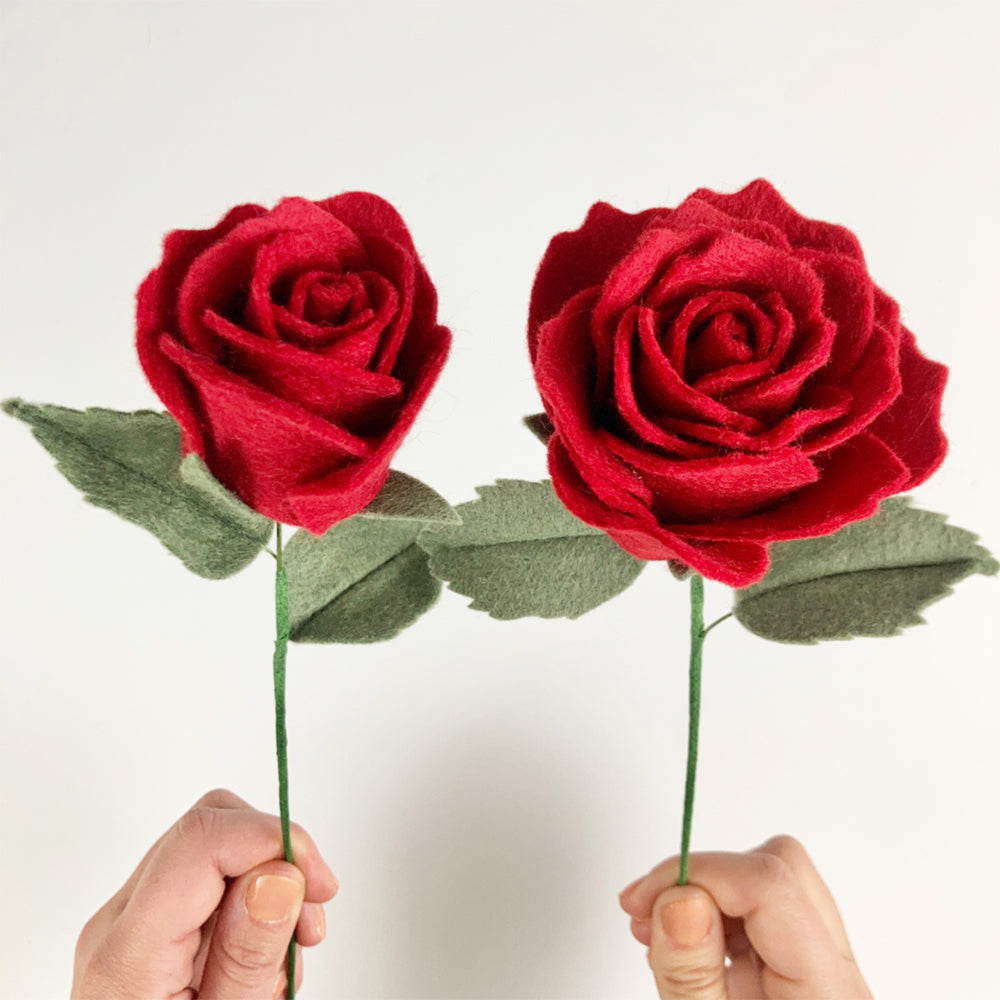
To create a small bud-like rose, continue to next step. To make a large full blooming rose, skip ahead to Step 11.
Small Rose
8. Twist four Large petals as shown in Step 6 to create a wave in each petal.

9. Add glue to bottom half of Large petal and position it a little lower than the center cone petals. Fold bottom of Large petal under the base and secure to bottom and side of rose. Glue a second Large petal directly opposite.

10. Glue remaining two Large petals directly opposite and in between first two petals. Secure to both the side of rose and bottom by folding petals under. Skip to Step 15 to add the stem and leaves.

Large Rose
11. Continuing from Step 7, glue remaining nine Small petals around the rose. Position each petal a little lower than the layer before it. Glue the petals in a very slight downward spiral until all are attached.


12. Twist the six Large petals to add a wave in each petal, as demonstrated in Step 6.

13. The next layer will have three Large petals evenly spaced like the points of a triangle. Position petals slightly lower than petals above and glue to both the side and bottom of rose with bottom folded and glued underneath. Flip the rose upside down to help with spacing the petals.


14. Repeat with the last three Large petals, placing them in between the first three and spacing evenly. Glue bottoms underneath, closing any gaps on the bottom of rose.
Floral Stem
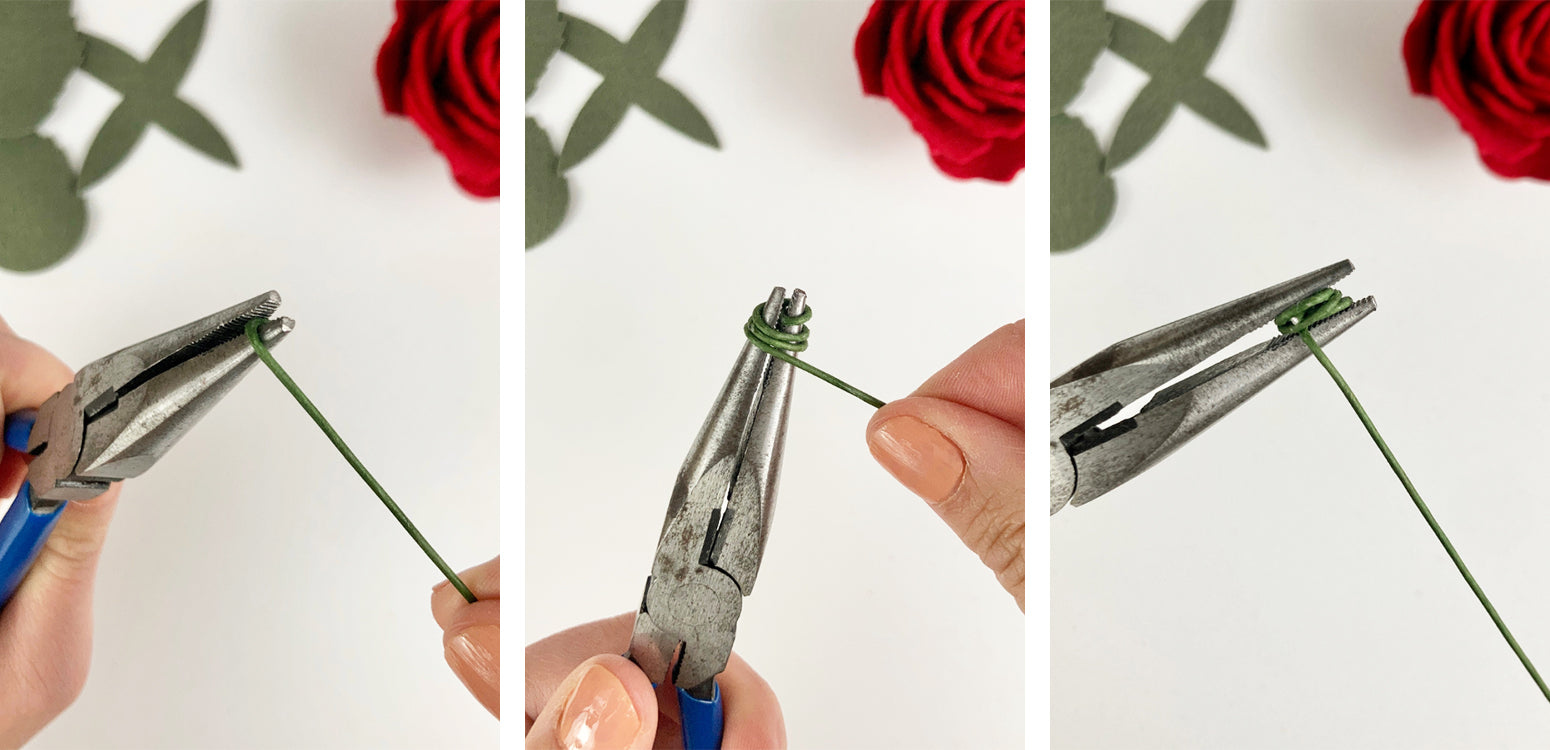
15. To create a floral stem, pinch end of 18-gauge wire with pliers. Twist end of wire into a coil, using the pliers to flatten it. Position stem in center of the coil.
16. Add glue to coil and attach to the bottom center of rose. Set stem aside to dry, propping it against something so it dries in an upright position.

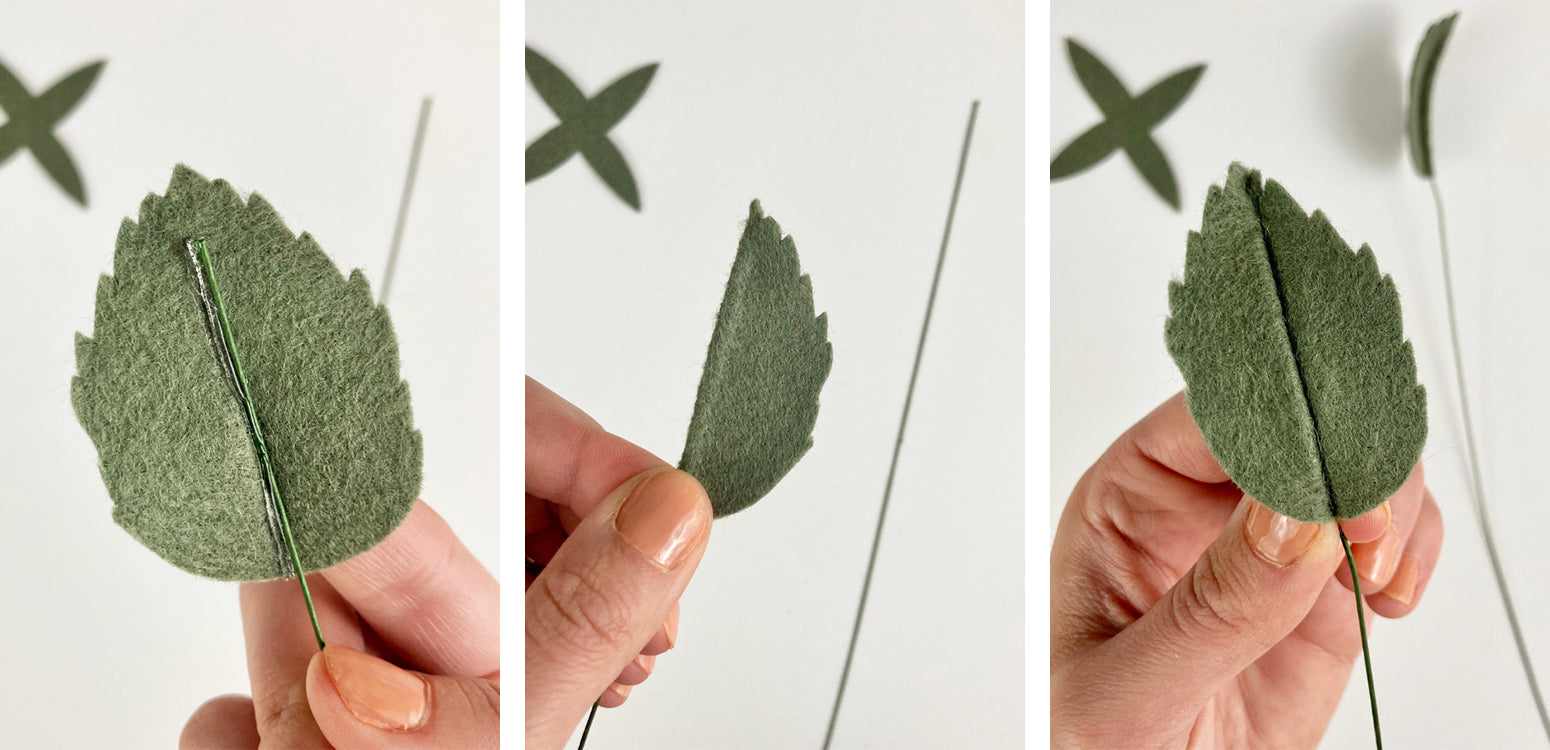
17. Cut an 18" length of 22-gauge wire with wire cutters. Position wire in the center of a leaf. Add a line of glue down the center. Fold leaf in half and allow to dry completely before opening. Repeat with second leaf.
18. Snip a small hole through the center of rose sepal. Thread sepal onto the rose stem and glue to underside of petals.

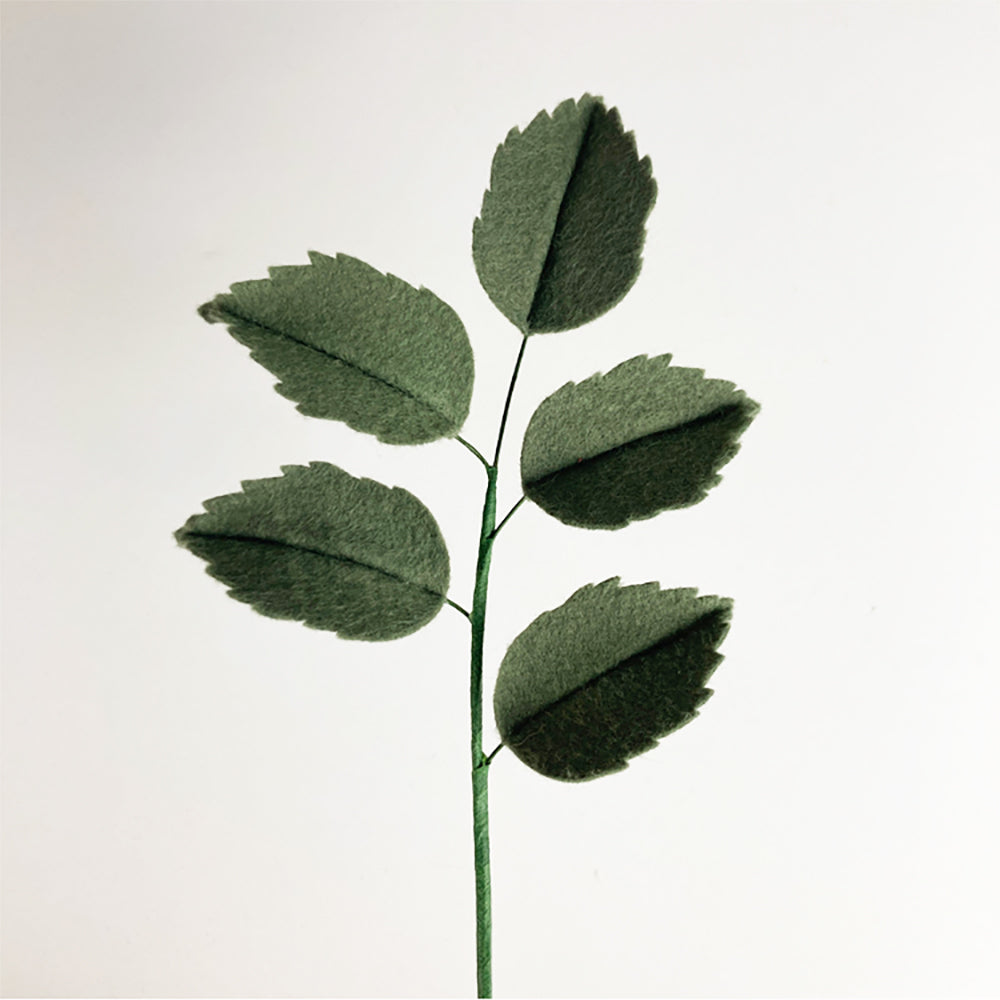
19. Use floral tape to secure each leaf to 18-gauge stem. Clip stems approximately 1" above where tape stops to prevent it from unraveling.

20. For additional greenery, wrap several leaf stems to add to a bouquet of roses.
Experiment with both rose sizes and use them together to make a stunning felt arrangement!

Kelsey Linville, creator of In Bloom Felt Studio, is a self-taught felt florist who loves to brighten up spaces around the world with her bold and colorful forever blooms. Kelsey’s philosophy is that creativity sparks joy. She wishes to share that with others through her designs and tutorials. When she’s not in her studio, Kelsey loves to spend her time in the great outdoors with her husband and two children.


