
If you thought making miniature clothes was fun, wait until you see this! In Part Three of our Miniatures series, Maker Team member Dani @knitty34 is teaching us how to build a miniature environment for our little felt creatures. It's vicarious living at it's finest!
Over the last two months we have worked on creating your own miniature felt creature from one of Cynthia Treen’s kits, and adding some fun accessories. This month we are going to start into the really fun stuff – making a mini room for your creature to live in!
Skill Level: Beginner
Time: 1-2 hours

Supplies:
Foam Board
Two Sheets of Scrapbook Paper - Walls
One Sheet of Scrapbook Paper - Floor
Assorted Balsa Wood
Vellum Paper
Bone Folder
Craft Knife
Metal Ruler
Sandpaper
Cyanoacrylate Glue (also called CA Glue or Crazy Glue)
Glue Gun
Double-sided Tape
Directions:
1. To make the walls and floor, cut 3 pieces from your foam board:
(1) 11” x 11”
(1) 11” x 8.5”
(1) 11.25” x 8.5”
When cutting foam board, use a fresh blade in your craft knife and make multiple gentle cuts, running along the side of a metal ruler. If your blade is dull or you push too hard, it will tear the foam. Also make sure that you are cutting on a surface you don’t mind damaging. Don’t use your good quilting mat!

You will notice my foam is different colors, marked, and even dented in some places. Feel free to use up your scraps because we are going to be covering the surfaces with scrapbook paper.

2. To make a window, open your package of balsa wood. You will see lots of different sized pieces. Find a piece that is about ¼” thick. From this, use your ruler and craft knife to cut long ¼” thick strips. They will be long pieces that are ¼” square on the ends when you finish.
To cut balsa wood, score the wood several times with a knife until it splits. Work slowly and carefully.

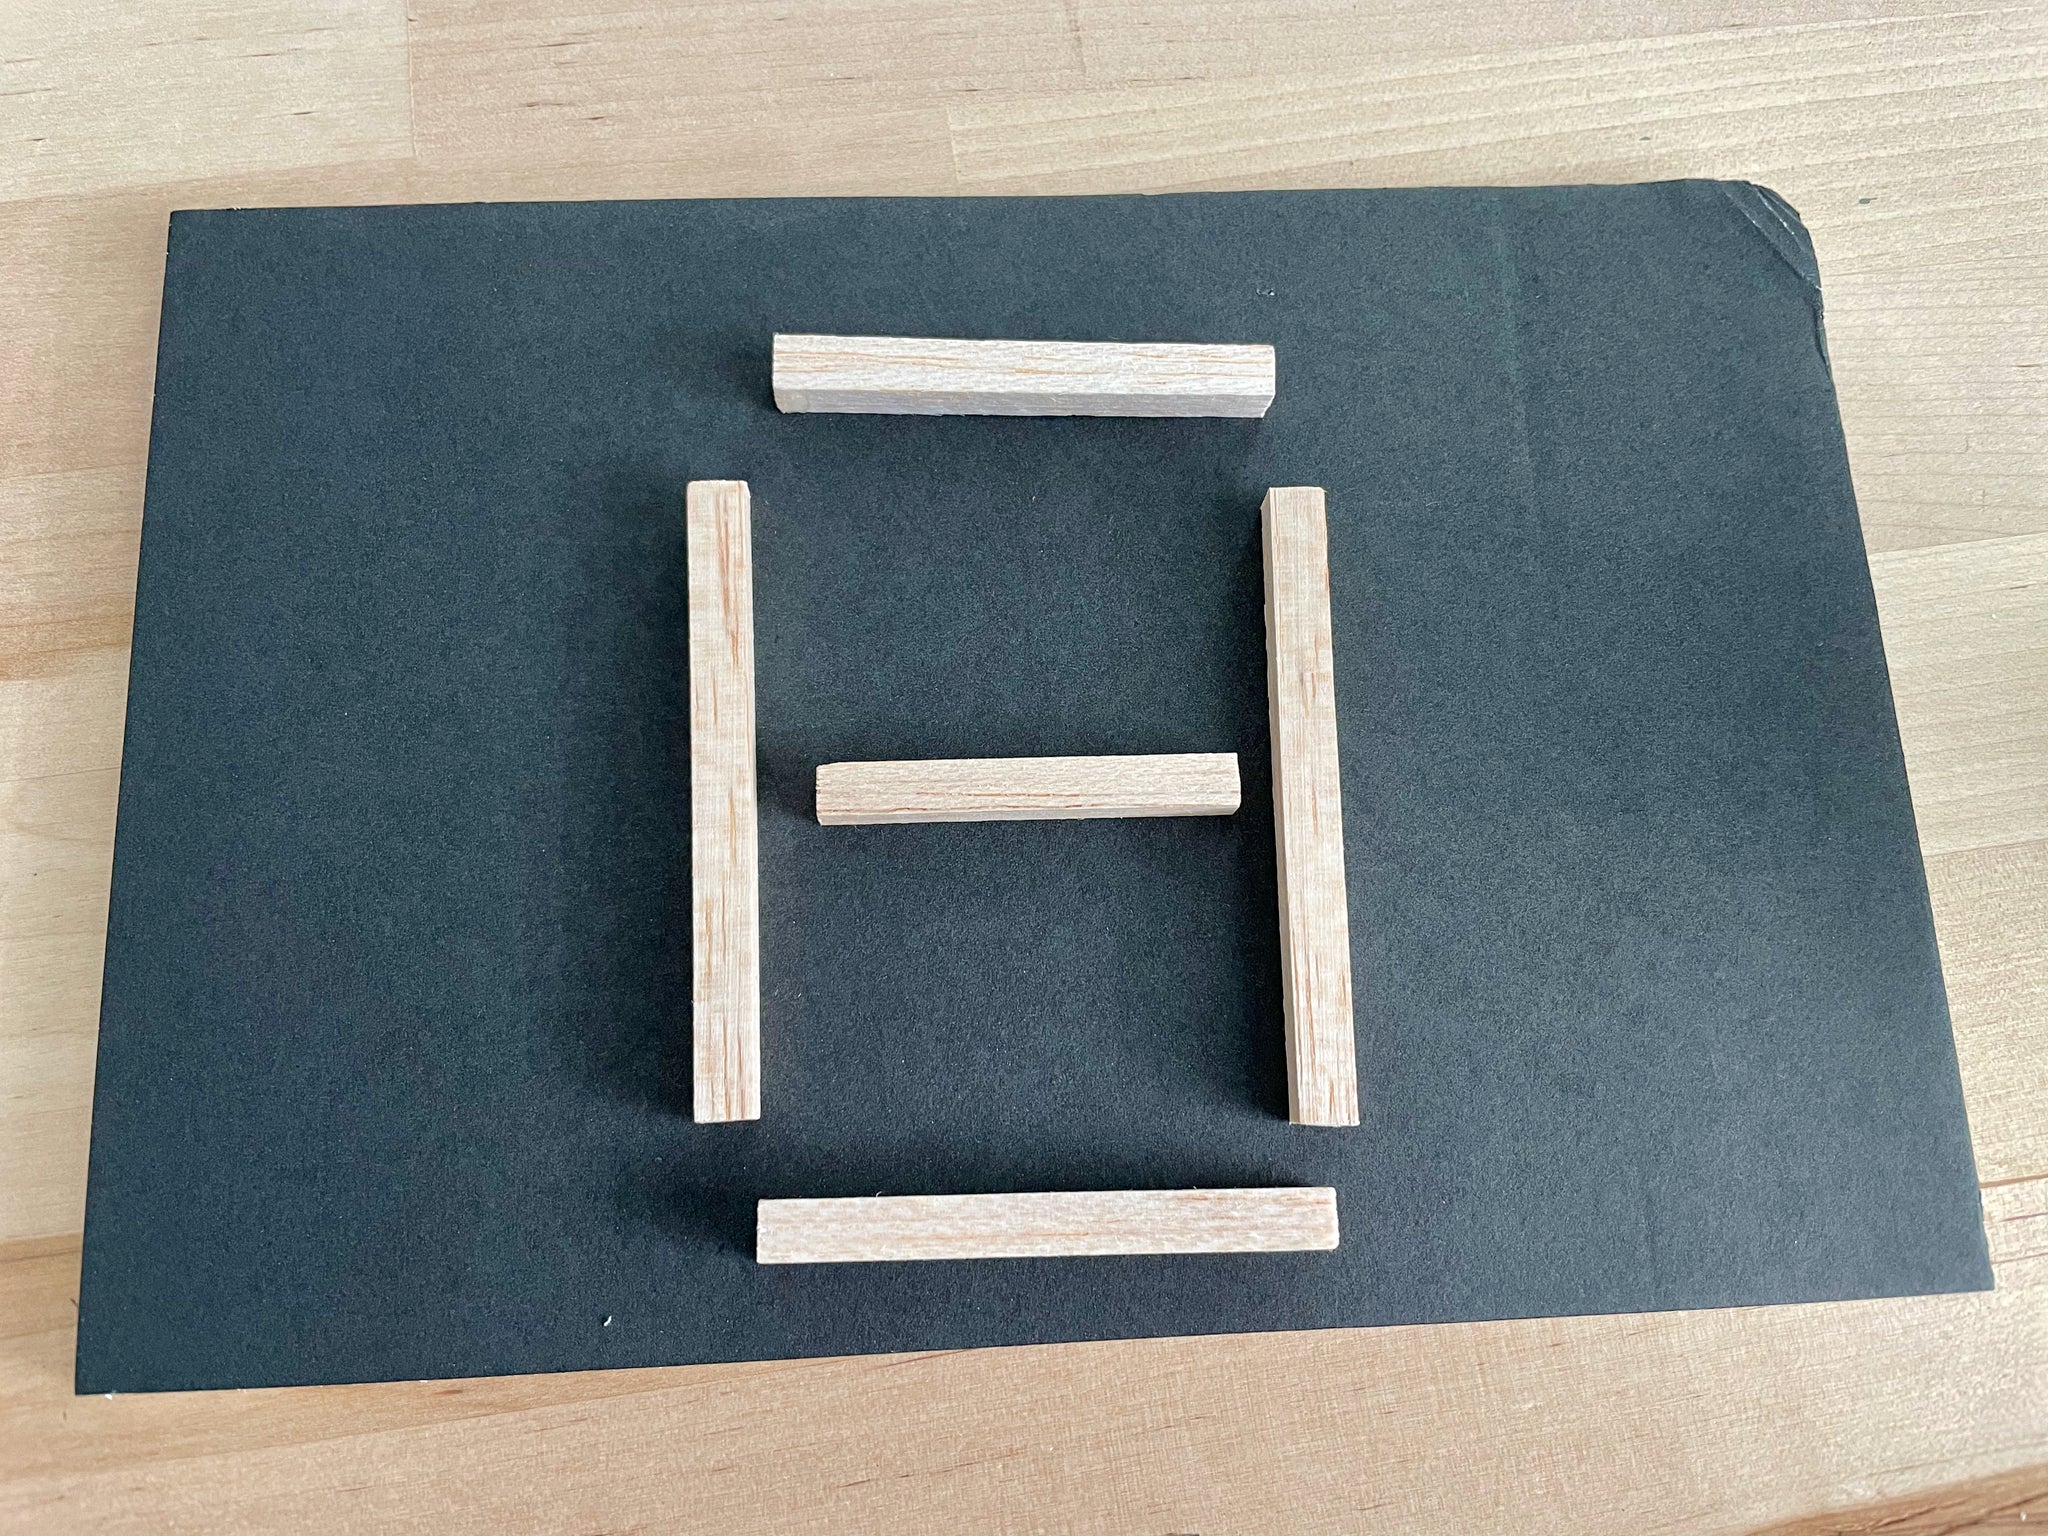
3. From the balsa wood strips, cut these lengths:
(2) 2.5” L
(2) 3” L
(1) 2” L

4. If needed, sand the ends of these pieces so they are flat and square. Lay these pieces out as shown, with the long pieces on the sides, the middle pieces on the top and bottom, and the smallest one in the middle.
5. Using your CA glue, create a window frame shape. Work on a surface you don’t mind getting glue on and watch that you don’t get the glue on your fingers! (If you do, acetone will remove most of it.) After the window dries, sand any parts that you wish.

6. Place your window on the desired wall and trace around it with a pencil. Cut out the foam board about 1/8” inside the line using your craft knife. Check that your window frame covers your cut out edge and set aside.

7. To assemble the walls, use your glue gun to attach one wall to one side of the floor. Attach the second wall to the first wall and the floor to make a corner.

8. Place the scrapbook paper you've chosen for the floor on the foam board base. I chose a piece that looks like wood flooring! Flip the whole room upside down while holding the paper in place. Position your "room" on the square corner of a table, making sure the paper is tucked tightly into the corner.

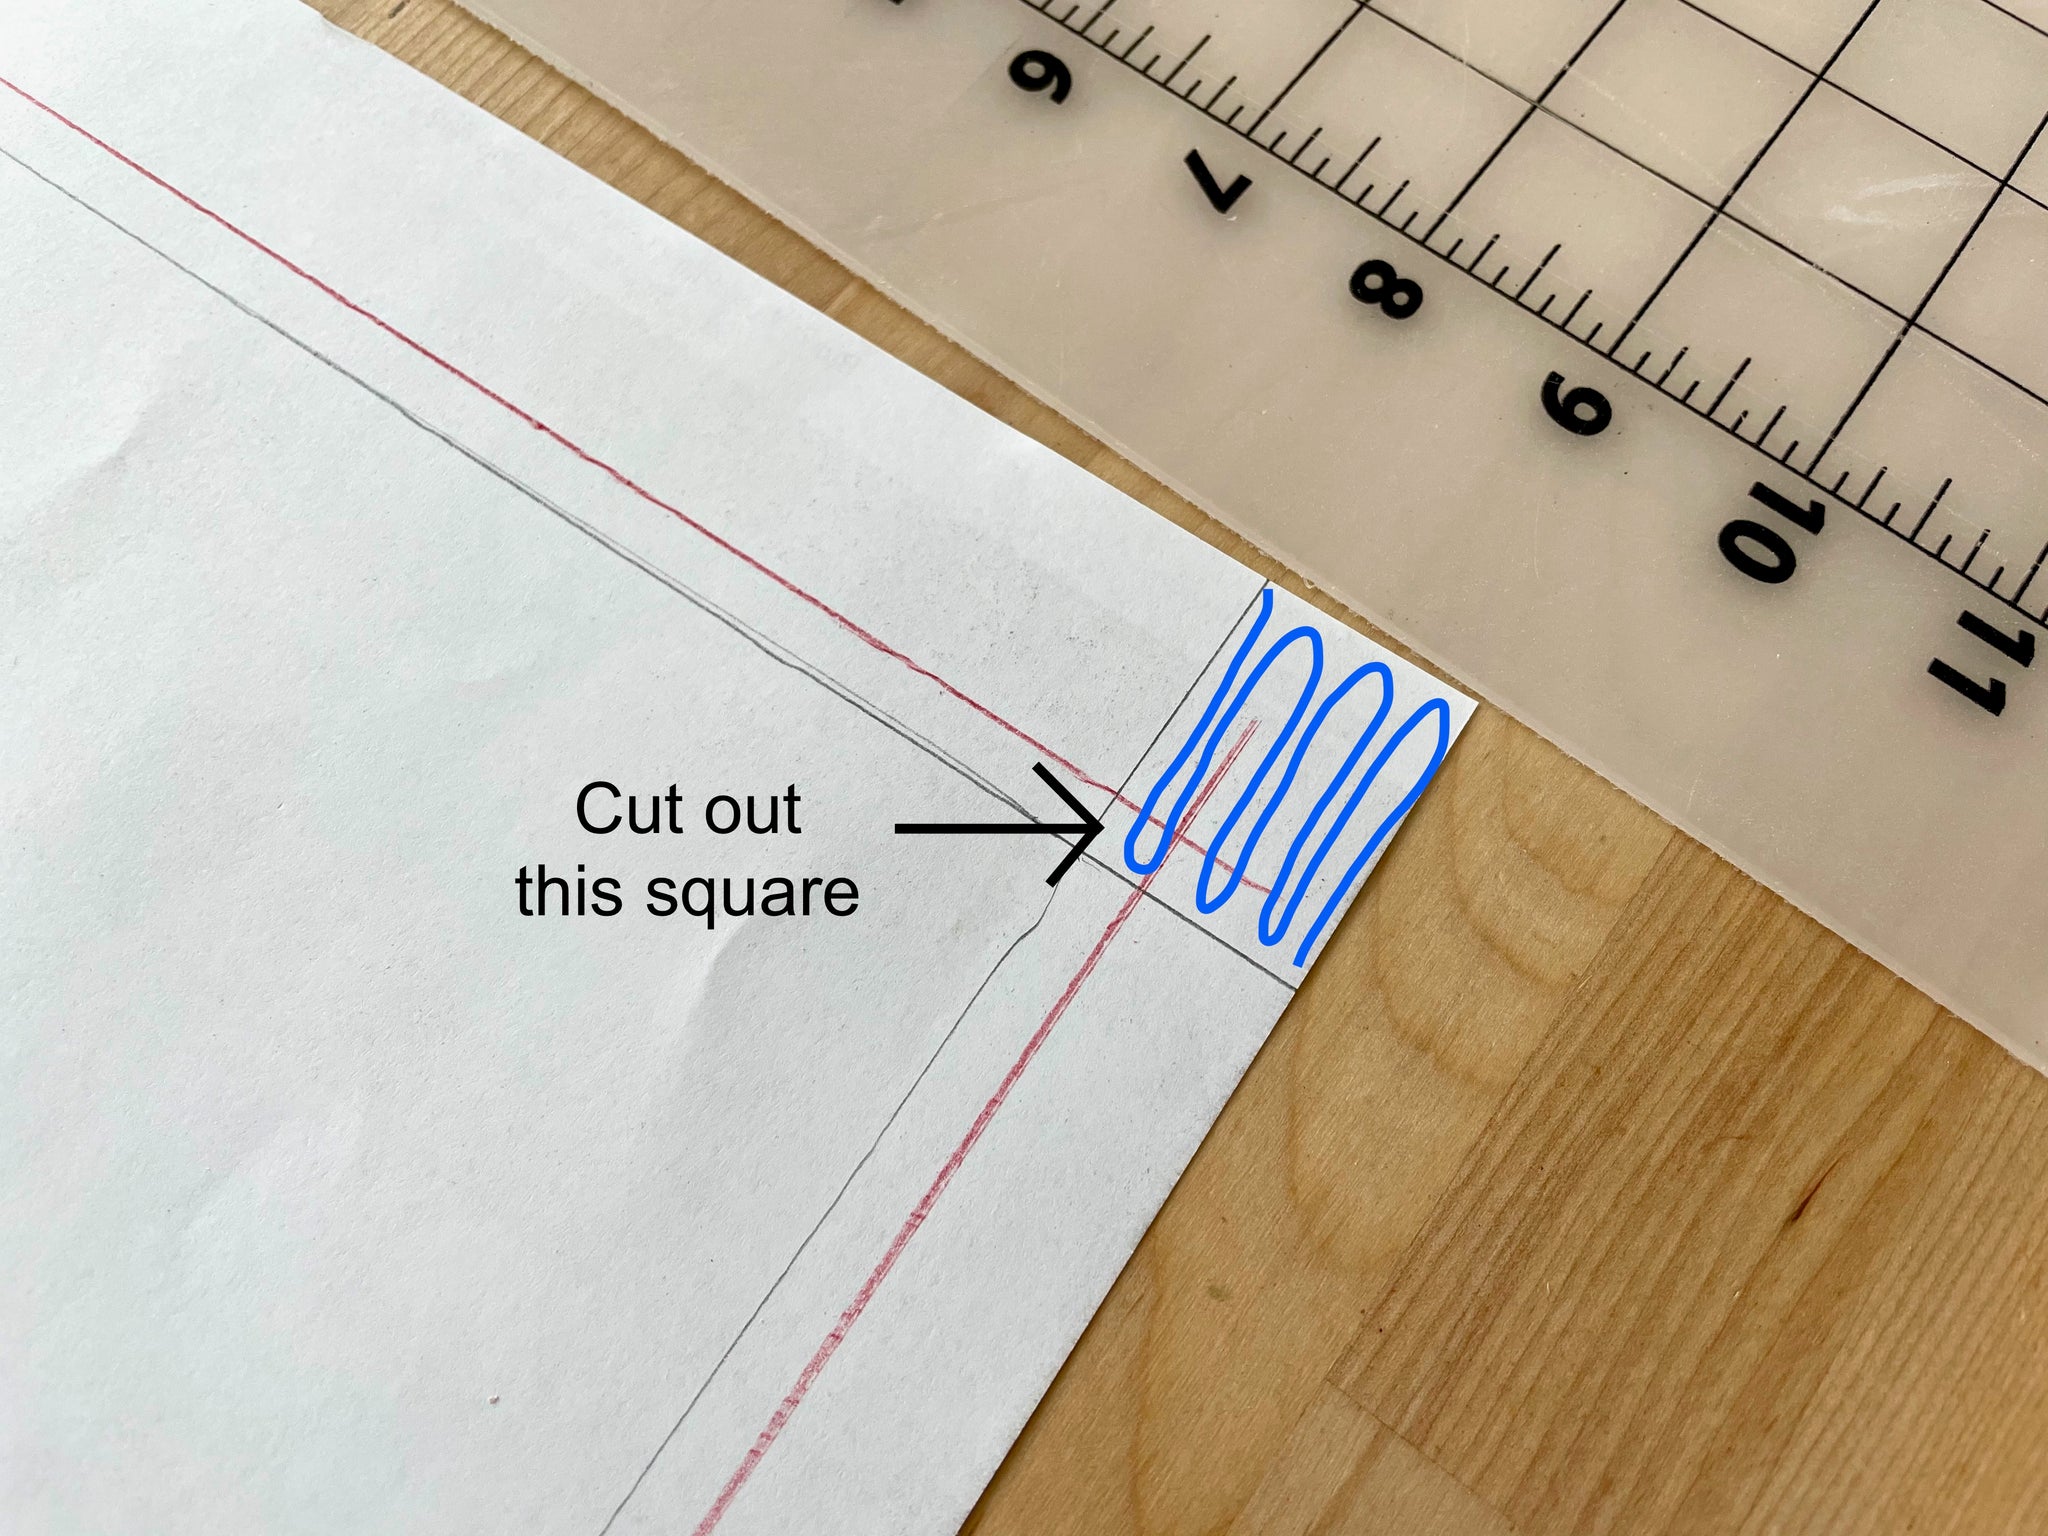
9. Trace the edges of the foam board with a pencil to outline the floor. Remove the foam board and mark another line ¼” outside of your pencil line (shown here in red).

10. Extend your first pencil lines out to the edge of the paper, and cut away the square in the corner shown here:
11. Using your bone folder, score a line on both the pencil and red lines. Fold the paper on both lines toward the back. We are making sure the edges of the foam board will be covered by paper and not seen.

12. Flip your room right side up and, using double sided tape or a glue stick, stick the paper first to the floor, and then wrap the edges around and tape them to the underside of the floor. This will completely hide the foam board.
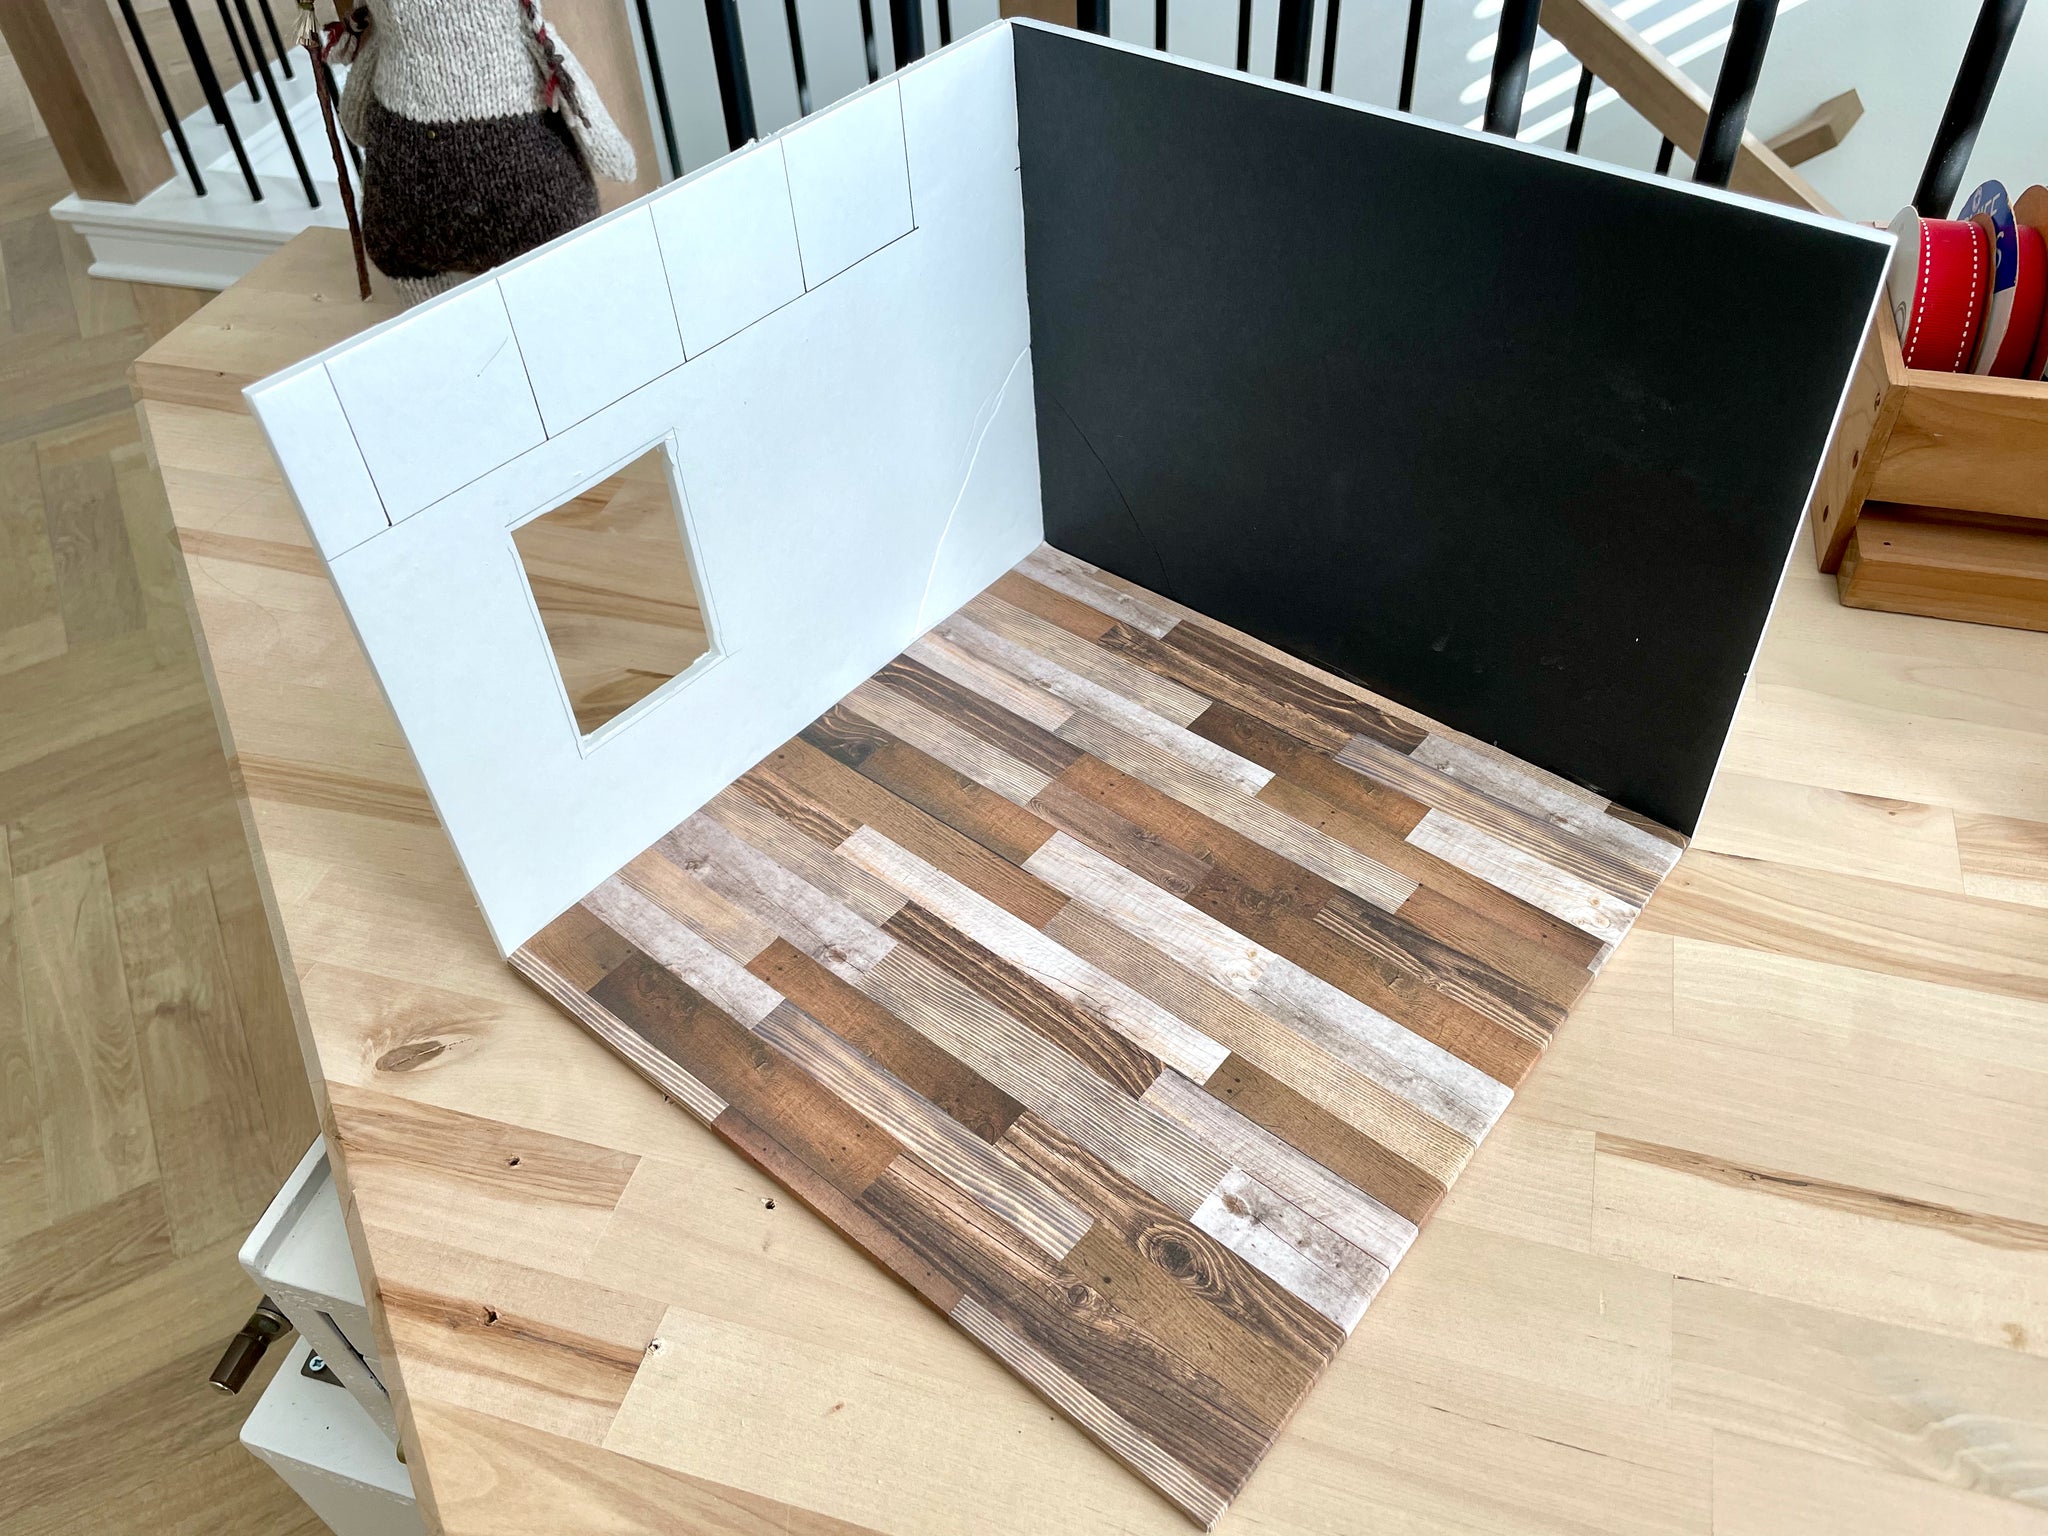
13. Repeat steps 8-12 to cover the walls with scrapbook paper.

14. Trace your window frame onto a piece of vellum. Cut the vellum so it is just a touch smaller than the window and glue it to the back of the window.
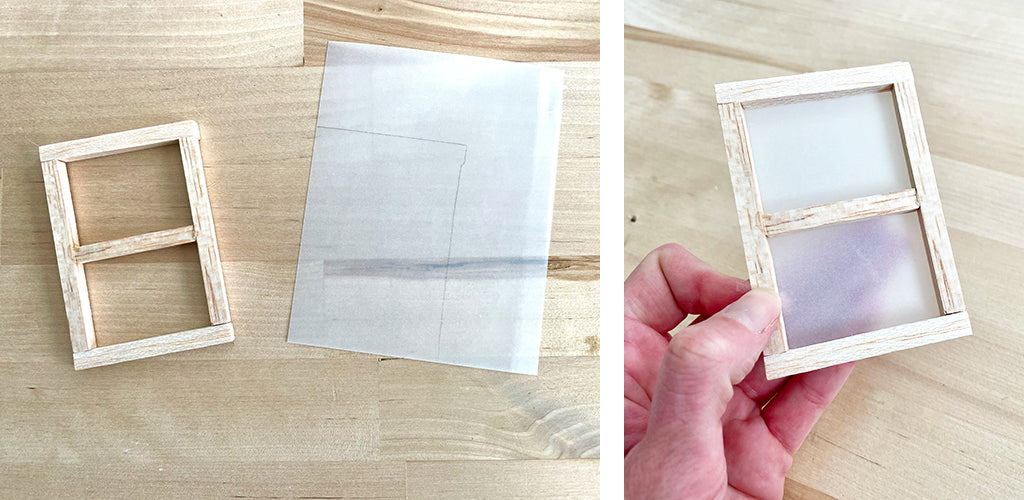
15. Cut out the paper on the wall covering the window opening. This is easiest to do from the back side. Glue the window to the opening on the wall of your room.

And with that, the beginnings of your room are done! Next month we are going to build the room out so, before then, decide what you want your room to be. I will show you some techniques for making mini items, but you will use your creativity to apply them to your own design. Ludwig is wondering how his new room is going to turn out!

Thank you to Maker Team member Dani for designing and writing this tutorial! You can follow her on Instagram @knitty34. Check out parts 1, 2 and 4 of this series and stay tuned for more tutorials from the Benzie Design Maker Team!


