
This freshly picked tutorial from Benzie Design Maker Team member Kasia of @theadventuredept is perfect for summer crafting! Follow along as she creates a felt bonnet that can be made in one sitting and is sure to become a family heirloom. Easy peasy lemon squeezy!
Like Jane Austen said, “It is a truth universally acknowledged, that a parent in possession of a baby, must be in want of a cute hat.” That’s how the quote goes, right? Ok, yes, it’s clearly been a while since I’ve been in an English Lit class but I am a parent of three kids under 5, and it’s a fact that there’s almost nothing more adorable than fruit-themed baby gear. This citrusy bonnet is a sweet summer project. Sized to fit a 6-12 month old baby, just scale the pattern up or down to fit other cute heads!
Skill Level: Intermediate
Time: 1 - 3 hours, depending on method of construction
Additional Supplies:
Citrus Bonnet Pattern (click to download)
2' of Green Ribbon, ½" wide
Sewing Machine
Iron
Embroidery Floss and Needle - optional, alternative to sewing machine
Directions:
1. Cut pattern pieces from the felt, fabric, and adhesive.

2. Use disappearing ink pen to mark the locations of appliques A, B, and C on hat base fabric.

3. Cut ⅛” around entire edge of iron-on adhesive pieces so they are slightly smaller than corresponding felt pieces. Apply iron-on adhesive to the back of felt pieces, then align felt pieces A, B, and C with markings on the hat base. Iron to adhere.

4. The felt appliques can be either machine or hand-sewn, depending on your preference. For machine-sewing, stitch ⅛” from felt edges with a straight stitch around perimeters of A, B, and C. For hand-stitching, use two strands of embroidery floss to blanket stitch around perimeters of A, B, and C.

Lightly press finished appliques to smooth everything out and embed stitches.

5. With right sides together, sew center hat seam with ⅜” seam allowance. Clip along curved sections of seams every ½”. (Do not cut across the stitches!)

6. Turn hat right side out. As an optional step, finish seam with the method of your choice (serge, zigzag stitch, pinking shears, etc.)

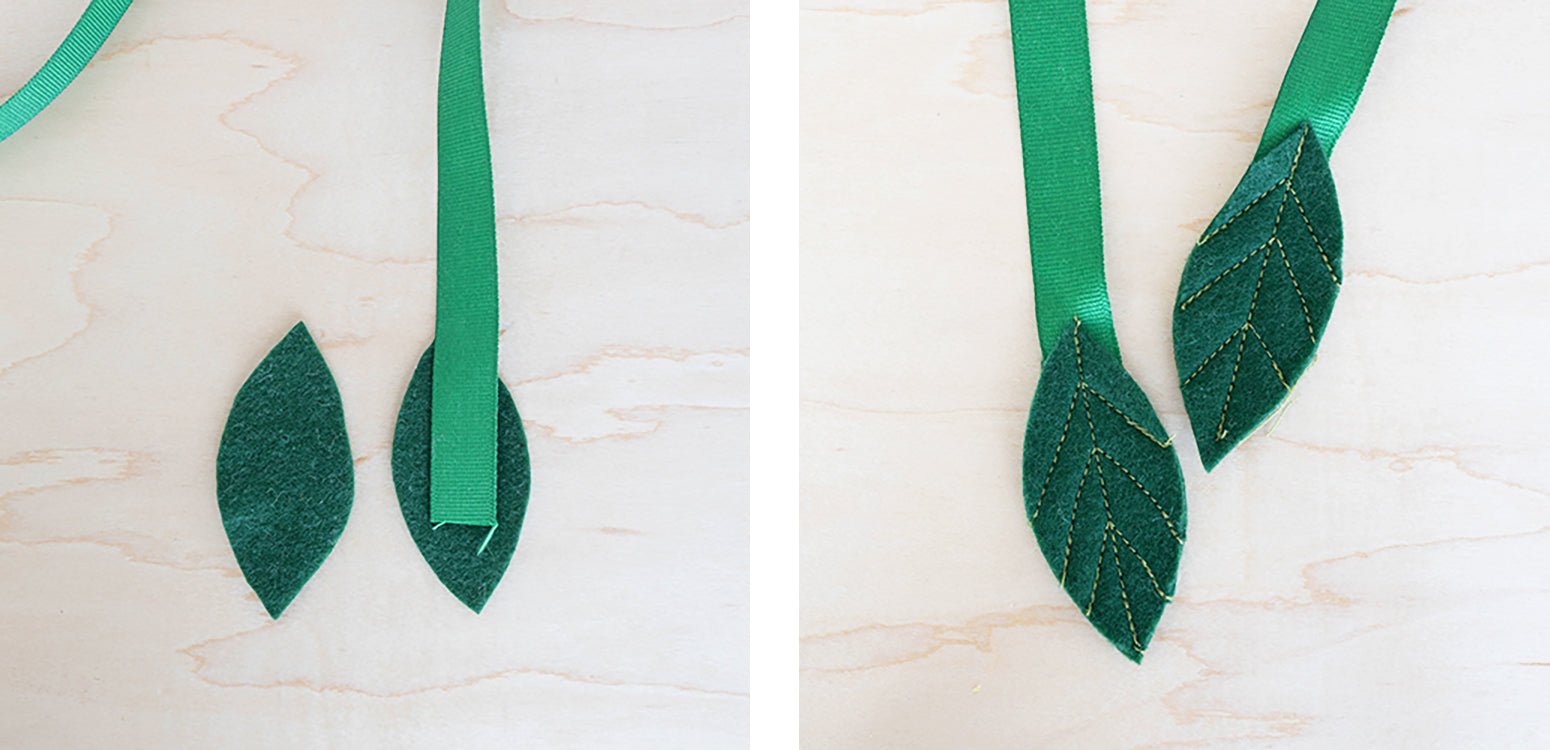
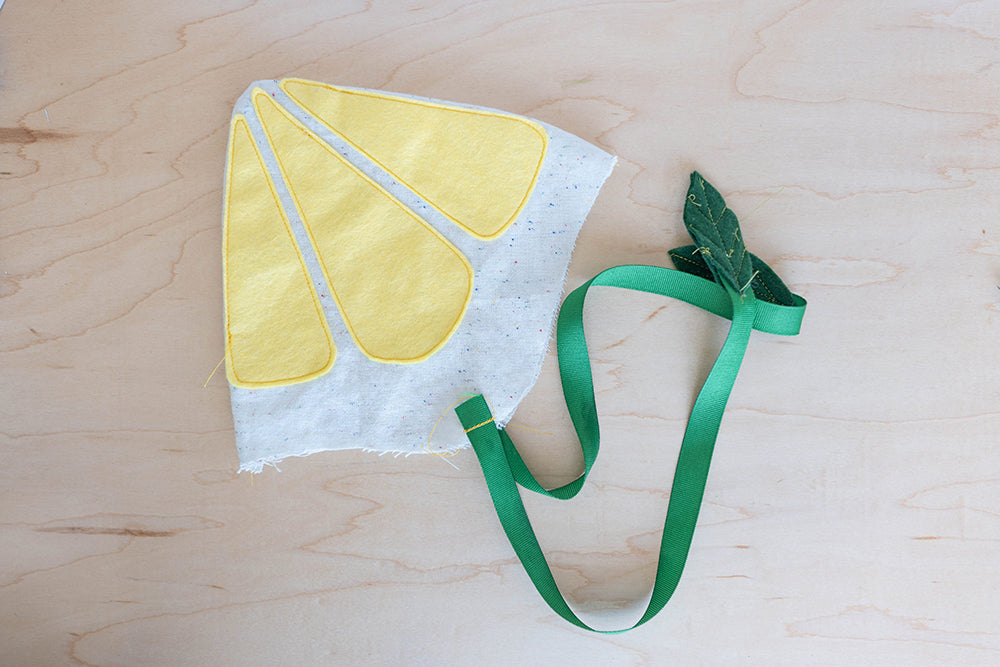
7. To make ties, cut two 12” sections of ribbon. Sandwich end of one section between two felt pieces marked Leaf. Sew a straight line down center of leaves, securing ribbon. As an optional step, hand or machine stitch along the veins marked on the pattern piece. Repeat for second tie.
8. Align plain end of each ribbon with the dot on hat base pattern. Tack in place.
9. Mark placement of applique D on hat base with disappearing ink pen. Align pieces D with markings. The two felt pieces should be sandwiching hat base with about 1/8” of overhang along raw edge. Pin in place, making sure pieces are lined up as carefully as possible.

10. Sew in place along both edges either by machine, ⅛” from edge, or using blanket stitch method. Trim any excess threads.

Now find a cute little baby head and pop this bonnet on!

While lemon screams summer, feel free to experiment with a rainbow of citrus colors - lime, orange, and grapefruit are all great options. Embroidery stitches for texture would be fun additions as well!

Thanks to Kasia for designing and writing this tutorial! You can see more of her work on Instagram @theadventuredept. Stay tuned for more tutorials from the Benzie Design Maker Team!


