
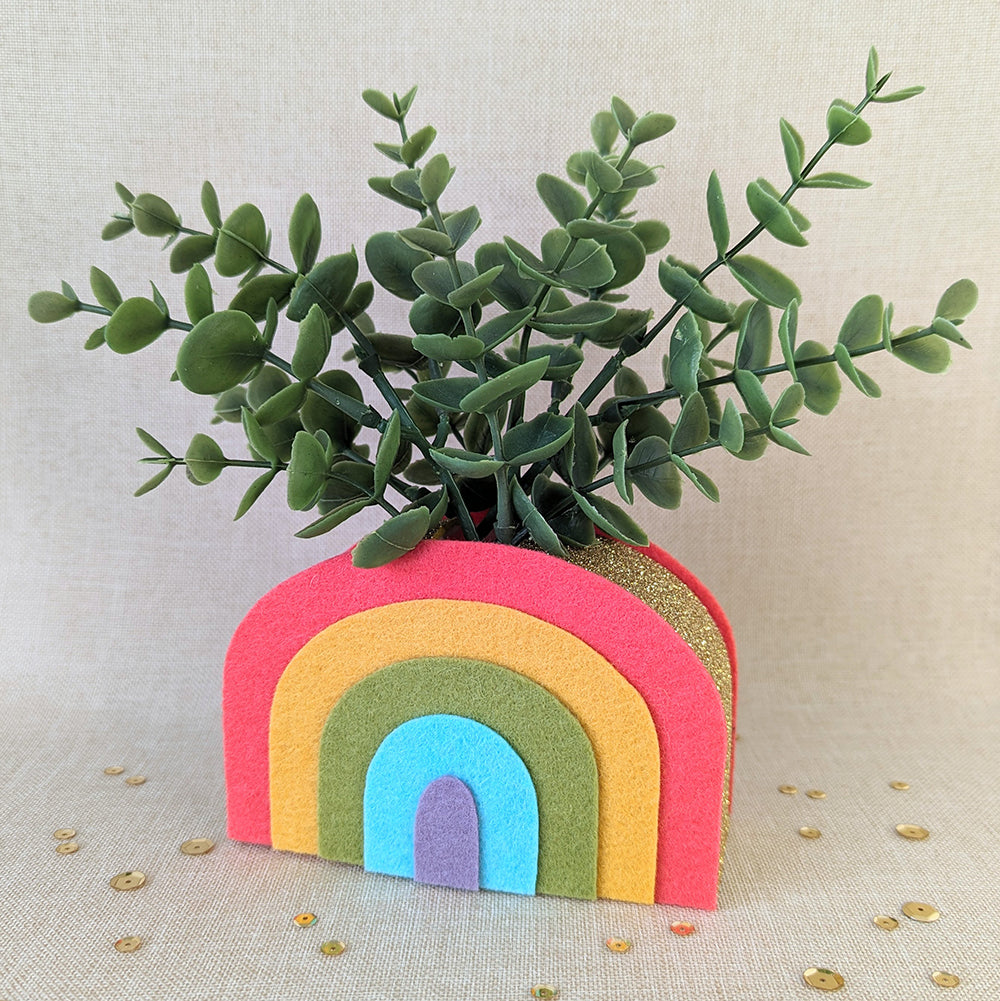
It's no secret that we love rainbows at Benzie. And with Spring and St.Patrick's Day just around the corner, there's no better time for rainbow crafts! This felt rainbow vase is such a quick and clever way to bring color into your home. Looking for the pot of gold at the end? Don't worry, we took care of that too!
Skill Level: Beginner
Time: 1 hour
Additional Supplies:
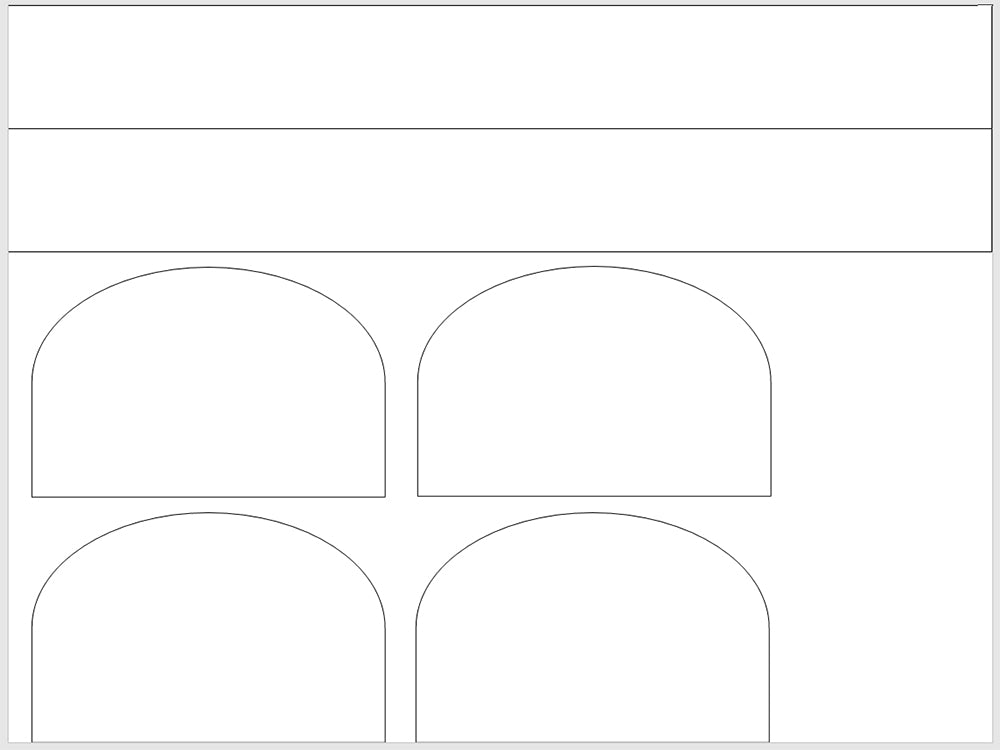
Rainbow Vase Pattern (click to download)
Ruler
Directions:
1. Download and print the Rainbow Vase Pattern above. Cut two Arch Supports from stiffened felt and a 1 1/2 x 12" strip from stiffened felt.
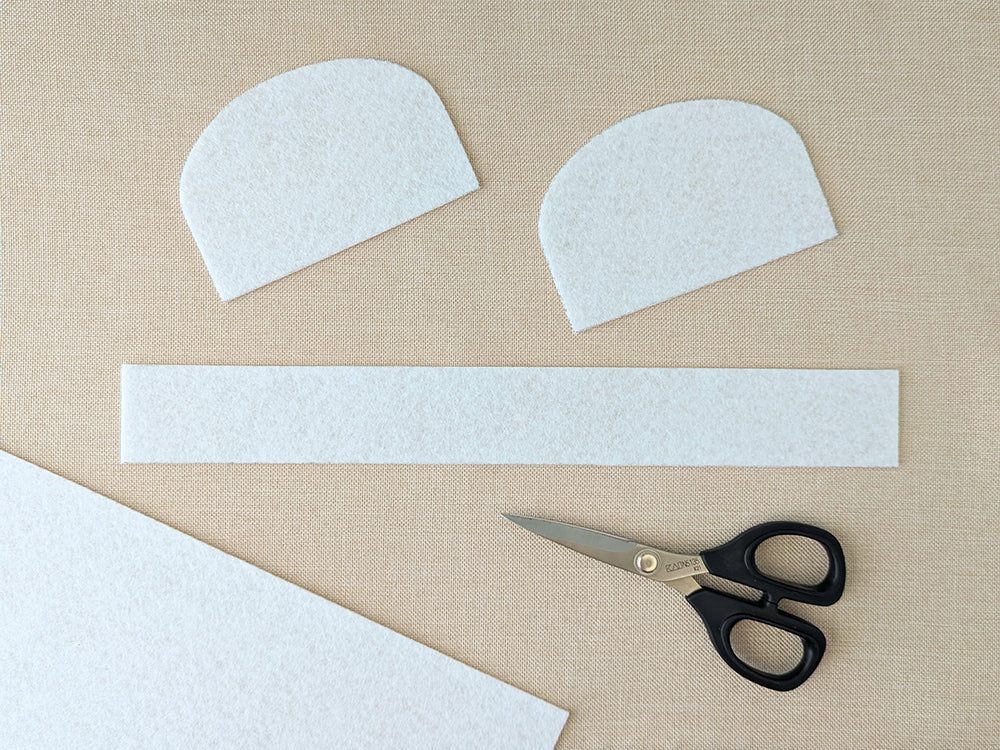
If cut as shown, one 9 x 12" sheet of stiffened felt will yield two vases. There is enough colored and glitter felt for several more.
2. Measure and mark the bottom center of the arch. Measure and mark the center of the felt strip. Line up markings and mark the edges of the arch on the felt strip.

3. Using a ruler and a precision knife (or scissor blade), score the felt strip along the markings that denote the arch edges. Do not cut through the felt! The scoring will allow the stiffened felt to fold easily in the following steps.

4. Draw a line of hot glue along the bottom edge of the arch, beginning at a corner. Line up the bent portion of the felt strip at the corner and press in place. Hot glue dries quickly, so work in small sections.

5. Work along the bottom edge. When you get to the corners, continue gluing strip up along the curve of the arch.

6. When first arch and strip are secured, glue second arch to the opposite side in like manner. The edges of the strip and arches should be flush with felt strip sandwiched between.

7. Cut a 1 5/8 x 9" strip of Gold glitter felt. Mark and trim glitter strip to cover each side of arched support (not bottom.)
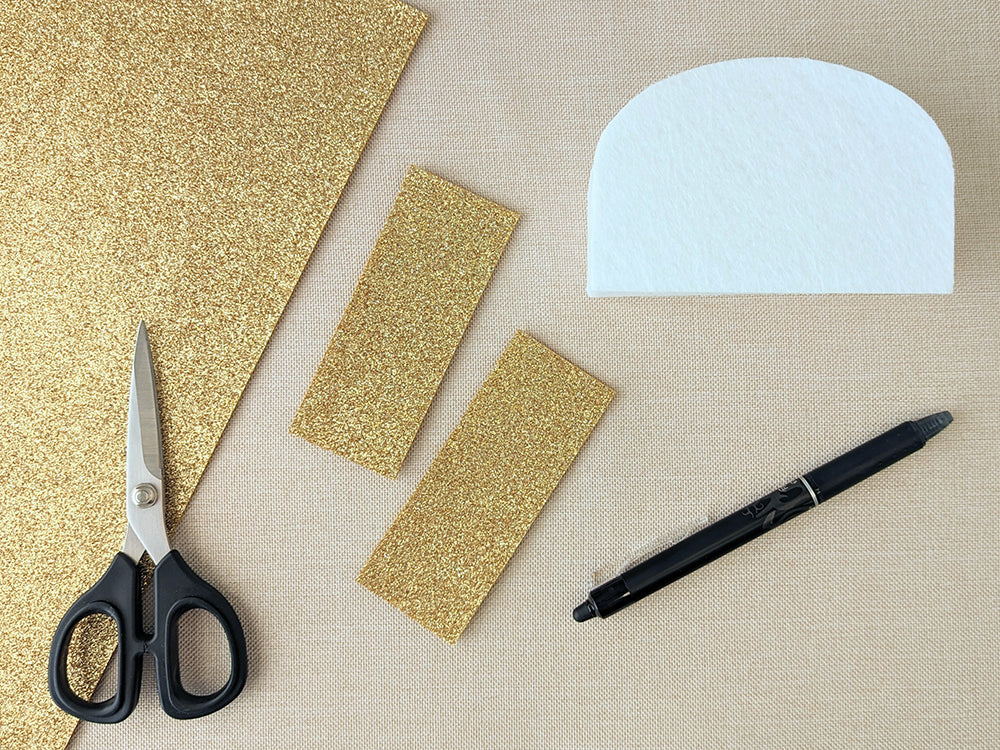
8. Hot glue glitter strips to each curved side.

9. Cut around outermost perimeter of Rainbow pattern and trace twice onto felt. Then cut away top arch and trace new shape twice onto next color of felt. Continue removing top arch and tracing before cutting. You will finish with two arches of each size in five different colors.

10. Use tacky glue to secure each colored arch at the bottom center of the previous arch in order from largest to smallest.

11. Repeat with the second set of arches.

12. Hot glue finished felt rainbows to each side of the vase. The colored felt should be flush with bottom of vase and extend just slightly past the sides and top to cover the stiffened felt.

Your rainbow vase is ready for (fake) flowers! We love these as table decorations or place settings. You can also use a pastel rainbow color palette to match your Spring or Easter decor.

Thanks to Camille for designing and writing this tutorial! You can follow her on Instagram @notsomodernmillie or visit her website. Stay tuned for more tutorials!


