
Rachael of @woolfolks knows a thing or two about wool. As part of our Maker Team, she's made some brilliant Instagram tutorials using Benzie's Corriedale wool roving. Today she's teaching us how to make a sweet needle felted brooch and we can bear-ly wait to get started!
Pins and brooches are a popular accessory. You can wear them or hang them on a pin board as a fun display in your house. Needle felting is a craft that allows you to explore a lot of really unique techniques and make detailed designs so it perfectly lends itself to brooches and other accessories! In this tutorial, I'll show you how to make your own berry-themed bear brooch from wool roving.
Skill Level: Intermediate
Time: 2 - 3 hours

Supplies:
1/2 ounce set of Sweetheart Ombré Wool Roving Palette
One ounce of Chartreuse Corriedale Wool Roving
One ounce of Emerald Corriedale Wool Roving
Embroidery Floss
Embroidery Needle
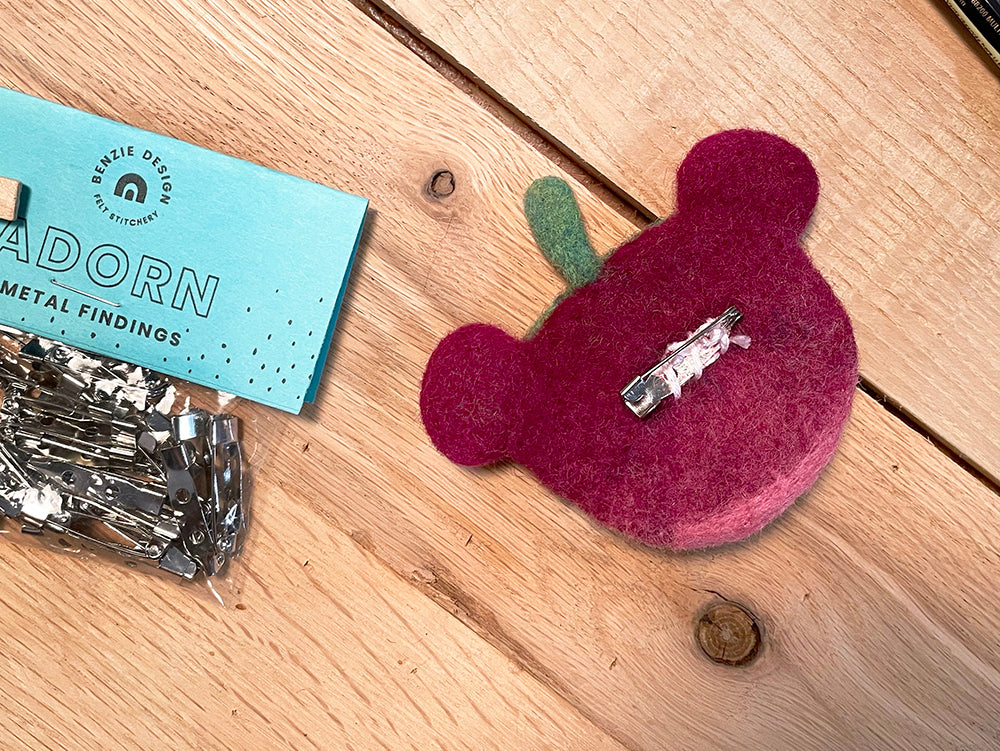
Pin Back
Needle Felting Pen
Felting Needle Tool
Needle Felting Cushion
Directions:
1. The finished bear head will have an ombré effect. Use a #36 needle and the needle felting tool to create the basic shape of the bear head out of the Burgundy wool roving.

2. After creating the basic shape, switch to a #38 needle to tighten the fibers a little bit more. I don’t use anything higher than a #38 before I’m ready to start detailing.
3. Now that you have a solid shape, create an ombré effect by adding in the lighter colors to mimic the look of a ripening berry. Even though the colors in this pre-made palette flow nicely from one to another, we want to make the transition more subtle by combining colors. If you aren’t familiar with the process of mixing felt colors, I hope this opens up a lot of new doors for you!

4. To create a new color, grab a little bit of wool roving from each color you want to mix. Place them together in one hand and pull the fibers with your other hand. Every time you pull, add it back to the pile in your hand. After repeating this motion for a few minutes, the fibers will blend together and create a new color that’s a blend of the two you started with. I repeated this process three separate times to create three different shades of berry using varying amounts of Burgundy and Rose wool roving.

5. Layer the new colors onto your base and felt them using a #38 needle.

6. Before adding any details, felt the base with a #40 and #42 needle so that it has a clean, ready finish.

7. Use the other colors of wool roving from the palette to make details - Oats, Midnight and Peacock. Take a small bit of the Chartreuse and Emerald wool roving to create the berry cap and inner ears. Use a #40 and #42 needle to felt the small details individually before attaching them to the base.

8. Now that the details are done and felted onto the piece, go over everything once more with a #42 needle for a final tight pass. Felting really small things is hard! It can be difficult to get the fibers as tight as you’d like. If your details are looking really fuzzy, don’t be afraid to give pieces a haircut using tiny scissors.

9. Secure your pin back to the back of your brooch with embroidery floss. Be sure to save this for the end or you’ll poke the pin back while felting and potentially break your needle!
Now you have a sweet berry bear brooch! (Say that three times fast.) I hope you've enjoyed working with wool roving in the process. The possibilities - and colors - are endless!

Thanks to Rachael for designing and writing this tutorial! You can follow her on Instagram @woolfolks for more needle felting magic. Stay tuned for upcoming tutorials from the Benzie Design Maker Team!


