
Trick or treat! These Pumpkin Pals are all dressed up and ready for a night of fun. This delightfully simple tutorial transforms our Pumpkin felted shapes and large felt balls into vintage style revelers that make the perfect guests for your Halloween fête. Let the party begin!
Skill Level: Kids* / Beginner
Time: 30 minutes
*Please supervise children when using sharp tools and glue gun.
Additional Supplies:
Pumpkin Parts Pattern (click to download)
Directions:
1. Print Pumpkin Parts Pattern onto cardstock and cut out. Cut pattern pieces from felt. There are additonal pattern pieces that can be mixed and matched but the main structure of the Pumpkin Pals are the same. I am demonstrating how to make the Butterscotch Pumpkin below.

2. Thread needle with one strand of Ecru thread and tie a knot at end. Stitch a loose gathering stitch along one long edge of Collar.

3. Pull the felt along the gathering stitch until it forms a wavy circle. Holding gathers in place, restitch through the first stitch and knot to secure. Use a small amount of tacky glue to connect Collar ends.

4. Hot glue Collar on top of felt ball (Body). Hot glue pumpkin (Head) on top of Collar.

Hot glue works well for large items (felt ball, felted shapes) while tacky glue is best for attaching smaller felt pieces.
5. Glue Buttons to center front of Body. Glue Cheeks and Mouth to Head.

6. Use wire cutters to cut Arms and Legs from Black chenille stems.
a. ARMS: Cut (2) 2" lengths
b. LEGS: Cut (2) 1 ¾" lengths
Optional: For a sitting Pumpkin Pal, cut (1) 4 ½" length for the Legs.
7. Fold Arm halfway. Add hot glue to one end and attach under the Collar on the side of the Body.

8. Leave other end of Arm free or glue onto the Body to mimic "hand on hip." Repeat with second Arm.

9. Fold up end of each Leg to make feet. For a sitting Pumpkin, fold Legs in half. Then fold up each end to make feet.

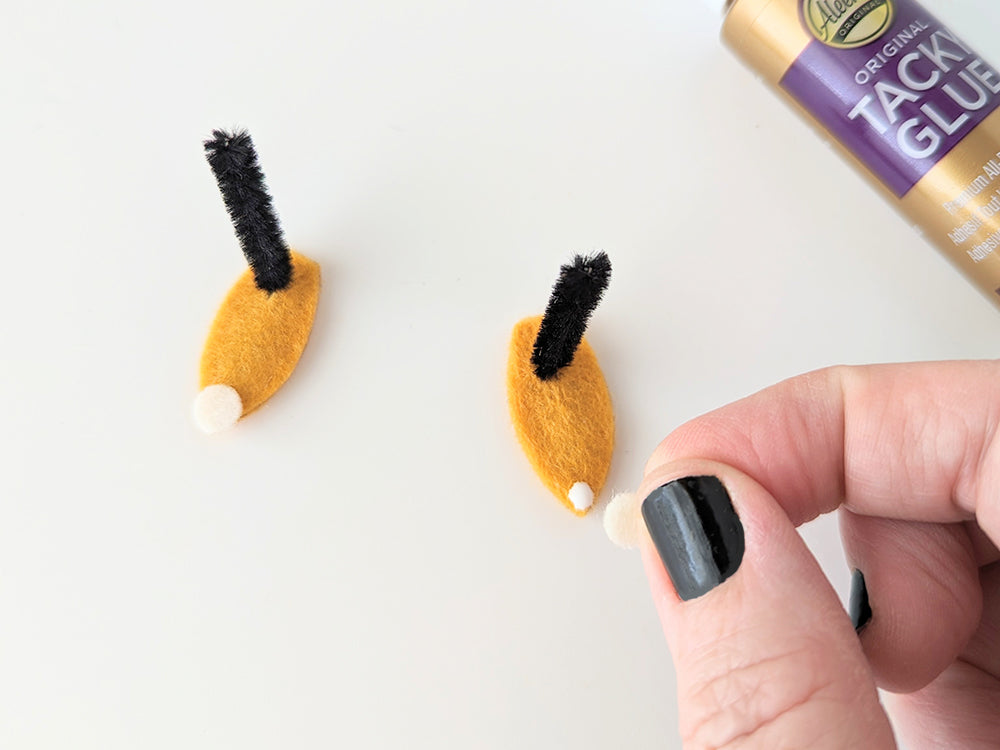
10. Take two Shoe shapes. Cut ¼" slit in rounded back of one Shoe.

11. Slide foot into slit of Shoe. Glue second Shoe piece to bottom with foot sandwiched between. Use glue to hold back slit closed. Repeat Steps 10 and 11 for other Shoe.

12. Add felt Flair (or pom-poms or bells) to toes of Shoes.
13. Use an awl to make holes in Body for Legs. Hot glue Legs into place. For a sitting Pumpkin, position Legs and hot glue Body to the folded center point.

Hot gluing your Pumpkin Pal to a wooden disc or thick felt circle will help to stabilize it. A dowel rod is also a great tool to balance a standing Pumpkin.

Your Pumpkin Pal is ready to party! These work great to make in batches. The supplies listed will yield several Pals - you just need a Pumpkin felted shape and large felt ball for each. How charming would these be as place settings at your Halloween table?

Thanks to Camille for designing and writing this tutorial! You can follow her on Instagram @notsomodernmillie or visit her website. Stay tuned for more tutorials!


